Understanding Image Sensor Noise in Photography [An Overview]
Through one click, you can capture your favourite moments forever, but there is a thing known as image sensor noise that can destroy them. It not only prevents you from preserving your memories but also makes it impossible to do good photography. However, you can work on such images by following a few techniques. In this guide, we discuss it in detail, along with the causes of this noise and ways to reduce it.
Part 1. Introduction to Image Sensor Noise
In your digital camera, the image sensor is the eye that captures light and is made of millions of tiny light-sensitive spots called photosites or pixels. Image sensor noise refers to fluctuations in this electrical signal that destroy the picture quality since it leads to a loss of detail in the image. Let's discuss the characteristics of the two main types of image sensors:
- CCD: It produces sharper pictures with less noise because it transfers analog charge.
- CMOS: The CMOS image sensor has more noise because each pixel has its own separate amplifier and ADC.
Part 2. Types of Image Sensor Noise
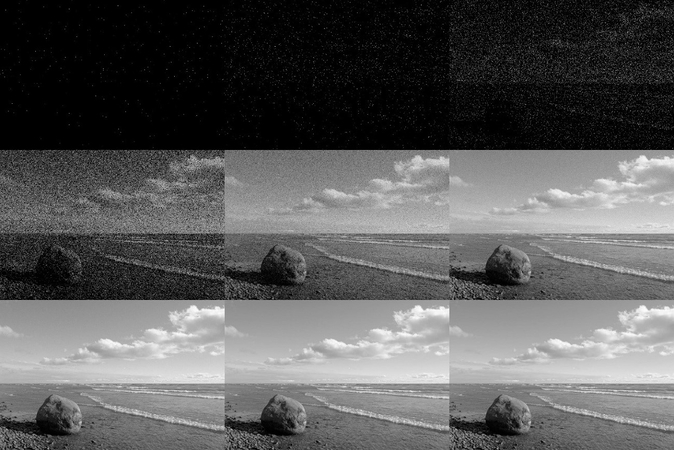
Having discussed the basics of digital camera noise, let's now have a look at its major types:
1. Photon Shot Noise: Photon shot noise arises when the light photons arrive randomly at the sensor and are more visible in the low-light areas where few photons exist.
2. Thermal Noise: This noise occurs due to the sensor’s temperature and generates “dark current” electrons, increasing with longer exposure and high temperature.
3. Read Noise: Read noise happens during the electronic readout and conversion of the sensor’s signal and is present in all images.
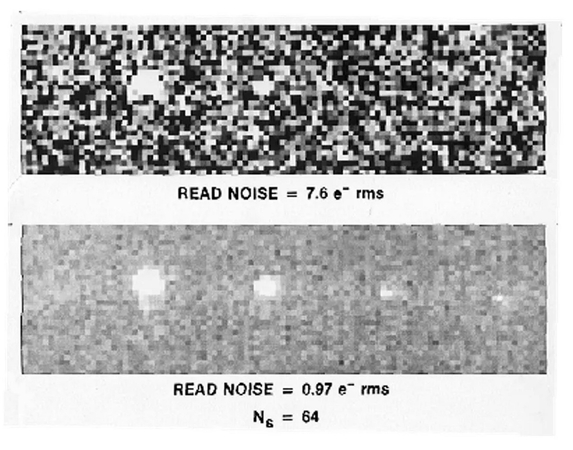
4. Fixed Pattern Noise (FPN): This is a consistent and non-random noise pattern that happens due to the manufacturing variations in the sensor’s pixels.
Part 3. Common Causes of Image Sensor Noise
Sensor noise in photography is common and destroys the quality of your images. Therefore, now let's discuss the common causes of noise in images:
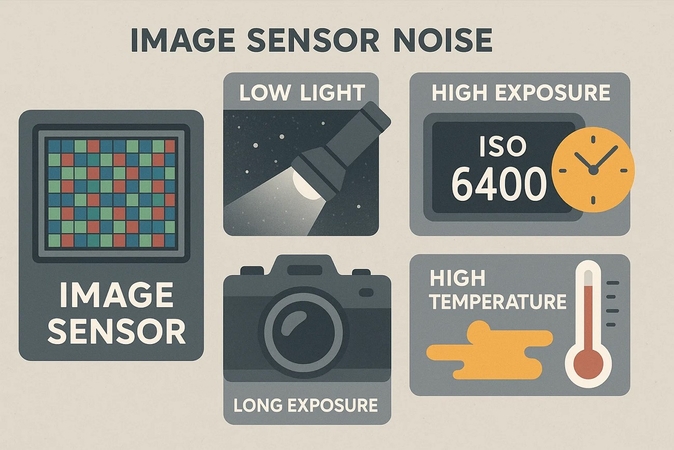
1. You increase the ISO to make your images look brighter in dim light but it enhances noise.
2. When there’s less light, the sensors struggle to gather photons, and the faint signal it captures needs heavy amplification, making subtle noise more prominent.
3. Due to keeping the sensor active for extended periods for night photography, it heats up and leads to more thermal noise.
4. A hotter sensor resulting from prolonged camera use or high temperature produces more electrical interference, leading to thermal noise.
Part 4. How to Reduce Image Sensor Noise: Some Simple Approaches
Having discussed the causes of image sensor noise, here are the simple approaches you must apply:
1. Adjusting ISO, Shutter Speed, and Aperture
These work together to control how bright your photo is. If you're in a dim room and your camera uses a "kit lens," make aperture f/5.6. Also, instead of setting your ISO very high, you can lower it to 1600 or 800 and use a faster shutter speed to avoid blurry pictures.
2. Using In-Camera Noise Reduction Settings
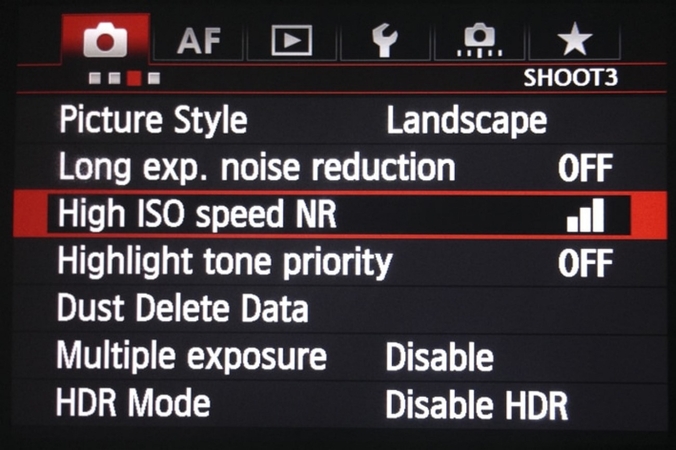
Most digital cameras contain settings such as “High ISO Noise Reduction.” Although they can effectively smooth out noise, they sometimes reduce fine details, which is why you must experiment to find a balance.
3. Importance of Proper Exposure and Lighting
The best way to minimize noise is to capture as much light as possible, but with adequate lighting, the sensor will receive a strong signal. Moreover, you can also try exposing your image to the right (ETTR) slightly without destroying the highlights.
4. Best Camera Settings to Avoid Sensor Noise
The best camera settings to avoid sensor noise include shooting at the lowest possible ISO and using the widest practical aperture. Moreover, if your object is static with stable support, utilize a longer shutter speed to compensate for low light. Moreover, you can add artificial light to improve exposure rather than relying on high ISO.
Part 5. Noise Reduction in Post-Processing Images: HitPaw FotorPea
You tried your best to capture a professional-looking image without noise but still got one due to low light. Factors like these must not stop you from capturing an image because you can fix them using AI tools without learning editing. HitPaw FotorPea has a separate Denoise model that enables you to remove Gaussian or any kind of noise.
Once you upload an image, the tool will also turn on the AI models automatically to fix your image, such as the Face model. It is a perfect option for those who want to avoid the manual effort of removing noise from images and need a tool that gets the job done in seconds. Once the tool removes noise, it places the new image next to your uploaded one so you can compare it.
Key Features
1. Face Model: Using the AI Face Model feature, you get the ability to work on the blurry faces in your images.
2. Making Images Sharp: The Upscale Model enhances your images by sharpening the photo and have it appear with rich details.
3. Increasing Brightness Through Low-Light: Remove low-light image noise using the Low-light model to increase teh overall brightness of the images uploaded to FotorPea.
Steps to Perform Denoise With FotorPea
Here are the steps you must perform to remove denoise from your images using HitPaw FotorPea:
Step 1. Hit Enhance Photos Now to Add Your Captured ImageTo initiate the noise removal process, hit the “Enhance Photos Now” option from HitPaw FotorPea’s homepage to add your image containing noise.

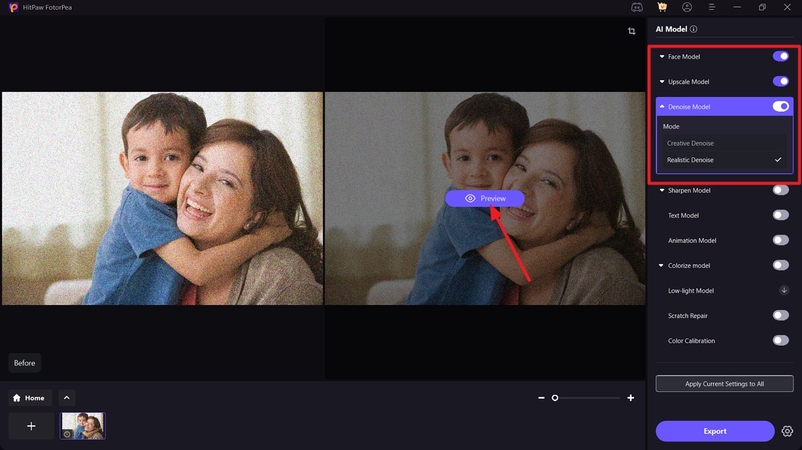
Step 2. Turn On Denoise Model to Remove the Noise
Next, use the AI model interface from the right side of your screen and turn the toggle on for “Denoise Model,” while selecting any particular denoise option. You can also choose other AI models such as “Upscale Model” and “Face Model” for more enhanced results. Afterward, hit the “Preview” option on the screen to check how your image looks without the noise.
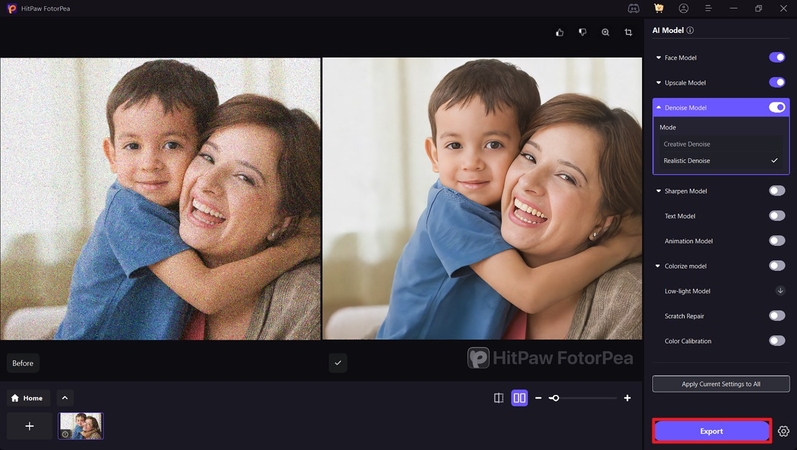
Step 3. Export Your Professional-Looking Image Without Noise
Finally, when the tool provides you with a professional-looking image without noise, compare it with the original one and press the "Export" button in the bottom right to save it.
Part 6. Sensor Noise in Specialized Photography: Learning The Use Cases
Having discussed how to reduce image sensor noise in low light, let's have a look at its use cases:
1. Astrophotography: Stacking, Calibration Frames
Astrophotography captures very faint light, making noise a huge problem. Thus, photographers stack many short exposures and adjust them to make noise disappear while light from the stars adds up. They also use calibration frames to remove specific types of sensor issues.
2. Night Photography: Noise Tradeoffs With ISO and Exposure
Night photography balances getting enough light while controlling noise. When you use a higher ISO, it brightens your image but also adds more noise, so a longer exposure with a tripod results in a lower and cleaner ISO.
3. Video: How Readout Speed Impacts Sensor Noise
For video, the speed at which the sensor reads out each frame affects noise. Thus, faster readout speeds for higher frame rates mean less time for clean signal processing, which often leads to increased electronic read noise.
Conclusion
To conclude, this article discussed image sensor noise in photography in detail, along with ways to fix it. It also mentioned a tool, HitPaw FotorPea, that you can utilize to remove it without learning to edit. With HitPaw FotorPea, you can fix your images by benefiting from its AI abilities. The tool has a separate Denoise Model that automatically removes noise and blur from your images to give them a professional look.


 HitPaw Edimakor
 HitPaw VikPea (Video Enhancer)
 HitPaw Univd (Video Converter)



Share this article:
Select the product rating:
Daniel Walker
Editor-in-Chief
This post was written by Editor Daniel Walker whose passion lies in bridging the gap between cutting-edge technology and everyday creativity. The content he created inspires the audience to embrace digital tools confidently.
View all ArticlesLeave a Comment
Create your review for HitPaw articles