How Copilot 3D Works: Exploring Powerful Features for Designers
Copilot 3D has evolved to empower creators to transform 2D images into visually appealing 3D models instantly. Developed by Microsoft's Copilot Labs, it uses advanced machine learning to analyze JPG or PNG images and generate realistic ones. Unlike traditional tools, it has made 3D workflows remarkably accessible to designers at any skill level.
As most people are unaware of Copilot 3D's new powerful feature, this article will help you. In this guide, we will provide all its basic details, including key features and a detailed step-by-step guide.
Part 1. Copilot 3D: Key Features and Benefits
With Copilot 3D, immense hype has led many people to opt for this tool to transform their boring 2D images into 3D ones. For your ease, we have gathered its main key features to provide a deeper understanding of this tool.
Key Features of Copilot 3D
- 1. Single-Image to 3D Conversion:It instantly converts a simple 2D PNG or JPG image (up to 10MB) to a fully rendered 3D Simply upload your photo and click the "Create" button to initiate the process.
- 2. Browser-Based and Free to Try:This is an entirely web-based tool, which means there is no need to download it. Anyone can access it for free by creating an account, which can be of Apple, Microsoft or Google.
- 3. Fast and Intuitive Workflow:Ideal for rapid prototyping or concept design, Copilot 3D lets you convert your 2D image to 3D within seconds. Your creations are saved in the "My Creations" dashboard for 28 days, providing easy access.
- 4. Maximum Compatibility:It exports your outcome into GLB format, which is highly compatible with other 3D software, including Unity and Unreal. This feature makes it ideal as users can easily share their generation with different software for further editing.

Advantages of 3D Design Tools
Now, let's have an overview of real-life use cases of Copilot 3D, making it easy for you to use this tool in your daily operations:
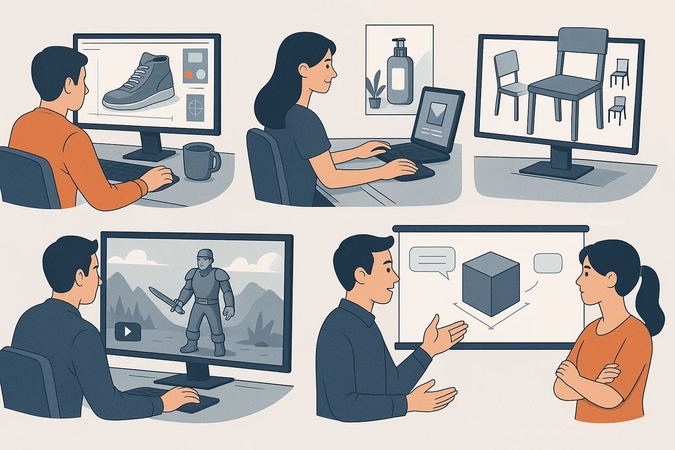
- 1. Realistic Product Visualization:Designers and manufacturers can create highly detailed models, which can then be reviewed for the final look of a product before any physical prototype is made.
- 2. Marketing:Marketers can produce beautiful images and animations to make advertisements, websites, and other promotional items more attractive to increase sales.
- 3. Faster Prototyping and Design:You can easily make changes or experiment with the design and make several variations of it, which speeds up the prototyping process.
- 4. Storytelling in Games and VR Experiences:This tool has the ability to produce 3D models of games or even lifelike characters to give depth and reality to virtual experiences.
- 5. Collaboration and Communication:Users can present visual ideas and discuss them effectively, reducing the time spent explaining the complex ideas and obtaining feedback in real-time.
Part 2. Mastering Copilot 3D: A Complete Guide
Now, if you are wondering how to use the Copilot 3D tool to transform your 2D image to 3D, go through the following section.
How It Works - Initial Things to Consider
- Input Requirements: This tool accepts only JPG or PNG files of up to 10 MB in size. The picture you are uploading should feature a clear subject, be centered, and have a plain background.
- Processing Overview: After uploading your image, Copilot 3D uses AI to analyze the 2D image and recognize the object. Afterwards, it automatically generates a 3D picture by applying photo-based textures to it.
- Output Format: The generated output can be exported in .GLB file format, which can be later shared with any tool.The models used by users are temporarily stored in their dashboard so that they can be easily used later.
How To Turn 2D Images To 3D Models with Copilot 3D
Tips: Before uploading your 2D image to Copilot 3D, enhance the image quality first to achieve better 3D results. With HitPaw FotorPea, you can optimize your images in one click—simple and fast.
Let's dive into a detailed guide on how to transform 2D images into 3D images using Copilot 3D:
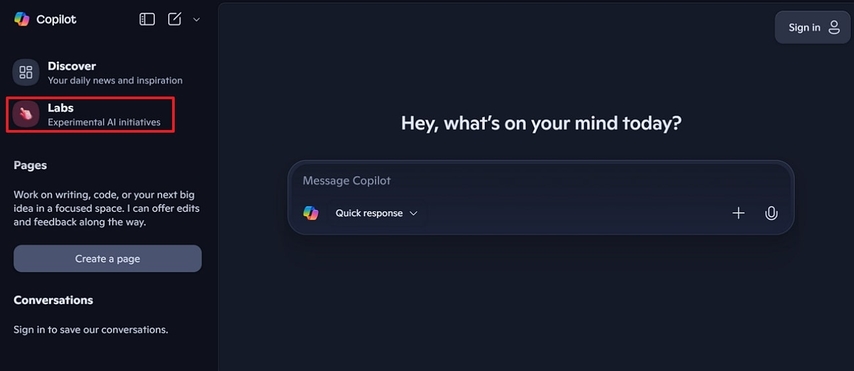
Step 1.Begin by visiting the Copilot website and clicking on the "Labs" section in the left panel.

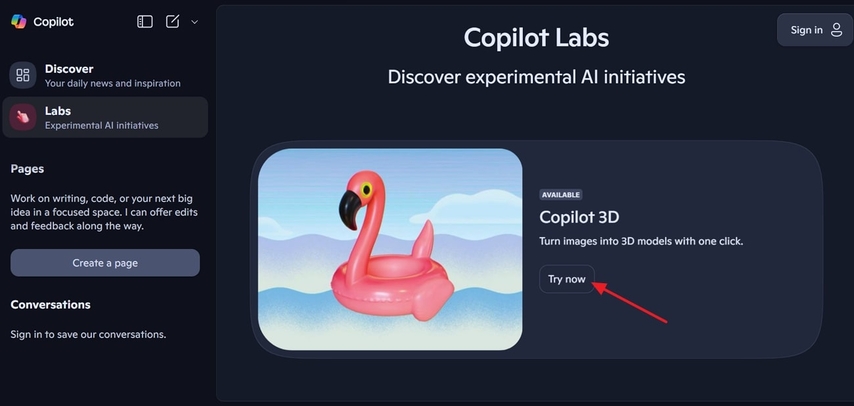
Step 2.Here, click on the "Try Now" button within the Copilot Labs tab to get into its editing interface.

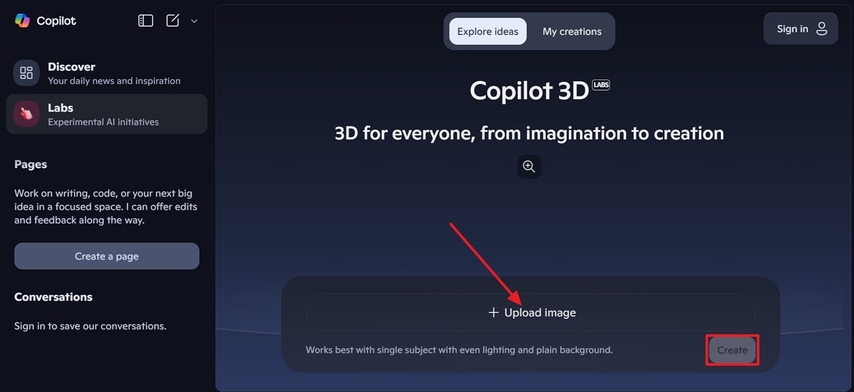
Step 3.Upon entering the 3D editing interface, tap on the "Upload Image" option to insert the desired image and then hit the "Create' button to initiate it.

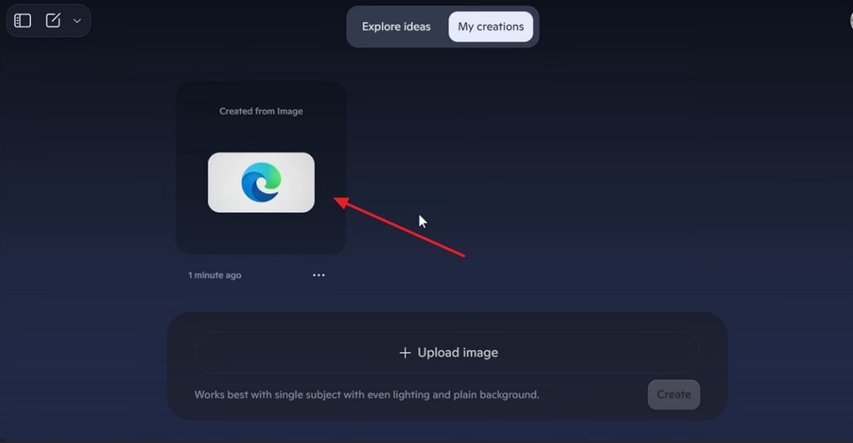
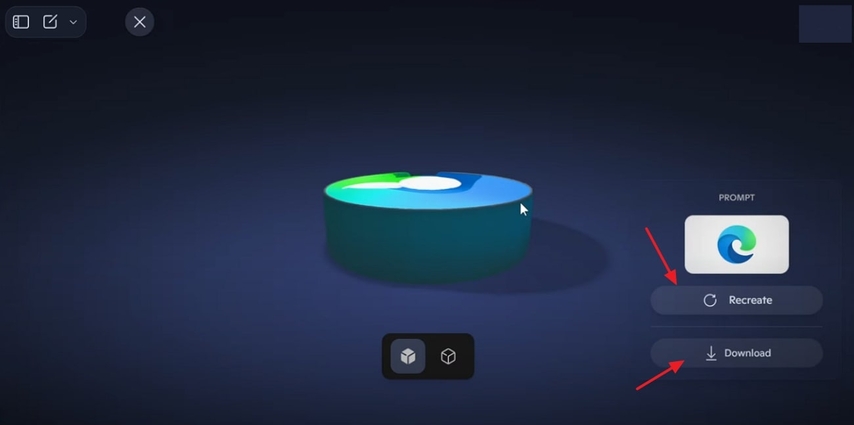
Step 4.After a few minutes, it will show your generated outcome, then click on the image to preview it.

Step 5.You can preview the generated 3D image and hit the "Download" button to save it to your device. Here, if the results are not satisfactory, you can click on the "Recreate" button to let the tool generate another version.

Part 3. Copilot 3D Guide: Turn 2D Images into 3D Models
Now that you know about Copilot 3D, you've tried to create a 3D version for your project. However, while generating, the quality of the source image is essential for exceptional results. That is where we recommend using HitPaw FotorPea (formerly HitPaw Photo Enhancer), which allows you to enhance your 2D images up to 8x before you put them into Copilot 3D. With clean, high-quality images, you can ensure that every step of your 3D modeling starts with a solid foundation.
Key Features of HitPaw FotorPea
- 1.Lets you remove unwanted noise from the image without ruining its quality.
- 2.Allows for colorizing the black and white reference images to make it clear for Copilot 3D.
- 3.Provides a preview option to examine the generated outcome before saving it to the device.
- 4.Offers an Image Restoration tool to restore old photos efficiently.
- 5.Provides the Text Model to restore blurry text, enhancing its readability.
Enhance Your 2D Designs Before 3D Modeling with HitPaw FotorPea
If you are eager to use HitPaw FotorPea to enhance your images before transforming them to 3D with Copilot 3D, look into the steps below:
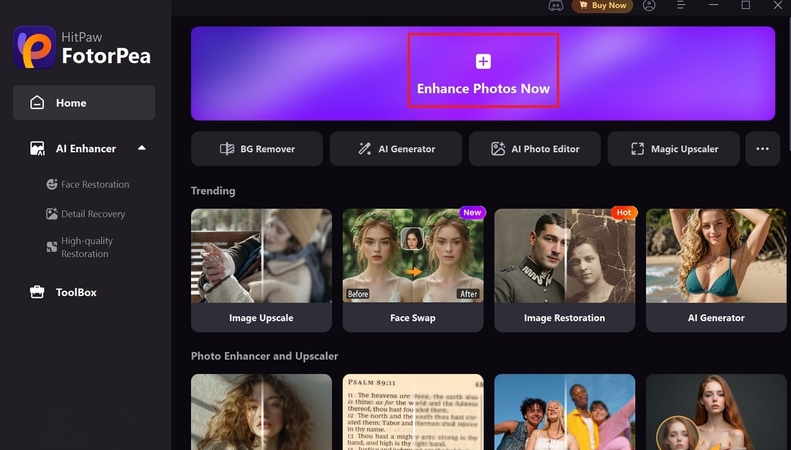
Step 1. Launch HitPaw FotorPea and Choose to Enhance Photos
Upon accessing the tool, tap on the "Enhance Photos Now" button available on the main interface to import the pixelated image.
Step 2. Choose the Desired AI Model for Image
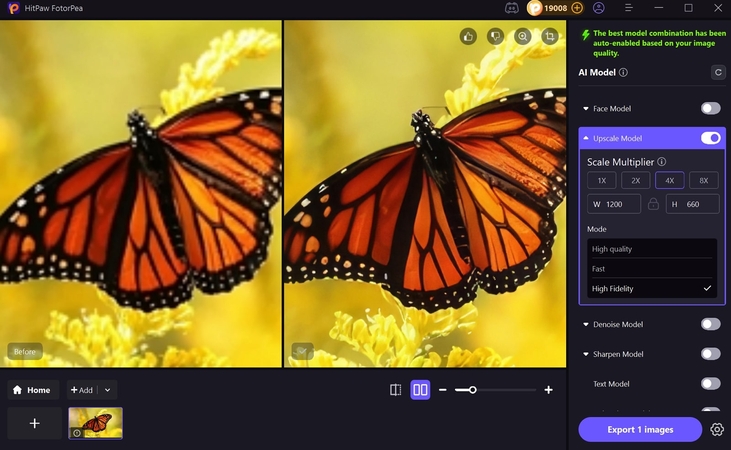
After importing an image, choose the "Upscale Model" and hit the "Preview" button to start the image-enhancing process.
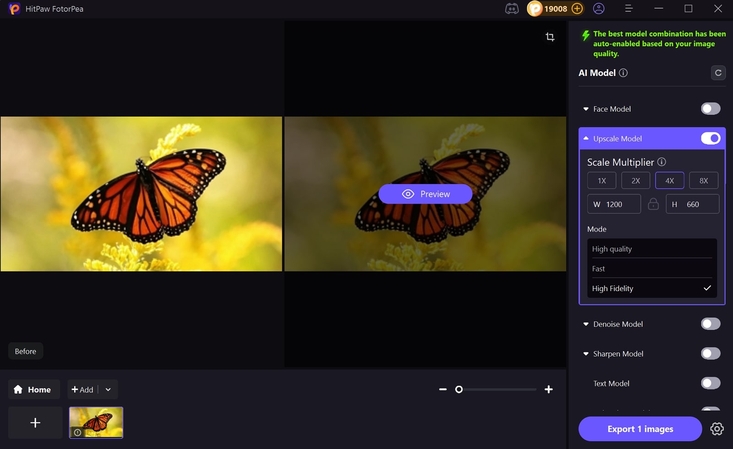
Step 3. Export the Generated Outcome to The Desired Folder
Finally, as the image is enhanced, click on the "Export 1 images" option to render it to the desired folder on the device.
Frequently Asked Questions on Copilot 3D
Unlike other conventional tools that require expertise, one can use this gadget to convert a 2D image into a 3D picture. Users only need to upload an image, and it will be converted by AI in no time.
Copilot 3D is currently available for free and does not require a subscription for basic access. However, it is an experimental feature; premium versions or extended usage options could be introduced in the future.
It allows you to import standard input formats, including PNG and JPG images, each of which is under 10MB. However, you can export your 3D file in .GLB format to later edit it in other editing platforms.
Conclusion
In summary, with the advancement of AI, Copilot 3D has introduced a new feature that enables the transformation of 2D images into 3D images. In this article, we have provided a detailed guide to use this tool along with its real-life use cases. However, if your 2D image is pixelated, we recommend using HitPaw FotorPea, which lets you enhance your image for further editing in the Copilot 3D tool.
Leave a Comment
Create your review for HitPaw articles


