VLC Media Player Repair Video: How to Fix Corrupted Videos with VLC
Corrupted video files are a common headache whether the damage comes from interrupted downloads, bad storage sectors, or codec mismatches. Before reaching for paid software, many users can recover files using VLC media player repair video features. This guide walks you through four practical methods to repair video with VLC, explains how they work, and shows when a dedicated AI repair tool is a better choice. You will find clear steps for each method, plus a fast guide to using HitPaw VikPea if VLC video repair is not enough.
Method 1: Fix Corrupted Video in VLC By Transcoding
Transcoding creates a new file container and can bypass damaged headers or incompatible codec data. When a video stream is intact but the container is corrupted, converting the file with VLC often restores playback. This is one of the safest first steps for users who want to repair video with VLC without altering the original file. Transcoding produces a fresh copy in a standard format such as MP4 or MKV, which increases the chance of successful playback in other players.
Steps to transcode and repair a file in VLC
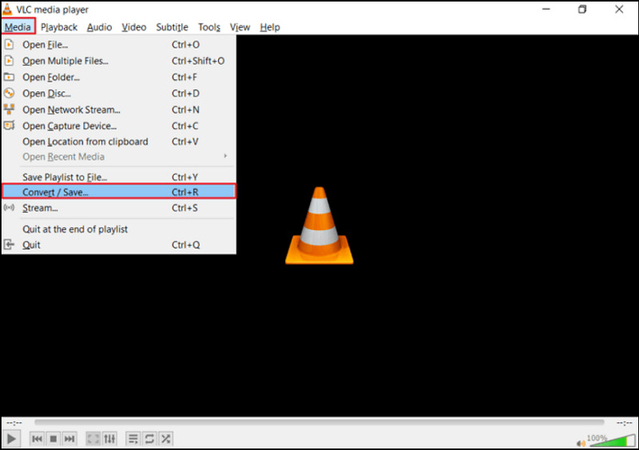
Open VLC media player, click the Media menu, and select Convert or Save to open the conversion dialog.

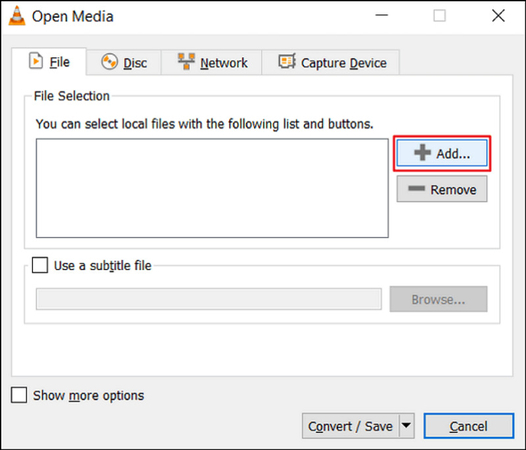
In the Open Media window, click Add and choose the damaged video file or files, then click Convert or Save to proceed.

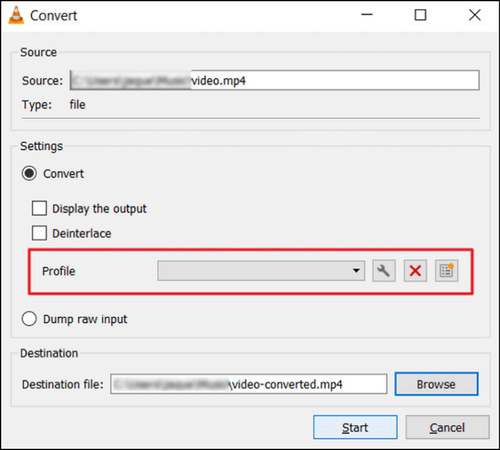
In the Convert window, choose a reliable Profile such as MP4 with H.264, confirm destination filename, and click Start to transcode and create a repaired copy.

Method 2: Fix Corrupted Video in VLC with AVI Video Repair Feature
VLC includes a built-in repair toggle designed for damaged AVI files. When other formats act like they have container problems, temporarily renaming them to the AVI extension can trigger VLC to apply its AVI repair heuristics. This method is useful for those who need a quick VLC repair MP4 workaround, especially when VLC can reconstruct missing indexing or ignore small container errors.
Steps to enable AVI repair in VLC
- Rename the problematic file's extension to .avi so VLC treats it as an AVI container, then open VLC on your computer.
- From the menu, open Tools and choose Preferences to access the settings panel.
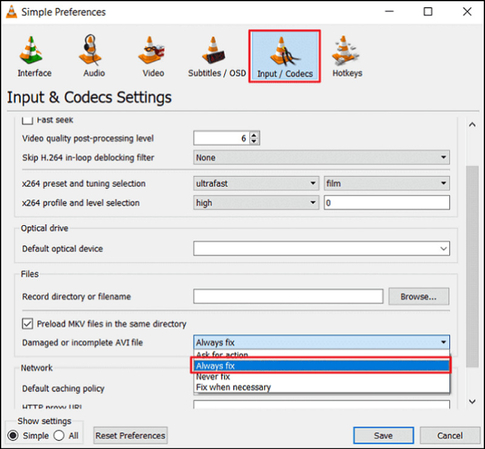
Select Input / Codecs, locate the Damaged or incomplete AVI file option, set it to Always fix, and click Save.

- Reopen the renamed file in VLC. If it plays, convert or export it to a stable format to preserve the repaired version.
Method 3: Increase the Cache Values in VLC Player
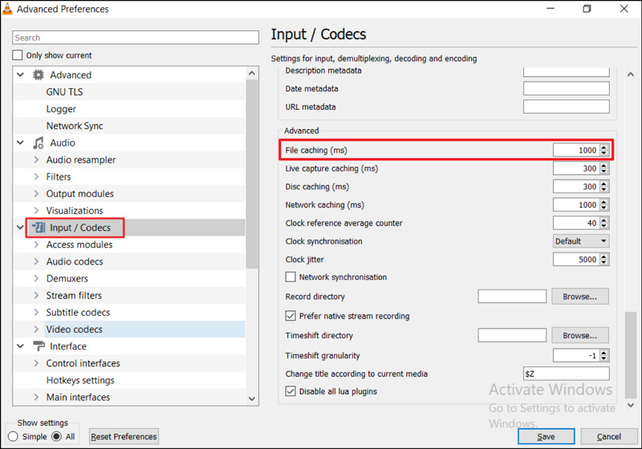
Playback issues can sometimes mimic corruption when the real problem is buffering or rendering. Increasing file and network cache values helps VLC handle poor or inconsistent I/O and can eliminate stutter, frame drops, or partial frames that look like file damage. Enabling video auto scaling and adjusting advanced cache settings can improve playback stability and reveal whether the underlying file is actually salvageable.
Steps to increase cache and enable video auto scaling
- Launch VLC and go to Tools then Preferences to open the basic settings page.
- At the bottom left, choose All under Show settings to reveal advanced options.
Under Input / Codecs, raise file caching and network caching values to a higher number appropriate for your hardware, then find Video and enable Video auto scaling.

- Click Save and restart VLC to test playback with the new caching and scaling settings.
Method 4: Change Video Output Settings in VLC
Different video output modules interact with your graphics drivers in different ways. If a video plays but shows black frames, artifacts, or abnormal colors, changing the output module can resolve rendering conflicts. This method targets display incompatibilities and is safe to try when VLC media player repair video options do not resolve visible playback problems.
Steps to change video output settings in VLC
- Open VLC and navigate to Tools then Preferences.
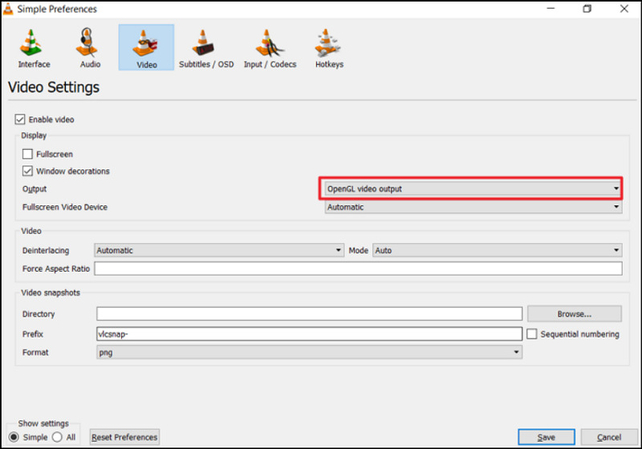
- Click the Video section to reveal output options.
Change Output from Automatic to a specific module like DirectX (DirectDraw), OpenGL, or Windows GDI depending on your operating system and graphics driver. Older systems can try DirectX 3D.

- Save changes and restart VLC, then play the file again to check whether the rendering issue is fixed.
VLC Repair Not Working? Try a More Professional AI Video Repair Software
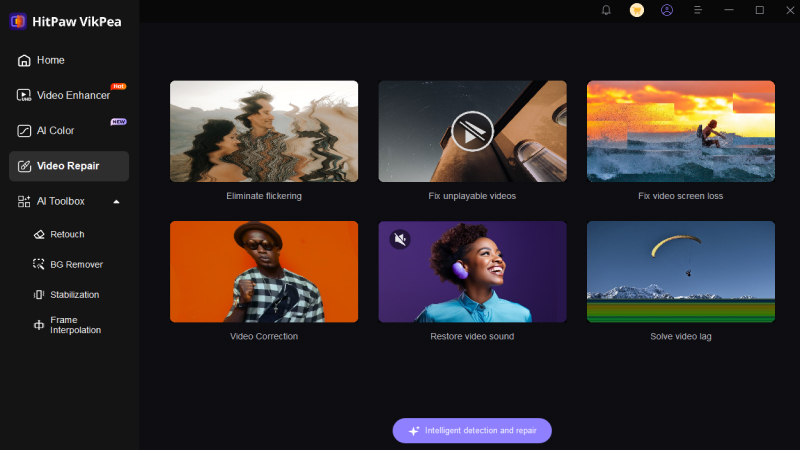
If VLC repair video techniques cannot recover your file, consider a dedicated repair tool that can reconstruct missing frames, restore audio, and handle severe corruption. HitPaw VikPea is an example of AI-driven repair software that can work where simple VLC video repair methods fail. This remarkable video repair program helps you fix damaged videos with the desired repair module, such as eliminating flickering, restoring sound, fixing unplayable videos, and more. Along with that, it automatically enhances the video quality using AI algorithms.
- Intelligent AI repair that eliminates flickering and reconstructs damaged frames automatically.
- Fix unplayable video files by rebuilding headers and restoring readable streams.
- Recover lost video screen content and repair black or missing frames reliably.
- Advanced video correction for color, artifacts, and synchronization problems.
- Restore damaged or missing audio tracks and resynchronize sound with visuals.
- Resolve playback lag and stuttering by optimizing frame timing and buffers.
How to restore corrupted videos with VikPea?
Step 1.Download and install HitPaw VikPea from the official website. Launch the app and open the Video Repair module to view repair scenarios and the Intelligent detection and repair option.

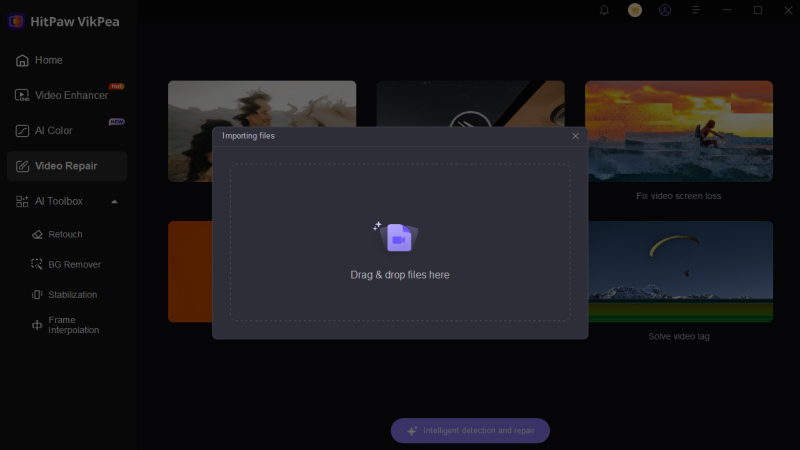
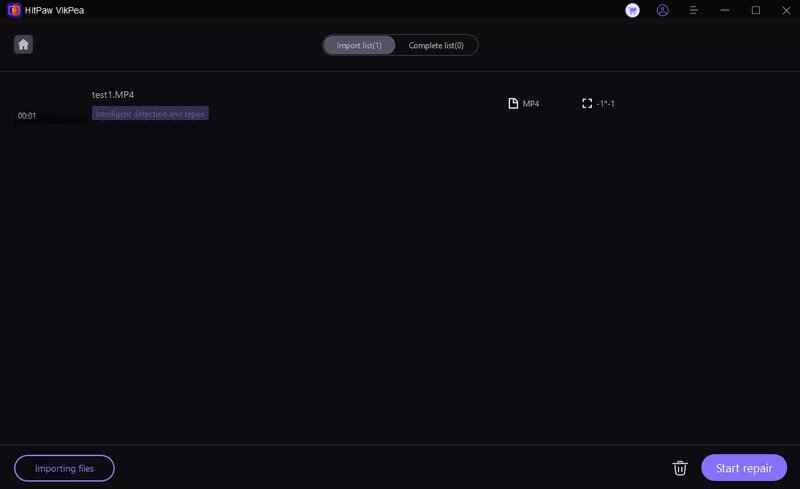
Step 2.Drag and drop corrupted files or browse to add them. The tool supports batch repair for multiple files.

Step 3.Click Start Repair to let the software analyze and fix the videos.

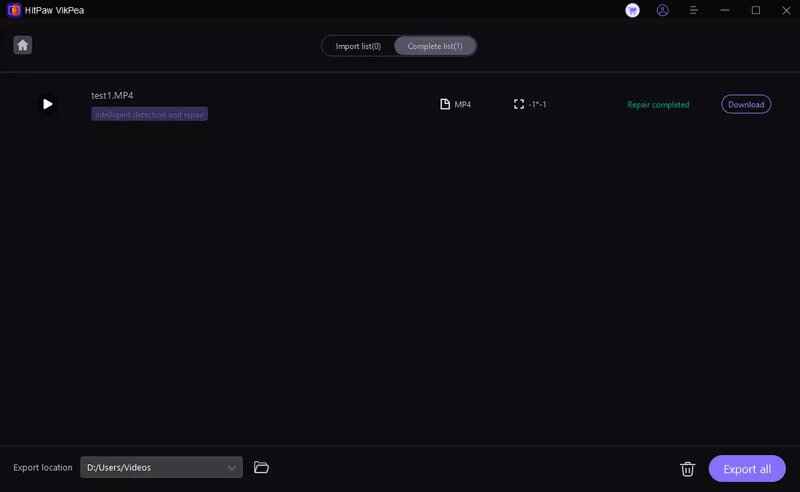
Step 4.When repair completes, download repaired files individually or use Export All to save everything.

Video Tutorial on How to Repair Damaged Video with VikPea
FAQs of VLC Media Player Repair Video
Yes. VLC can detect and fix some MP4 header and indexing problems. For minor corruption, VLC repair MP4 tools often succeed, but severe damage may need specialized software.
Common causes include damaged headers, incomplete downloads, missing or incompatible codecs, or rendering conflicts. Try converting the file, enabling AVI repair, increasing cache values, or changing video output in VLC.
Professional options such as HitPaw VikPea use AI to rebuild frames, restore audio, and handle complex corruption that VLC repair video features cannot fix.
Conclusion
VLC provides several effective, no-cost ways to repair video with VLC, including transcoding, the AVI repair toggle, cache tuning, and output changes. Start with transcoding and cache adjustments for the best balance of safety and success. If those attempts fail or corruption is severe, a purpose-built AI repair tool such as HitPaw VikPea can recover files that VLC cannot. Use the steps above to try each method, and keep backups of your originals before attempting repairs.
Leave a Comment
Create your review for HitPaw articles


