[Step-by-Step] Two Tested Methods for Easily Syncing Subtitles
Syncing subtitles with videos can significantly enhance the viewing experience by ensuring that the dialogue matches the visual content accurately. Whether you're watching movies, educational content, or any other type of video, having perfectly synced subtitles is crucial. In this guide, we'll introduce two tested methods that make the process of syncing subtitles easy and efficient.
These methods are designed to be user-friendly and accessible, even for those who are not tech-savvy. By following these step-by-step instructions, you can ensure to sync subtitles improve the overall quality of your video content.
Part 1. How to Sync Subtitles in VLC
VLC can also occasionally refuse to delay a subtitle when you push H. Or, alternatively, it could reject to speed the release up whenever you press G. If Your Windows PC: Manually Sync Subtitles in VLC VLC If you're using a Windows PC, follow these measures to manually sync the subtitles in VLC
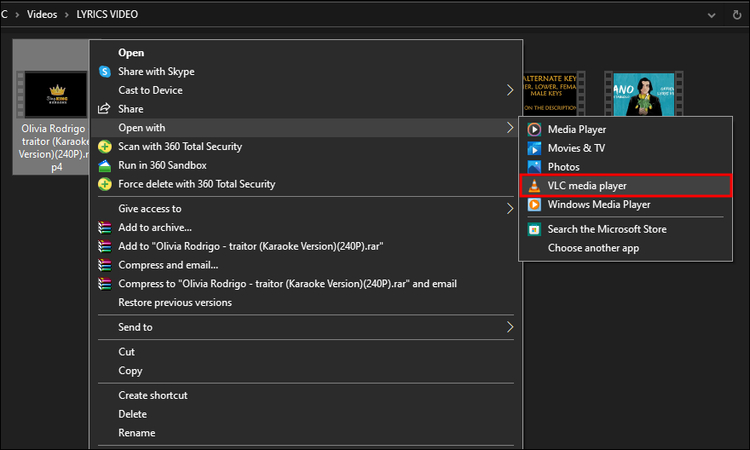
Step 1: Locate the folder on your computer where your movies and videos are stored. Find the specific video file for which you want to sync subtitles. Right-click on the file, and from the context menu that appears, select the "Open with" option. Look for "VLC Media Player" in the Programs list. VLC will open and begin playing your video to preview the effect.
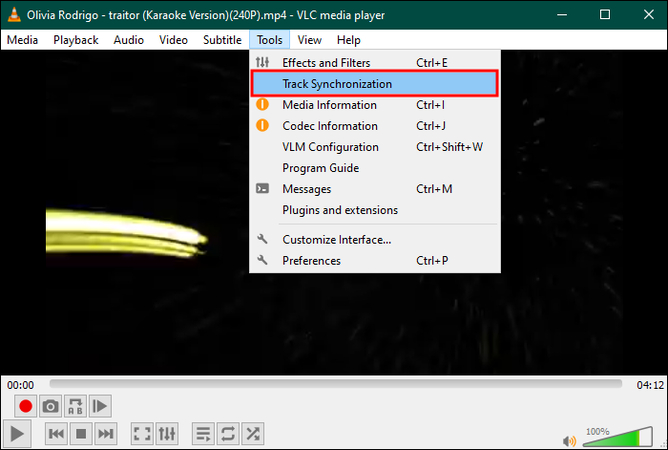
Step 2: Once your video is playing in VLC Media Player, look at the top menu bar and click on the "Tools" option. From the dropdown menu, select "Track Synchronization." This will open the synchronization settings, where you can adjust the timing of the subtitles.
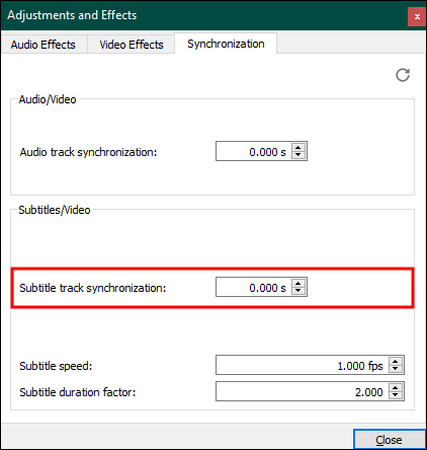
Step 3: In the "Track Synchronization" window, navigate to the section labeled "Subtitle track synchronization." This area is specifically designed for adjusting the timing of subtitles relative to the video.
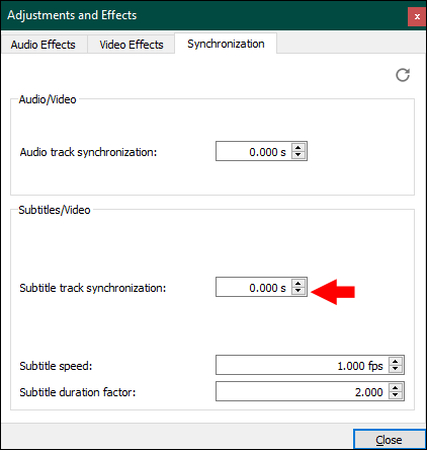
Step 4: To synchronize the subtitles with the video, you can adjust their timing using the provided controls. If the subtitles are appearing too early, you can delay them by clicking the down-pointing arrow. Each click will delay the subtitles slightly. Conversely, if the subtitles appear too late, you can advance them by pressing the up-pointing arrow. This will bring the subtitles forward in time, helping them sync better with the video. Click "Close" to preserve your changes.
Part 2. How to Online Sync Subtitles in Happy Scribe
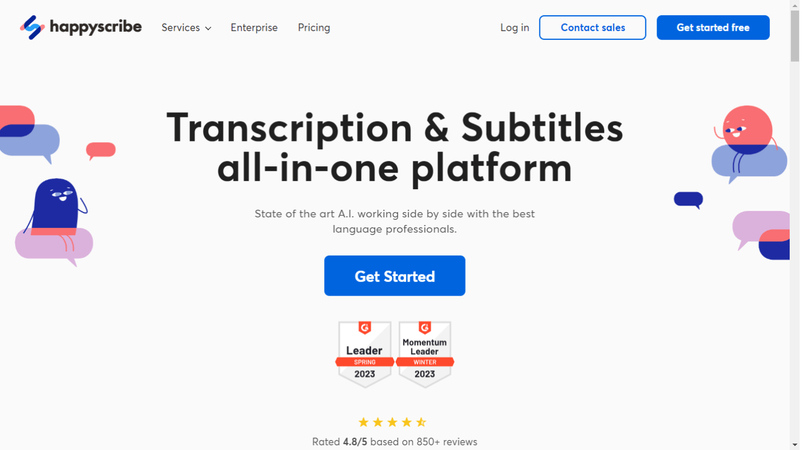
Syncing subtitles accurately can significantly enhance the viewing experience, ensuring that the dialogue matches the visual content perfectly. Happy Scribe is a powerful subtitle online sync tool that makes this process easy and efficient. Here's a step-by-step guide on how to sync subtitles online using Happy Scribe.
Step 1: Visit the Happy Scribe webpage and sign in to your account. If you don't already have an account, create one now shot free. (It's free.) Then click on the 'Upload a new file' button in the logged in mode. Select the Video File, with which you have to Synchronize Subtitles. Alternatively, you can drag and drop the file in the upload section.
Step 2: After uploading the video, select the language spoken in the video. This will help Happy Scribe transcribe the audio accurately. Click on the "Generate Subtitles" button. Happy Scribe will automatically transcribe the audio and generate subtitles for your video. This process could take a few minutes, depending on the length of your video.
Step 3: Once the subtitles have been prepared, check them for accuracy. Use the Happy Scribe editor to make any necessary corrections. You can play the video and adjust the subtitle timings to ensure they sync perfectly with the audio.
After making the necessary edits, click on the "Sync Subtitles" button. Happy Scribe will automatically sync the subtitles with the video, ensuring precise timing. Once the subtitles are synced, download the final video with embedded subtitles or download the subtitle file in your preferred format (e.g., SRT, VTT). You can now use the video with synced subtitles for your desired purpose.
Part 3. The Best Tool to Add Subtitles with HitPaw Univd
HitPaw Univd (HitPaw Video Converter) is a versatile tool that allows users to easily download, convert, and edit videos, including adding subtitles. This software is particularly user-friendly, making it accessible to both beginners and experienced users. With its AI-powered features, HitPaw Univd ensures that subtitles are added accurately and in sync with the video content.
Features
- Easy to navigate, making it simple for users of all levels to add subtitles.
- Automatically generates and syncs subtitles with high accuracy.
- Supports a wide range of video and subtitle formats.
- Efficiently processes videos, saving time without compromising quality.
How to add subtitles through HitPaw Univd?
Step 1: First, visit the HitPaw Univd website to download the software. Once the download is complete, open the installation file and follow the on-screen instructions to install the application on your computer.
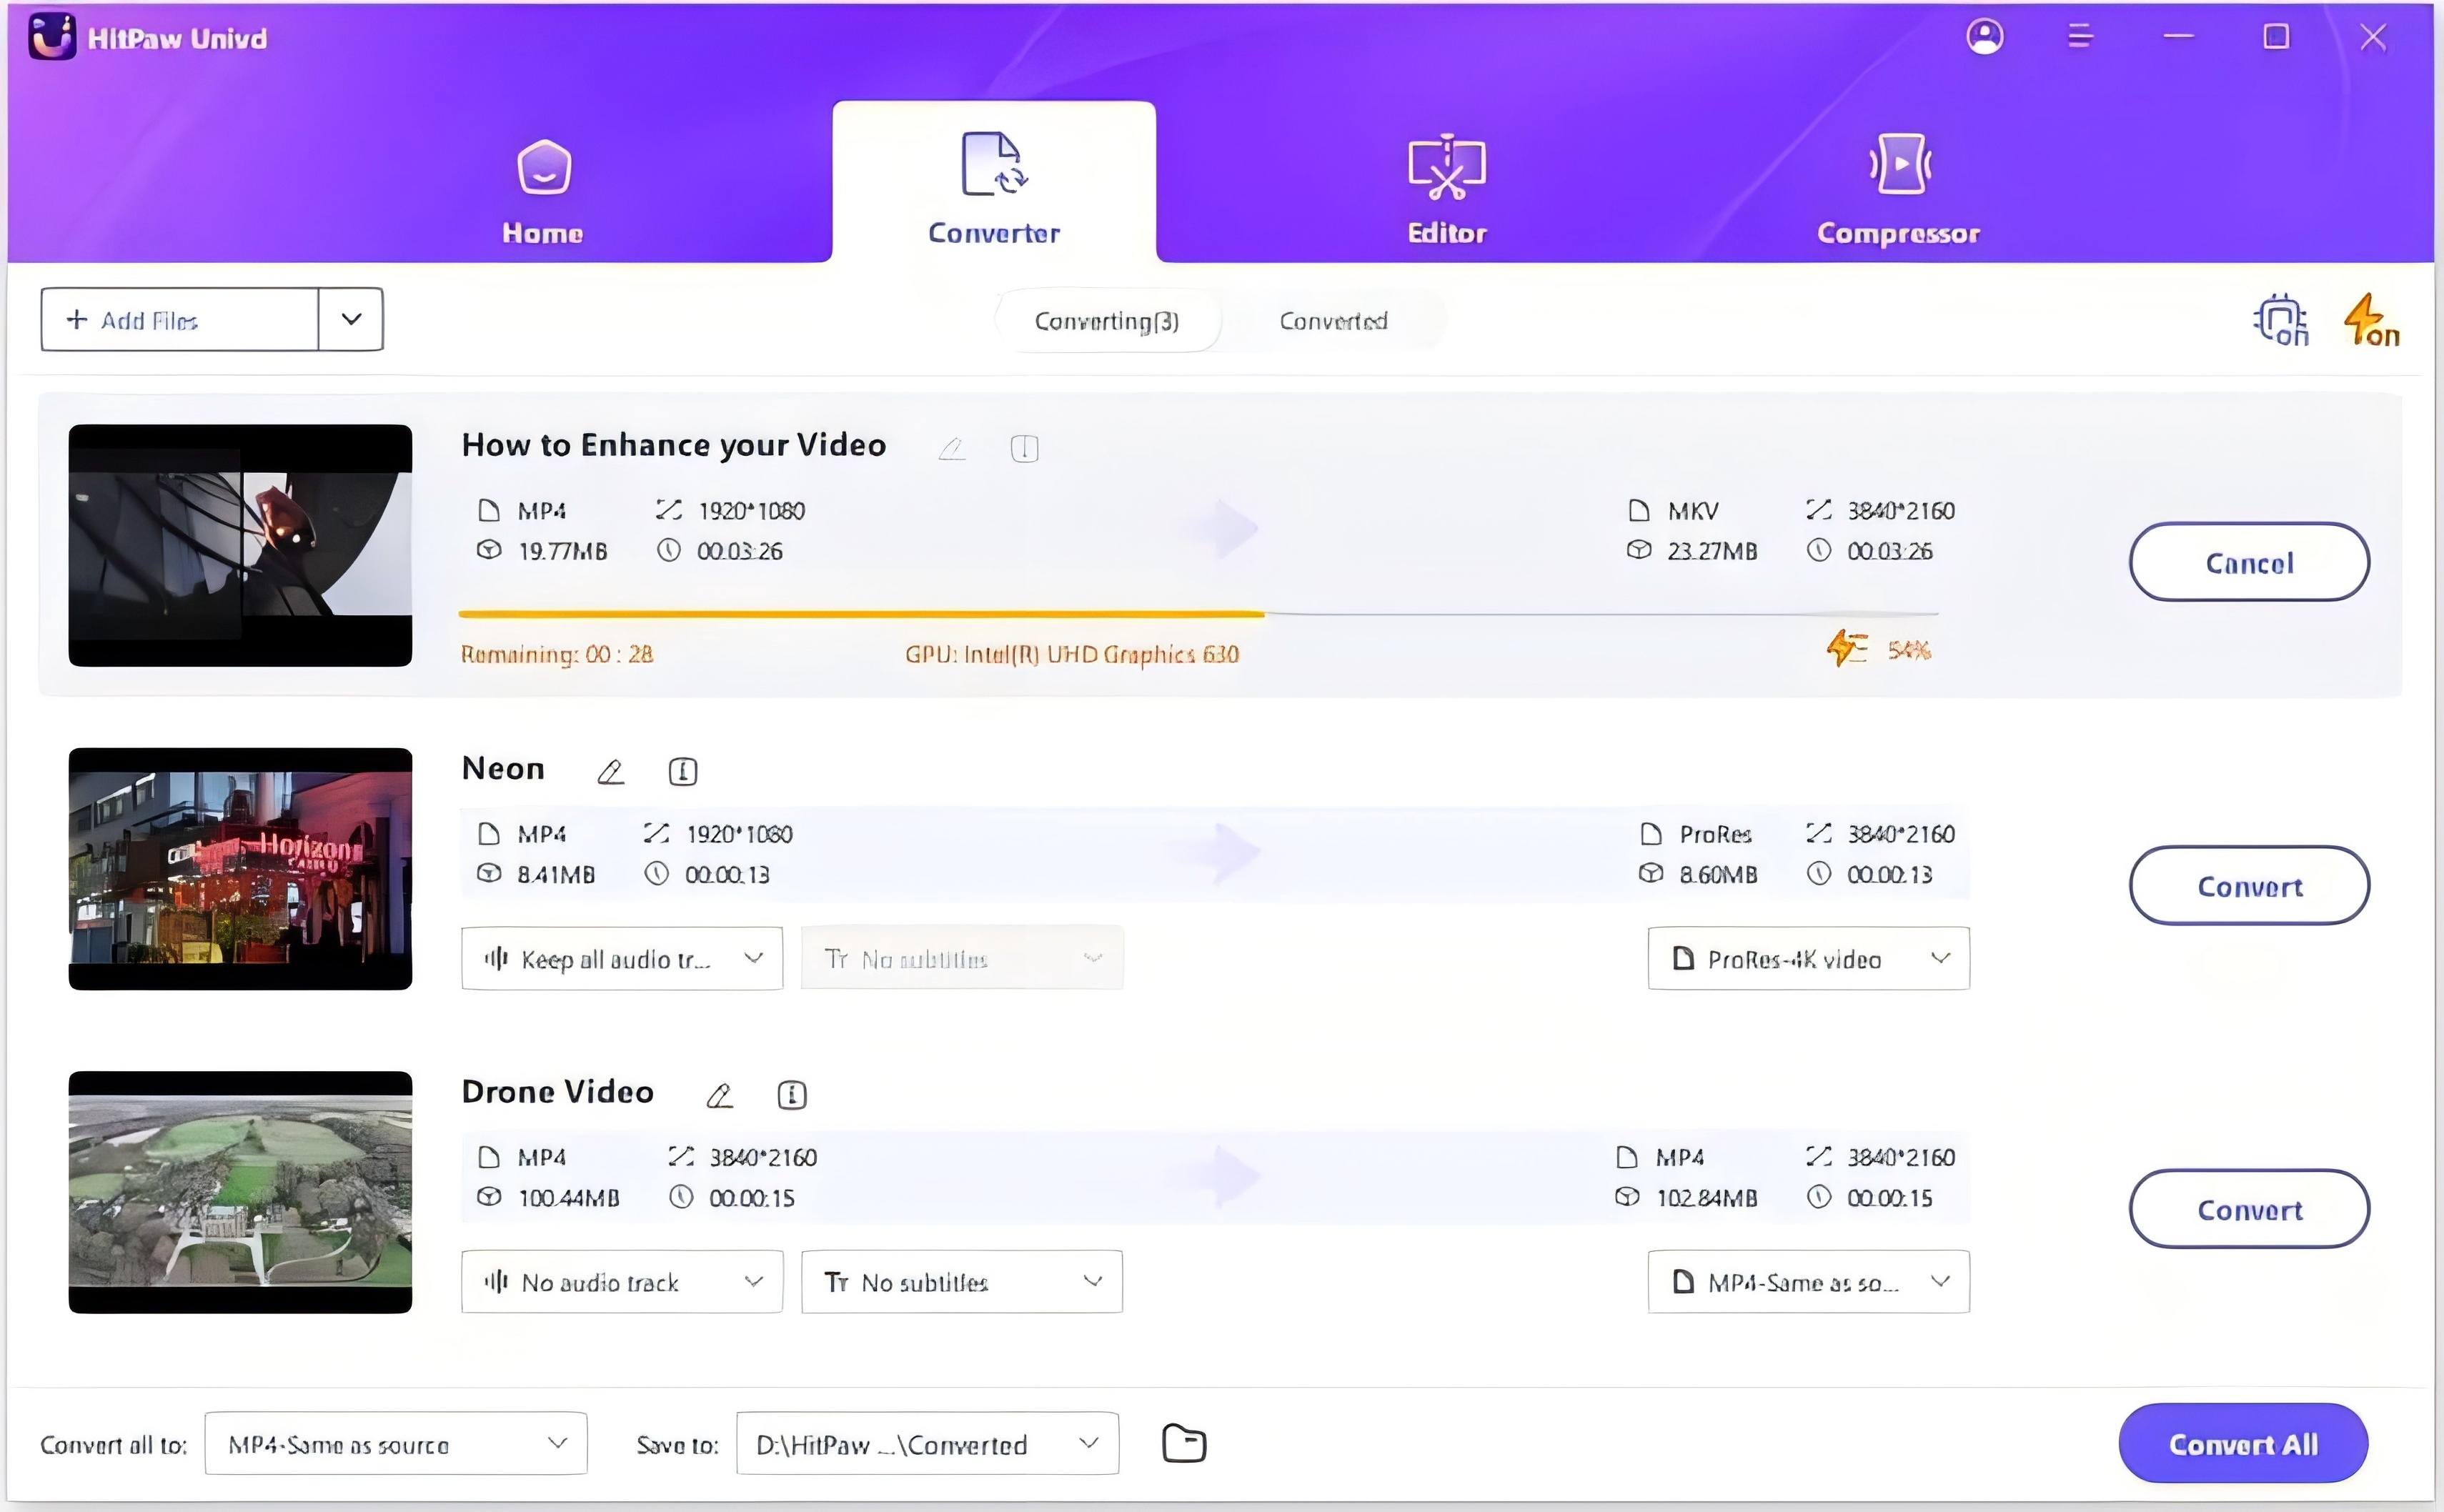
After installing the HitPaw Univd, launch the application. In Converter tab, select the Add Video to import your files or drag video(s) directly to the program.

Step 2: When you add a video to HitPaw Univd, you can check the subtitles status. If the default option is “No subtitles”, it could be that this video is embedded with hardware subtitles or closed subtitles. These types of subtitles are permanently added in the original video frames and cannot be switched off by the users.
You can add external subtitles to the video by clicking “Add subtitles”. Currently HitPaw Univd supports adding the following three types of subtitles: SRT, ASS, VTT and SSA. You can add one subtitle file each time.
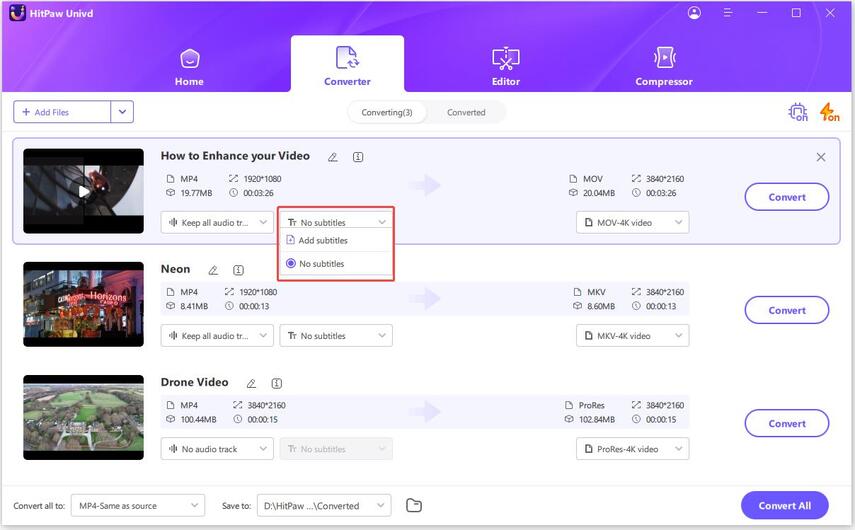
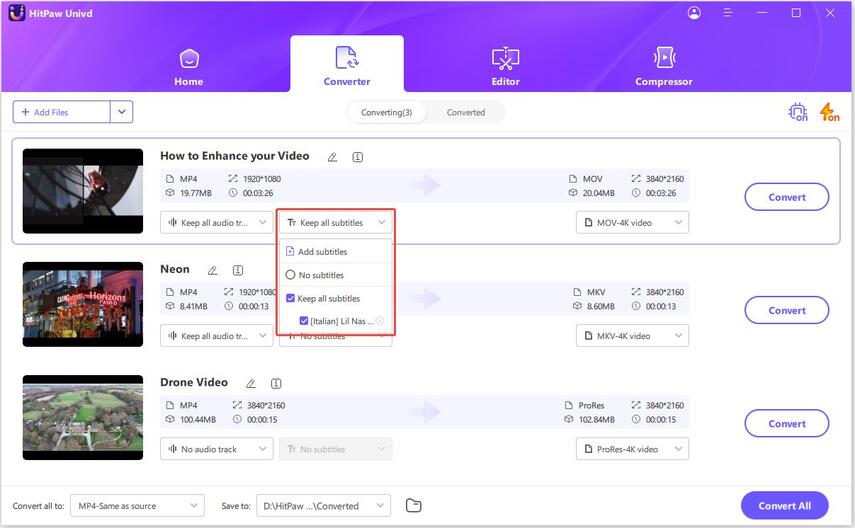
The added external subtitle files will be sorted in descending order according to the import order. There will be a delete icon on the right of each added subtitle.
Step 3: You can select an output format for each file by clicking the inverted triangle icon on the lower right side of each file. Click "Convert All" in the lower left corner to select a unified output format for all imported files. Choose a target folder in the interface, and click Convert (or Convert All in case of multiple files) to convert the video to the format you selected.
This allows you to tailor the output to your specific needs, whether for online sharing, presentations, or personal use. Once you've made your selections, save the final video with the embedded subtitles.
Bottom Line
We've explored two stunning ways to sync subtitles with your videos, ensuring an enhanced and seamless viewing experience. First, we introduced Happy Scribe, an online tool and VLC that provides accurate and easy-to-follow methods for sub sync. Then, we delved into the HitPaw Univd, showcasing its powerful AI Video Editor that makes adding and syncing subtitles a breeze.
Among these options, we highly recommend the HitPaw Univd as the best way to add subtitles to your videos. Its user-friendly interface, AI-powered subtitle generation, and efficient processing make it an invaluable tool for anyone looking to produce professional-quality videos with perfectly synced subtitles. By utilizing these methods, you can ensure that your video content is accessible and enjoyable for all viewers.


 HitPaw Edimakor
 HitPaw Watermark Remover
  HitPaw VikPea (Video Enhancer)
Share this article:
Select the product rating:
Daniel Walker
Editor-in-Chief
This post was written by Editor Daniel Walker whose passion lies in bridging the gap between cutting-edge technology and everyday creativity. The content he created inspires audience to embrace digital tools confidently.
View all ArticlesLeave a Comment
Create your review for HitPaw articles