
Catalog
If you want to enhance a blurry or low-quality image, HitPaw FotorPea is one of the best photography enhancement tools to try. With just a few simple steps, you can transform your photos with AI-powered enhancement. Follow the detailed steps below to learn how to upscale your images quickly and effectively.
Step 1: Download and Install HitPaw FotorPea
First, visit the official HitPaw FotorPea website and click the Download button to get the latest version of the software.
Once the installer is downloaded, open the file and follow the on-screen instructions to complete the installation. After it's installed, launch HitPaw FotorPea to get started.

Step 2: Upload the Original Photo
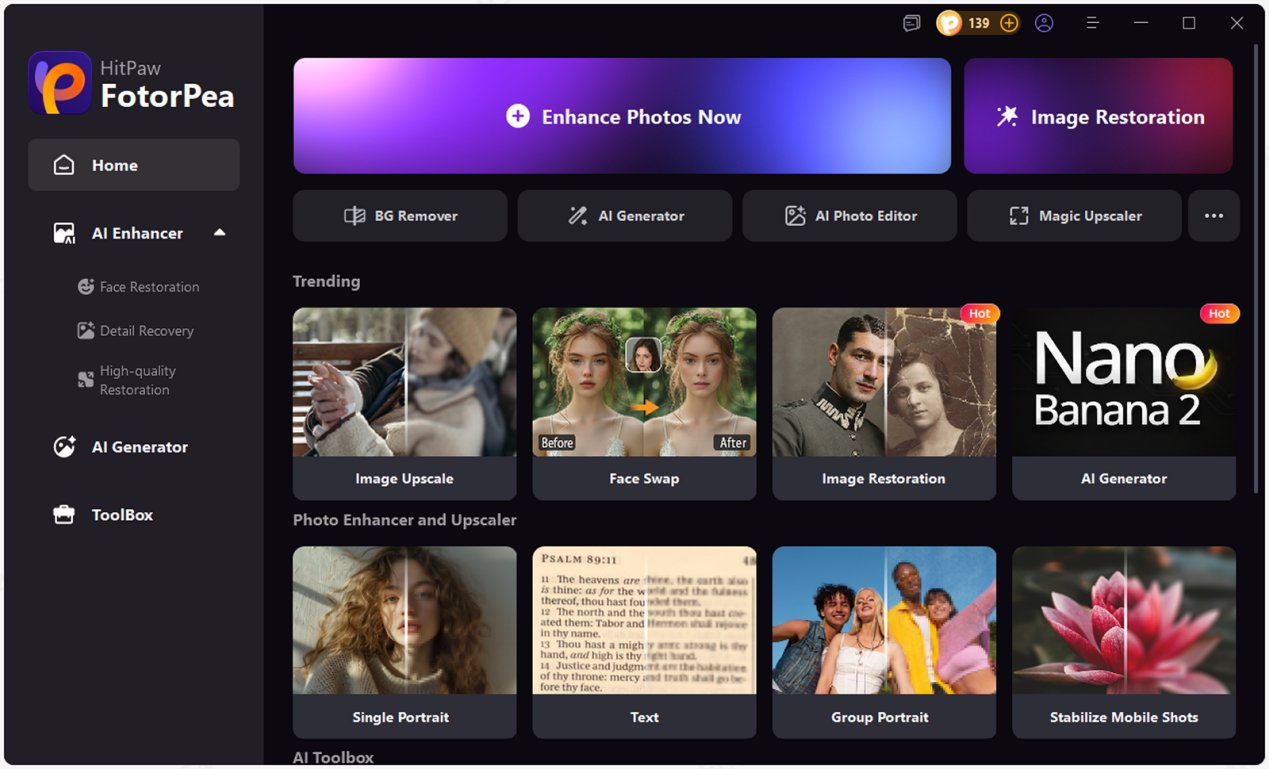
Click on Enhance Photos Now to start your enhancement journey.
You can import your image by:
- Clicking the Choose File button.
- Or simply drag and drop the photo directly into the interface.
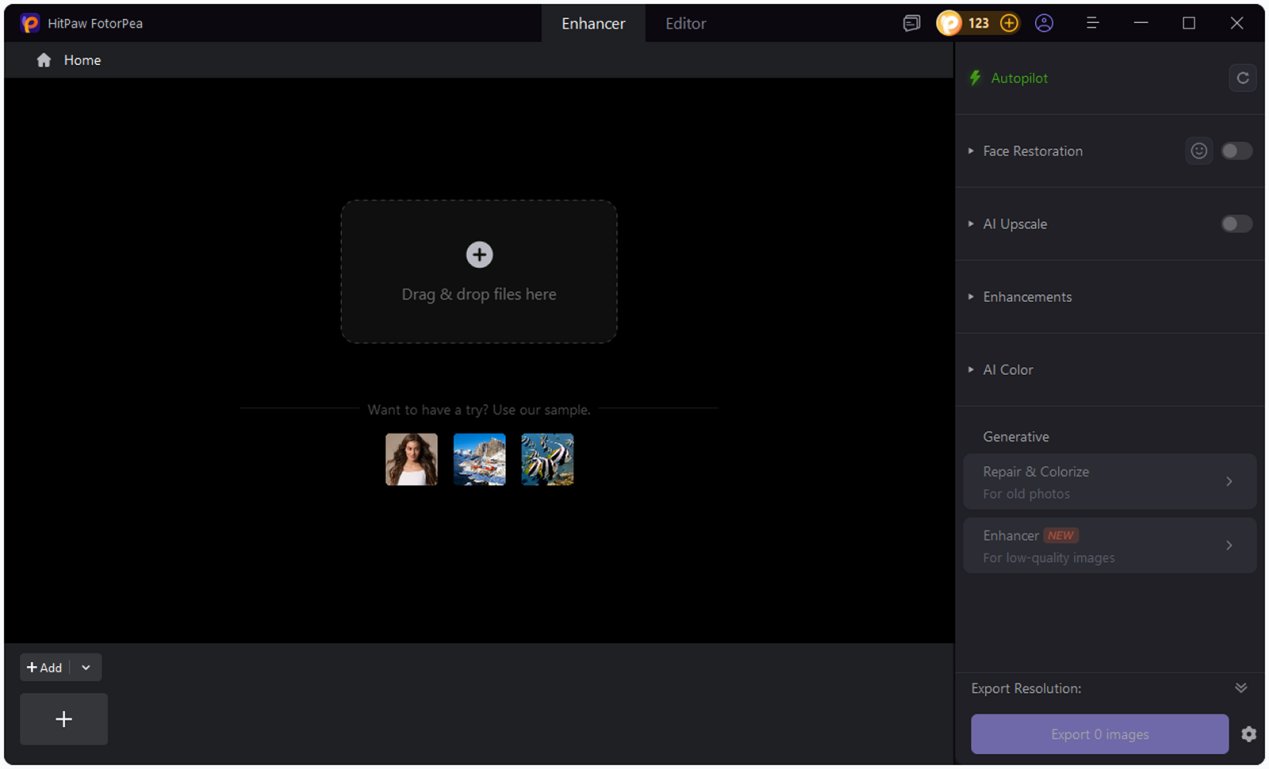
HitPaw FotorPea supports popular image formats including JPG, JPEG, PNG, WEBP, TIFF, and more-so you can work with most images without conversion.
Tip: You can try the sample image provided within the software to preview the enhancement effect before using your own image.
Step 3: Choose the Best AI Model for Your Image
HitPaw FotorPea offers two modes: Custom Mode allows users to freely adjust and precisely control models for more detailed, tailored results. Auto Mode automatically detects and selects the most suitable model for fast, high-quality enhancement.
In Custom Mode, FotorPea offers a powerful range of AI models to meet diverse image enhancement needs. Among them, five core models are most frequently used:
- Face Restoration Model - Enhances facial features naturally.
- AI Upscale Model - Boosts resolution without losing quality.
- Denoise Model - Removes noise and restores clarity.
- Sharpen Model - Fixes motion, lens, and compression blur.
- AI Color Model - Adds realistic color to black-and-white or faded images.
Beyond these, you'll find additional models for specific use cases: Text Model, Animation Model, Low-light Enhancement Model, Scratch Repair, Colorization and Color Calibration — all designed to fine-tune and perfect your images with precision.
Face Restoration Model
The Face Restoration Model is specifically designed to enhance portrait images. It detects and refines facial regions with precision, making it ideal for headshots, selfies, and group photos.
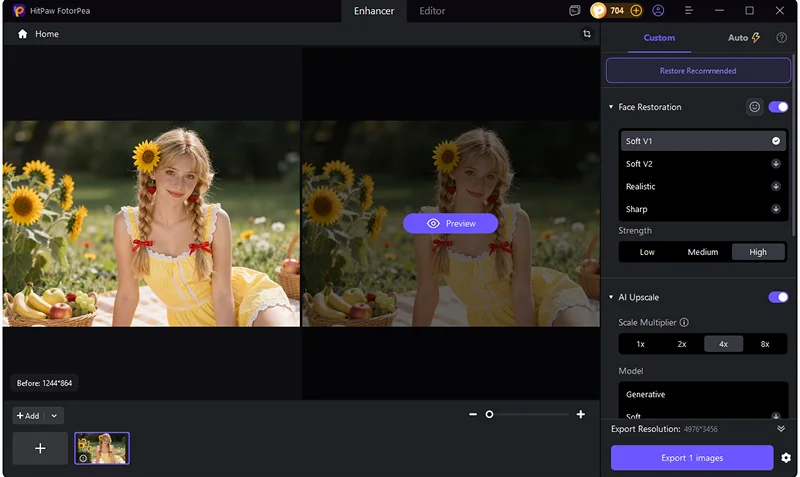
From the UI, you can toggle the Face Restoration Model and choose between three enhancement modes:
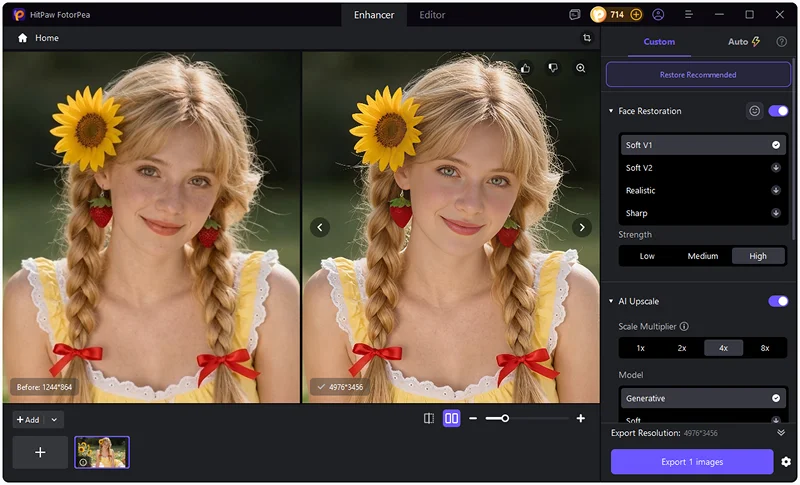
- Soft V1 (Default) – Smoothly enhances facial features while preserving natural textures. Great for general portrait enhancement.
- Soft V2 – An advanced version that balances detail enhancement with a more refined and natural skin finish.
- Realistic – Ideal for extremely low-quality or partially obscured face images - delivers results closer to the original texture with natural facial details.
- Sharp – Emphasizes facial outlines and edges, perfect for low-resolution faces or when facial details are unclear.
After selecting your preferred mode, click the "Preview" button to see real-time enhancements before exporting. This allows you to compare results instantly and ensure the final image looks just the way you want.
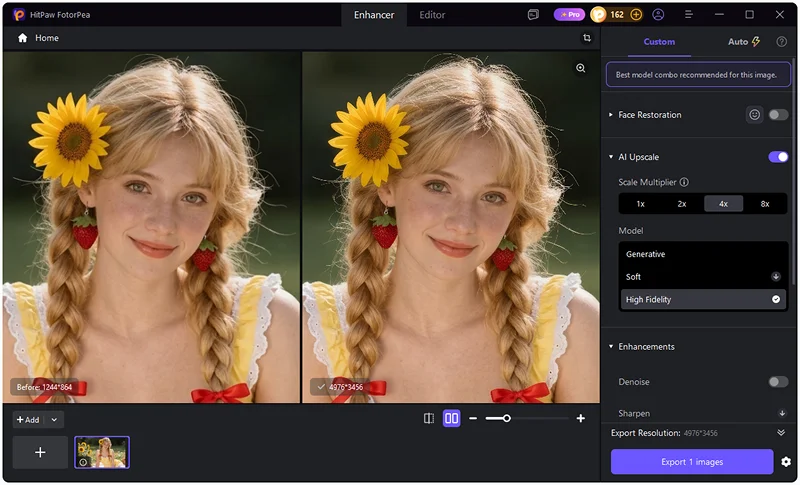
AI Upscale Model
The AI Upscale Model allows you to increase image resolution without sacrificing quality. It is mostly used in conjunction with Face Restoration Model. It’s perfect for restoring old images, preparing e-commerce product photos, or generating high-resolution content for print and social media.

From the interface, you can choose from these scale options: 1X, 2X, 4X, 8X, and define custom width and height dimensions (as shown: W 1000 x H 1000).
There are three processing modes:
- Generative – For low-quality images with light, medium, or heavy mixed noise – emphasizes clarity and sharp details generation for high-quality results.
- Soft – For low-quality images with medium to heavy mixed noise – great for portraits with noise, delivering softer skin and natural details.
- High Fidelity – For high-resolution, clear images. Retains fine, natural textures while maintaining overall image quality. Ideal for DSLR photos, posters, and AI-generated images.
Once your settings are selected, click the "Preview" button to instantly see how your image will look. This preview helps you evaluate clarity, sharpness, and scaling effects before finalizing the enhancement.
Denoise Model
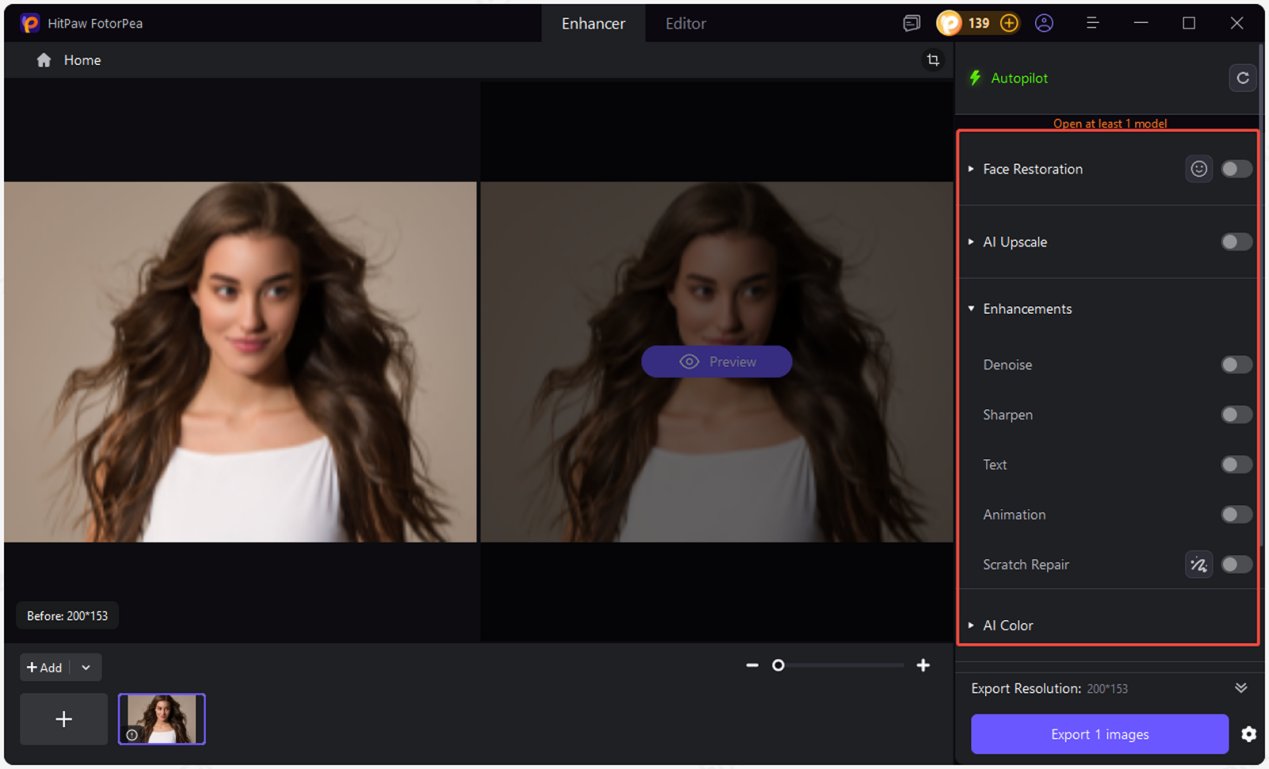
The Denoise Model is built to remove noise and grain from images while preserving essential details. It’s especially useful for photos taken in low light or with high ISO settings, and for images degraded by repeated compression. Choose from three specialized modes to achieve optimal results for different types of images:
- RAW Denoise – Removes noise and repairs hot pixels in RAW camera images, best for professional RAW photos from Canon, Nikon, or similar cameras.
- Realistic Denoise – Removes extreme noise while restoring details and retaining original textures, ideal for complex or high-clarity images.
- Creative Denoise – Removes standard noise, sharpens details, and generates new textures, especially effective for smartphone photos.
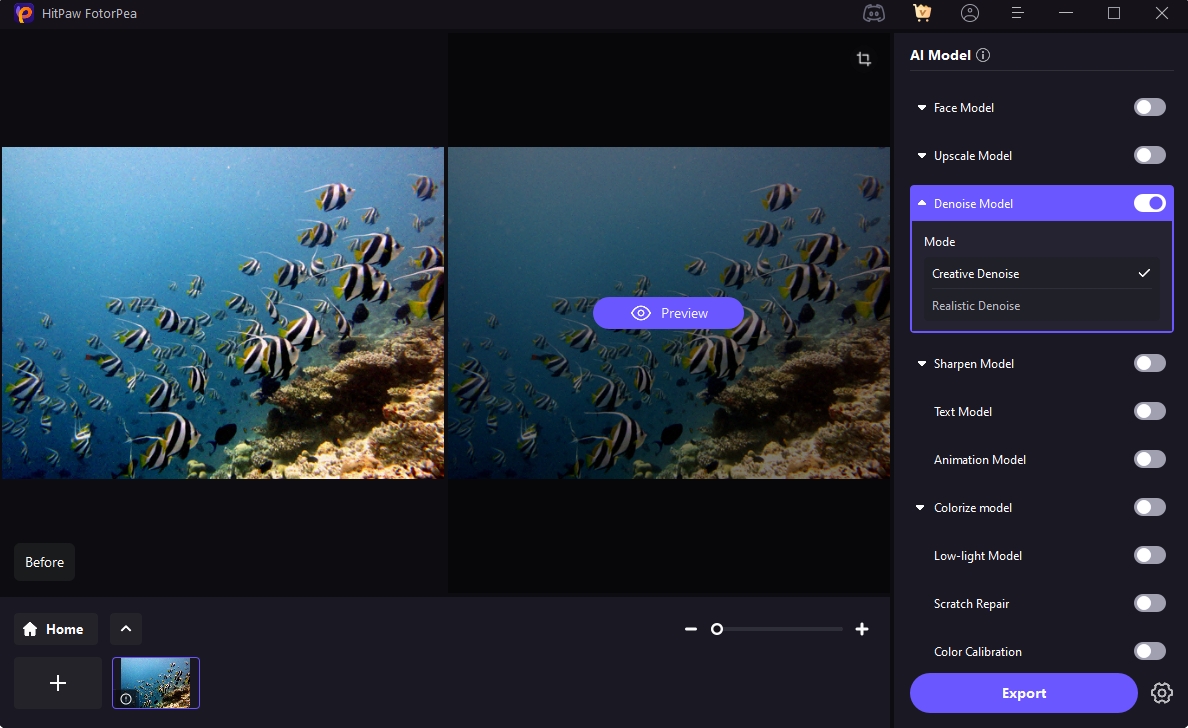
Best use cases:
- Night or indoor photography
- Scanned photos or old film stills
- Social media images with visible compression artifacts
This model intelligently identifies noise patterns and restores visual clarity without over-smoothing.
After applying your preferred settings, simply click the "Preview" button to compare the before-and-after effects in real time and ensure the noise reduction meets your expectations.
Sharpen Model
The Blur Repair Model fixes various types of blur and restores image sharpness using three specialized techniques:
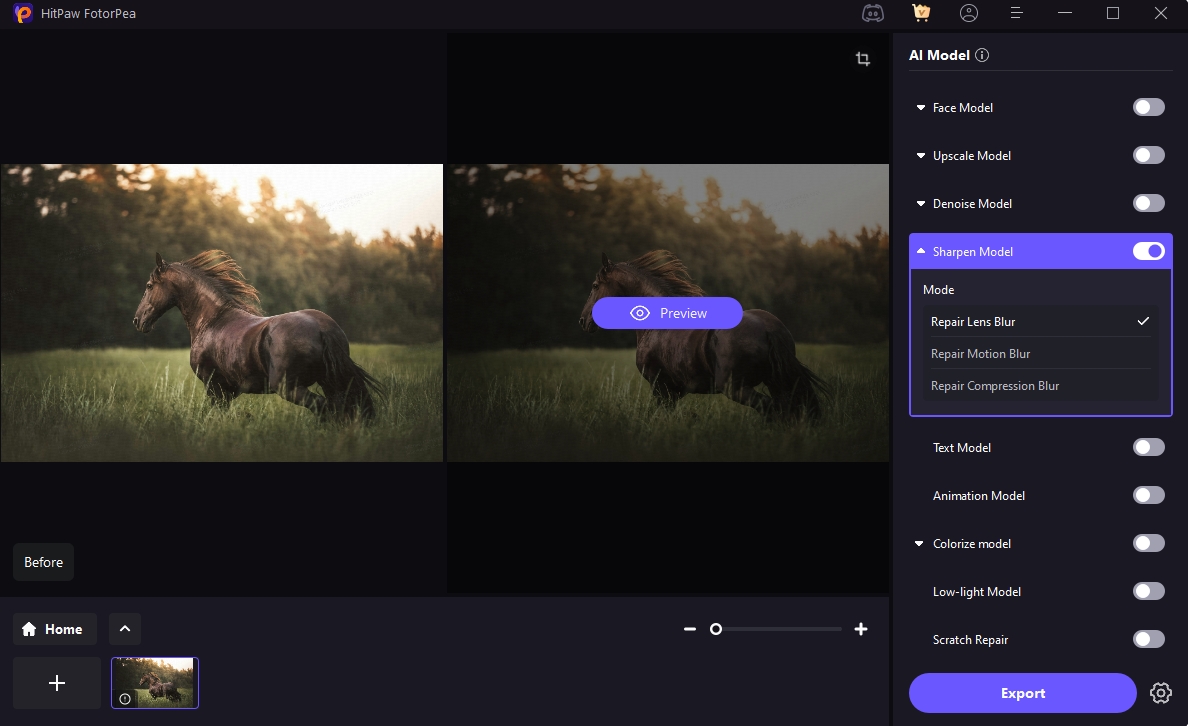
- Repair Lens Blur – Corrects soft focus caused by camera lens limitations or improper focusing.
- Repair Motion Blur – Reduces motion streaks resulting from camera shake or moving subjects.
- Repair Compression Blur – Removes blurring and blocky artifacts from overly compressed images.
Ideal scenarios:
- Blurry action shots or shaky photos
- Compressed screenshots or video frames
- Any image with unclear outlines and softened details
Once you've selected the appropriate blur repair mode, click the "Preview" button to see an instant comparison and evaluate the improvement before exporting.
Text Model
The Text Model enhances resolution and clarity in text images with light to moderate compression noise, perfect for scanned documents, screenshots, and heavily text-based compressed images.
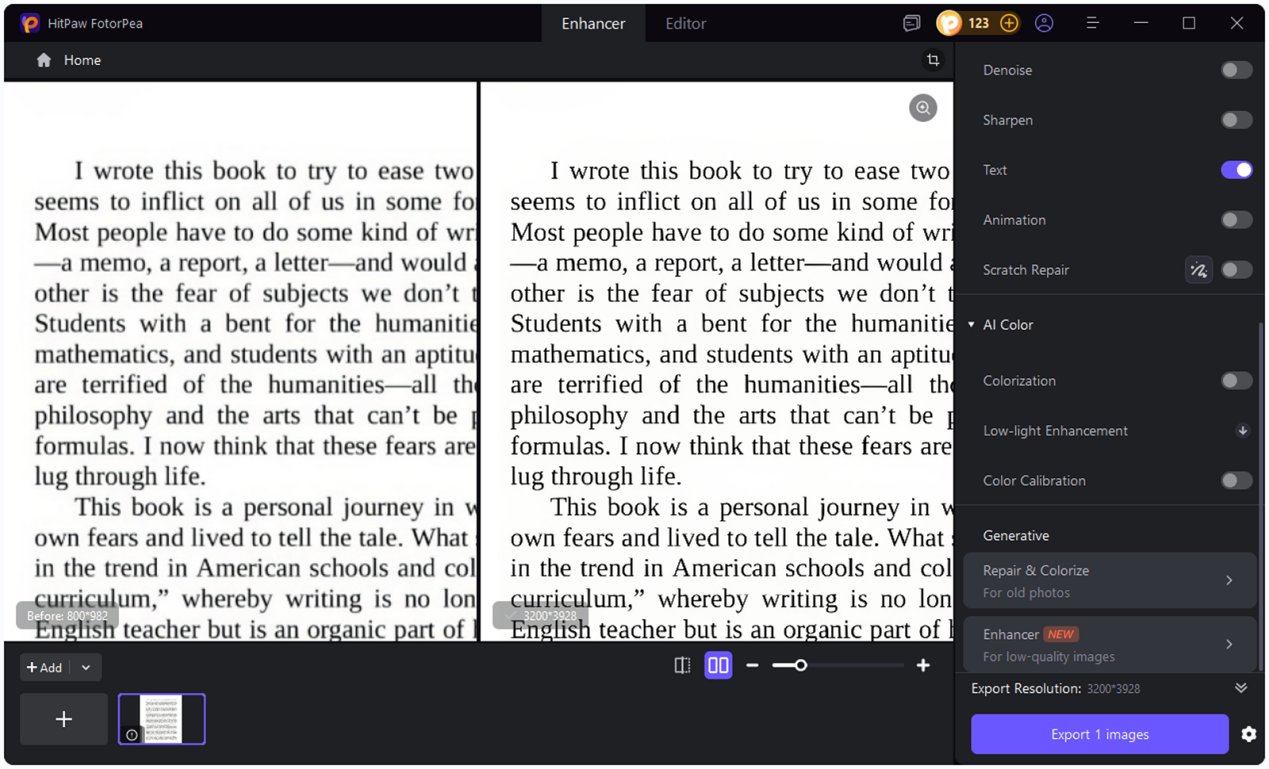
Once you click the "Preview" button, you can see an instant comparison and evaluate the improvement before exporting.
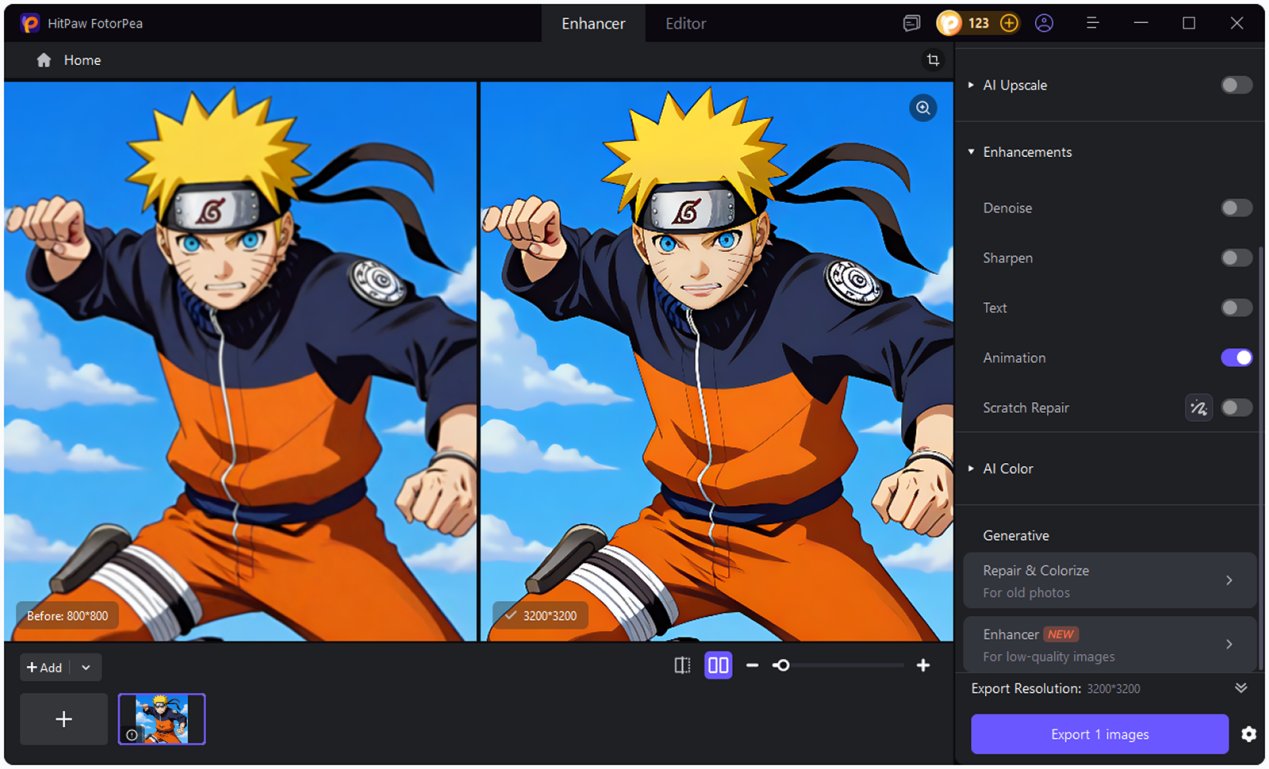
Animation Model
The Animation Model enhances clarity and sharpness in anime and cartoon images, perfect for illustrations, animations, and stylized artwork.
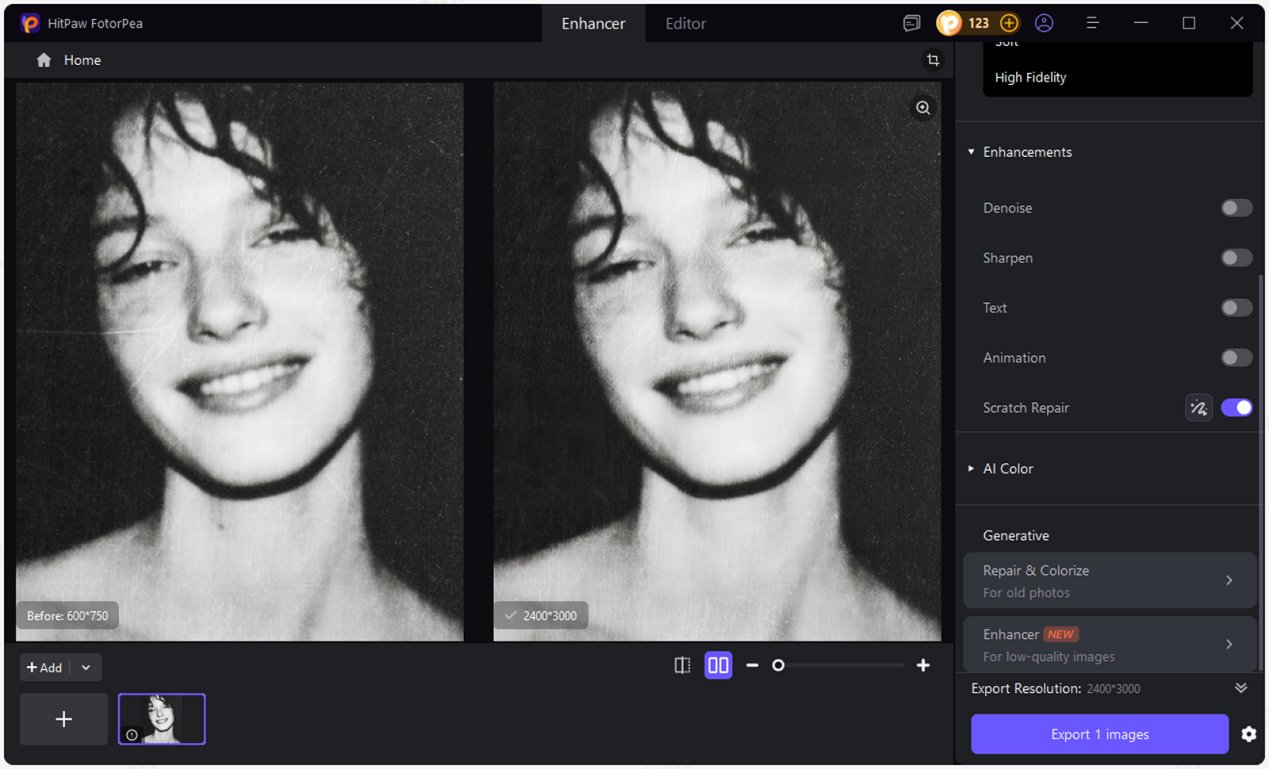
Scratch Repair Model
The Scratch Repair Model repairs scratches and blemishes in photos, ideal for restoring old or damaged images.
AI Color Model
The Colorize Model intelligently brings black-and-white or grayscale photos to life with natural-looking colorization. It’s great for historical restoration, creative projects, and manga or sketch-style images.
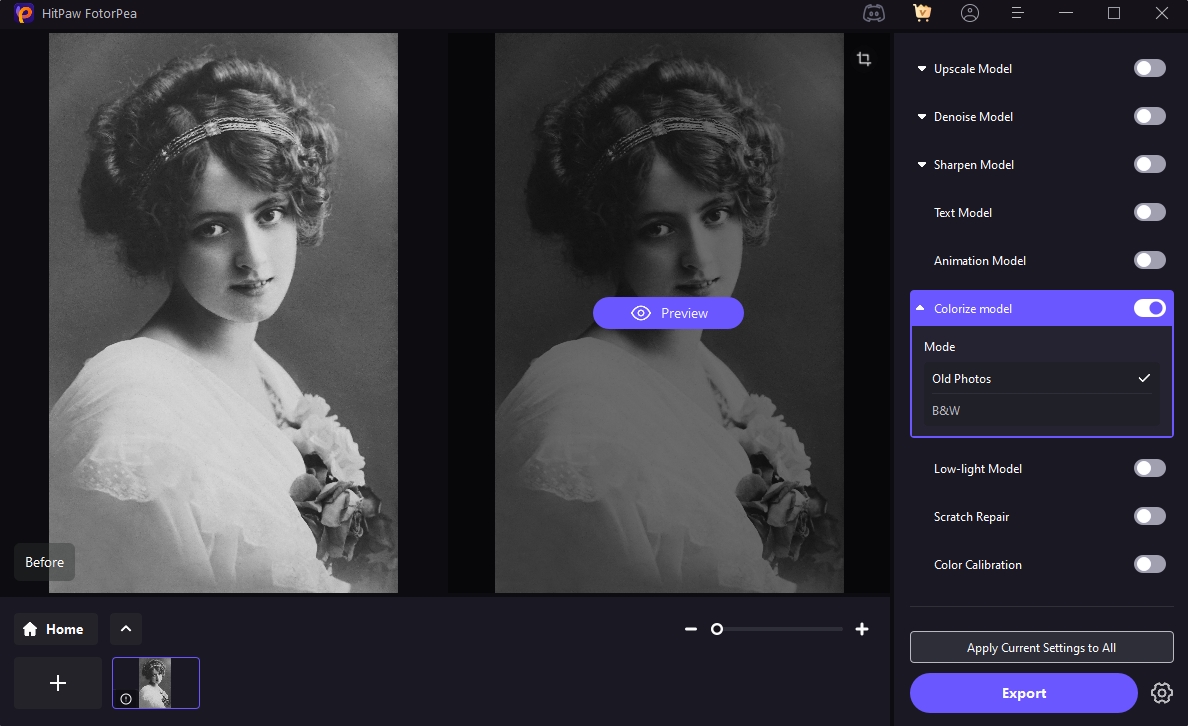
It automatically analyzes the image and applies context-appropriate colors to different areas, from skin tones to skies.
Pro tips:
- Use high-resolution grayscale images for best results
- Consider denoising before colorizing for cleaner output
- Use optional color adjustment tools for tone refinement
After applying the Colorize Model, click "Preview" to instantly compare the enhanced image and make refinements before export.
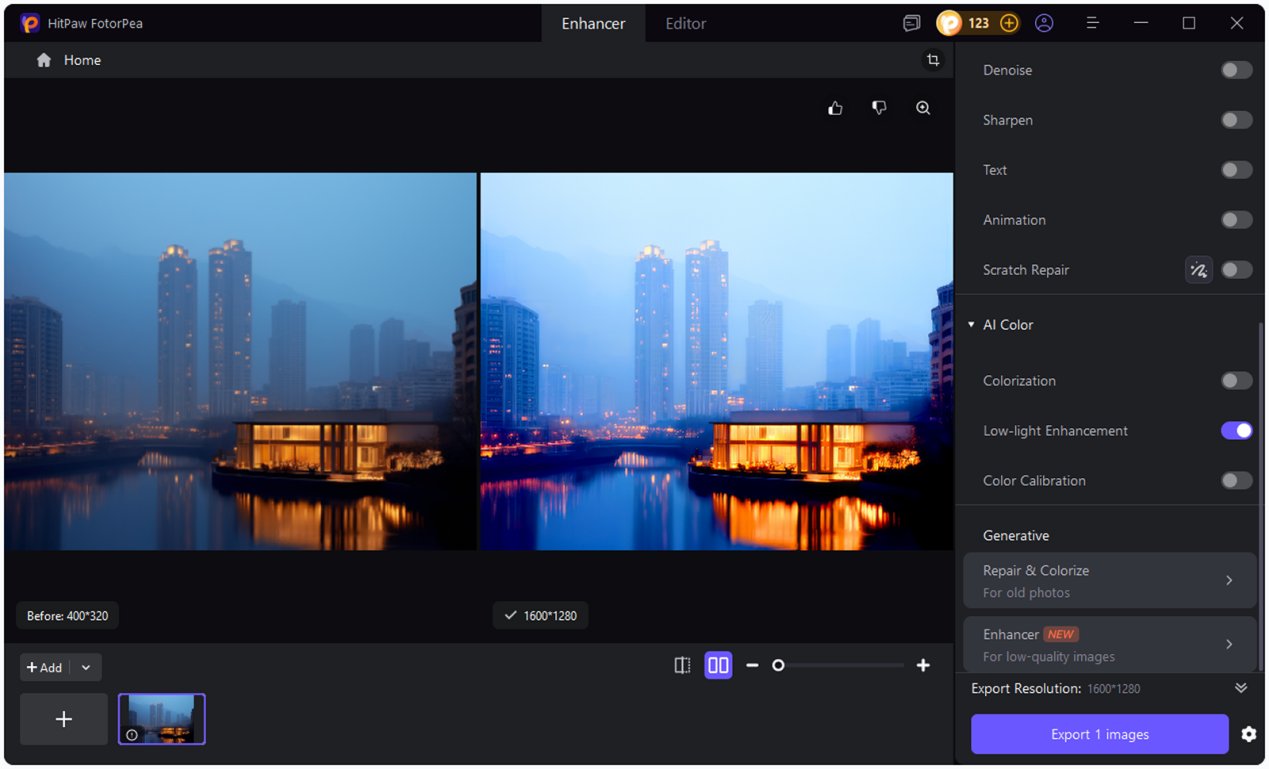
Low-light Enhancement
The Low-light Enhancement brightens and enhances images taken in low-light environments, perfect for night scenes, dimly lit photos, and indoor shots.
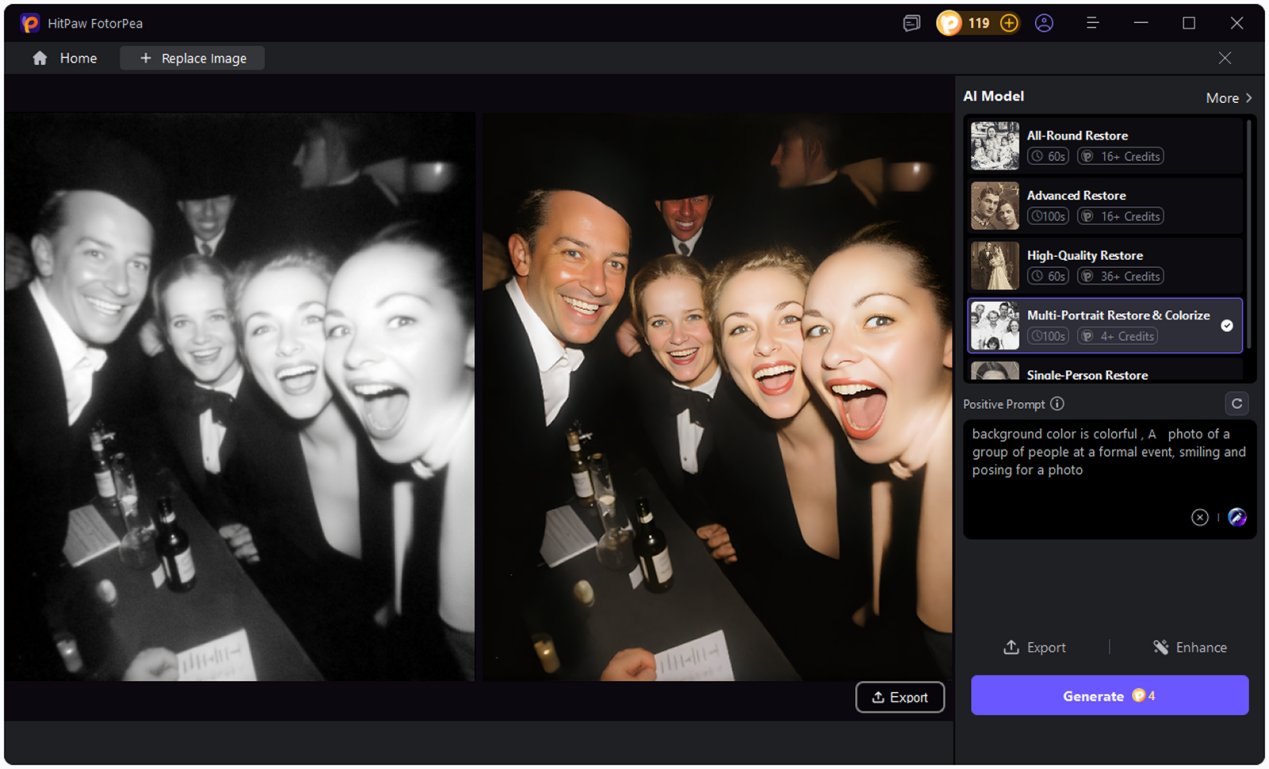
Generative Repair & Colorize Model
Experience advanced restoration and colorization with our Generative Repair & Colorize Model:
- All-Round Restore – Supports multiple scenes, including single-person and multi-person photos, providing comprehensive restoration and enhancement.
- Advanced Restore – Applies intelligent restoration and colorization across various photo scenarios, bringing images back to life with enhanced quality.
- High-Quality Restore – Delivers high-definition restoration for single-person and multi-person photos, preserving details and textures.
- Multi-Portrait Restore & Colorize – Restores and colorizes group photos, maintaining realistic appearances for all subjects.
- Single-Person Restore – Focuses on repairing damage and creases in single-person photos, enhancing clarity and detail.
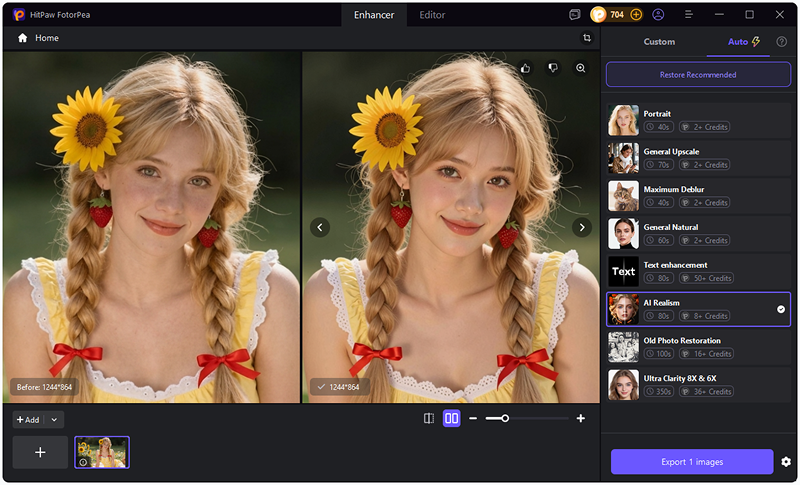
Generative Enhance Model (Auto Mode)
In Auto Mode, you can experience advanced photo enhancement with our powerful generative tools:
- Portrait – Enhances clarity and restores facial details in low-quality photos.
- General Upscale – Enhances clarity and resolution for general images, improving overall sharpness and detail.
- Maximum Deblur – Corrects camera blur, compression blur, and motion blur, restoring sharpness and detail in affected images.
- General Natural – Enhances small-resolution images in general scenarios, improving clarity and preserving natural textures.
- Text Enhancement – Powered by Nano Banna, it enhances text readable.
- AI Realism – Remove the artificial look of AI-generated images in one click. Works well on skin, hair, fabrics, metals, plastics, and more.
- Old Photo Restoration – Improved tone naturalness, texture consistency, and detail preservation.
- Ultra Clarity 8X & 6X – True 6× / 8× upscaling, restoring complex textures such as hair and leaves in high definition. It can also repair heavily compressed images, making faces, text, and architectural details appear clearer.
Step 4: Export Your Enhanced Photo
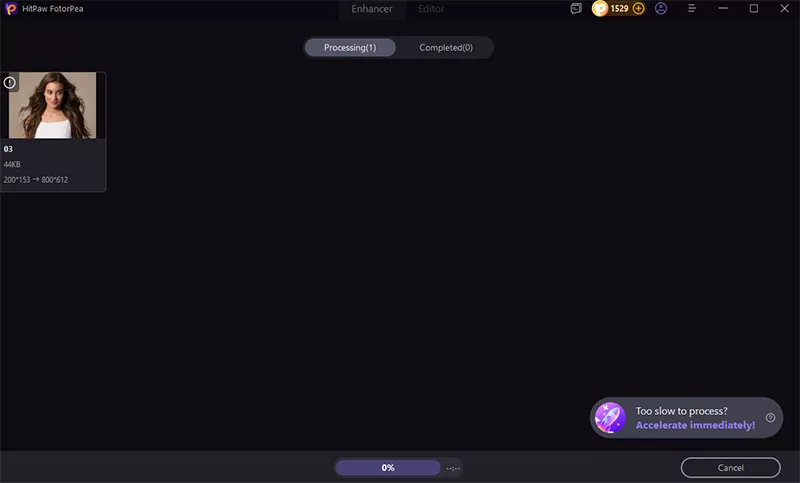
When you're satisfied with the final enhancement, click “Export” to save your high-quality, enhanced photo to your device.
Tip: The free version does not support exporting. To unlock full features and export in high quality, click the Buy Now button and upgrade to the full version.
Now your blurry or dull photo is transformed into a crisp, vibrant image—all thanks to the smart AI power of HitPaw FotorPea. Give it a try today and see the difference!
Still Need Help?
If you have any questions regarding the product usage, campaign optimization, sales, commissions, or anything else, please feel free to contact us.

