[Essentials] How To Perform Time-Lapse Photography Night Sky?
In recent times of content creation, photographers have been experimenting with their pictures. Time-lapse photography is a series of photos taken to capture the unseen movements of the night sky. Such photography is captivating for everyone, as it is a great way to capture shooting stars, colorful auroras, and meteor showers. The following article shares the top tips on how to create a perfect time-lapse of the night sky.
Part 1. Things To Plan For Your Time-Lapse Photography Night Sky
The following list will help you make a workable plan before you start shooting:
1. Start With the Location
Before you start capturing in some random space, look for a picturesque location that has an attractive foreground. Your ideal place should have a dark sky, so that the movement of the stars pops without editing. To get a perfect time-lapse photography night sky, make sure that the selected location does not have pollution.
2. Align With the Forecasts
As the season keeps changing, use a weather forecast application to keep track of the sky in your selected location. The perfect time for photography would be a night of clear skies, with no traces of clouds. If you want to capture stars and the Milky Way, your goal should be a night when the moon rises late or sets early.
3. Exploring the Right Time to Shoot
As the visibility of the Milky Way keeps changing, it is best to shoot from late spring to early fall in most countries. If you want to capture meteor showers, the right time for you would be August or December.
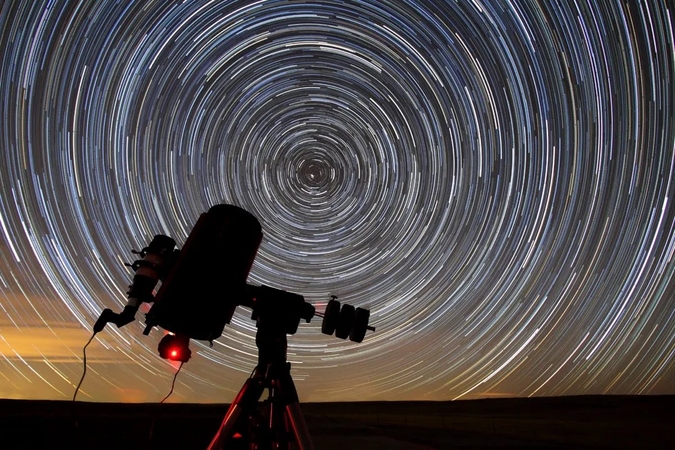
Photographers interested in taking photos of aurora can go to the high altitude places during winter. However, the general rule of time-lapse photography of stars is to start around midnight and end at 4 am.
Part 2. Time-Lapse Photography Night Sky: Planning The Equipment
Although the location and the choice of time matter a lot in capturing the late-night sky, the equipment plays an important role. The following section will help you maintain a check-list of the camera and other accessories:
1. Choose the Right Camera
DSLRs or mirrorless cameras are the best at capturing photos in low-light conditions, so make sure to put them in your backpack. They are also ideal for wide-angle lenses and for giving the user full manual control. If you do not have a professional camera, an advanced smartphone will also work.
2. Pack the Necessary Accessories
To prevent yourself from holding the camera for long hours, it is wise to invest in an adjustable tripod stand. Besides, it develops professional results by making sure that your captured images are not shaky. You can automate the photo-capturing trigger, use an external or built-in intervalometer and get the ideal star time-lapse outcomes.
3. Always Have Backup Batteries
To maximize productivity, always keep a backup of batteries and memory cards. Extra batteries will prove handy during long shooting sessions and cold temperatures that can quickly drain your power. Taking countless continuous RAW images of the sky can occupy lots of space, so always carry spare memory cards.
Part 3. The Right Settings For Time-Lapse Photography of Stars
Check out the following points and learn about the suitable settings for ideal sky photography:
1. The Ideal Manual Settings: To get complete control over the sky timelapse picture, use manual mode and set the ISO settings to between 1600 and 3200, depending on your camera's noise performance. For maximum light, an ideal aperture choice is f/2.8 or faster. You can avoid the star trails; set your shutter speed to 15 to 30-second exposures.
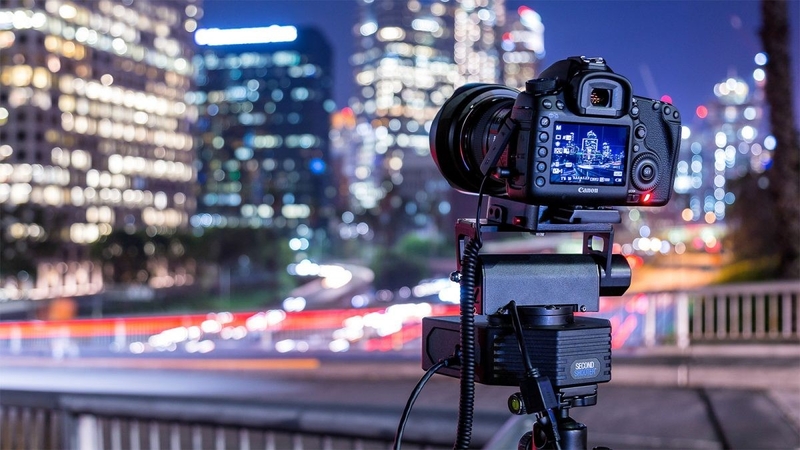
2. Manual Techniques for a Sharp Focus: Using autofocus is not a good idea as it does not capture tiny and faint stars. With manual focus, set the live view on your camera and zoom into a bright star. When the subject is perfect in the lens, start adjusting the focus slowly.
3. Calculating the Intervals: After setting the shutter speed, adjust the interval time to just a few seconds longer. A generally good range to capture a skytimelapse is every 20 to 40 seconds.
4. Choosing the Right Format for Maximum Editing Power: As the JPEG format loses the shadow and highlights details, it is better to choose an alternative image format. Pictures in RAW files retain more detail and make it easier to adjust the picture’s color and noise.
Part 4. Some Basic Tips To Improve Time-Lapse Photography Night Sky Results
The following tips will help you improve your time-lapse photography effortlessly:
1. Enhance your Composition: While the stars will be the focus of the picture, pay special attention to the foreground. With a captivating surrounding, you can add to the aesthetic of your images.
2. Maintain Consistency: To ensure your time-lapse has a smooth, cohesive feel, keep your camera steady and framed the same way throughout the session. Once you have started shooting, make sure that the tripod is stable and working.
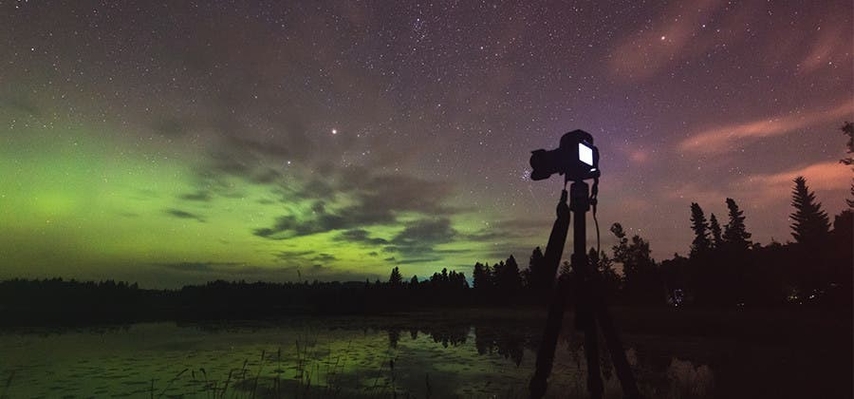
3. Stay on Top of Your Gear: Long exposures in the night time-lapse could strain your equipment, so keep spare batteries and memory cards. If light conditions change, keep monitoring your exposure settings constantly.
4. Prevent Natural Phenomena from Ruining Your Shots: As temperatures drop overnight, dew and condensation can fog up your lens and ruin your time-lapse. You could use a lens heater to avoid moisture build-up or use hand warmers to keep your lens dry.
Part 5. Enhance Time-Lapse of Night Sky Photos With HitPaw FotorPea
After spending hours shooting, a time-lapse with an unbalanced light can be disappointing. Besides, sharing such a picture on social media will present you as an unprofessional photographer. To retain the image quality, you will need a tool that carefully detects the problem with your image and fixes it within a few clicks. With an image enhancement like HitPaw FotorPea, you can fix the light imbalance and polish your sky time-lapse video.
Key Features of HitPaw FotorPea
1. The Low-Light Model perfectly balances the light within the picture if you take time-lapse star photos in low light or dark environments.
2. Denoise Model within FotorPea helps in removing all grainy pixels and noise within the time-lapse image, without requiring any reference image.
3. Speeds up the process of enhancing high-quality night images through the High-Res Acceleration feature.
4. The Upscale Model within this photo enhancement solution helps enhance the clarity of the night sky image.
5. Enables you to create ready to share photos for social media by letting you choose their aspect ratio.
6. Lets you double-check the time-lapse images by allowing you to preview before and after pictures.
A Quick Tutorial on Enhancing Sky Time-Lapse Images Using HitPaw FotorPea
Follow the guide below and learn how to use HitPaw FotorPea to enhance your sky trail time-lapse photos:
Step 1. Enter the Enhancer Interface to StartFirst, launch the main interface of HitPaw FotorPea and use the “Enhance Photos Now” button to head to the next screen.

Step 2. Import the Target Sky Image to Enhance
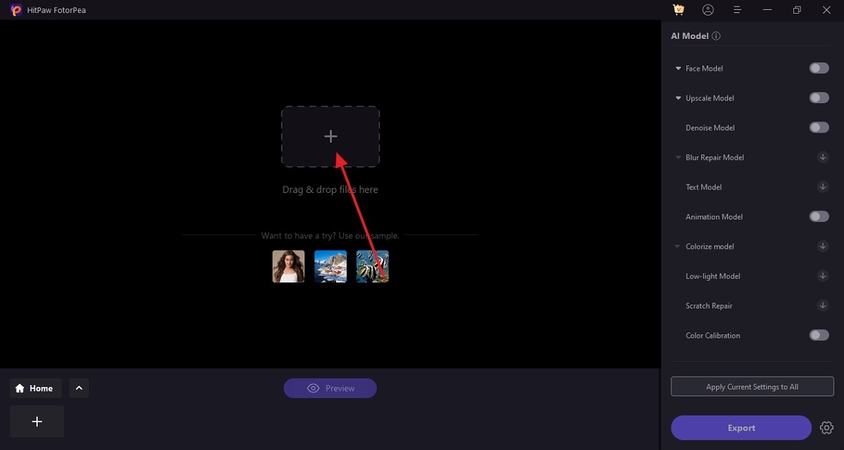
Using the next interface, “Import” the targeted night sky image and wait for it to appear on the screen.
Step 3. Select the Desired AI Model to Enhance the Imported Image
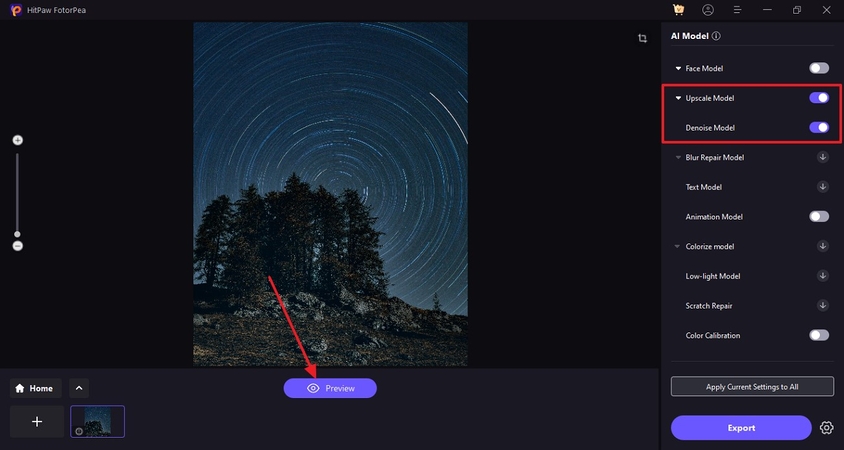
As the image appears, use the right panel to select the “Denoise Model” from the “Upscale Model” menu. To generate the enhanced image results, select the “Preview” option from the bottom of the screen.
Step 4. Save the Enhanced Sky Image to the Device
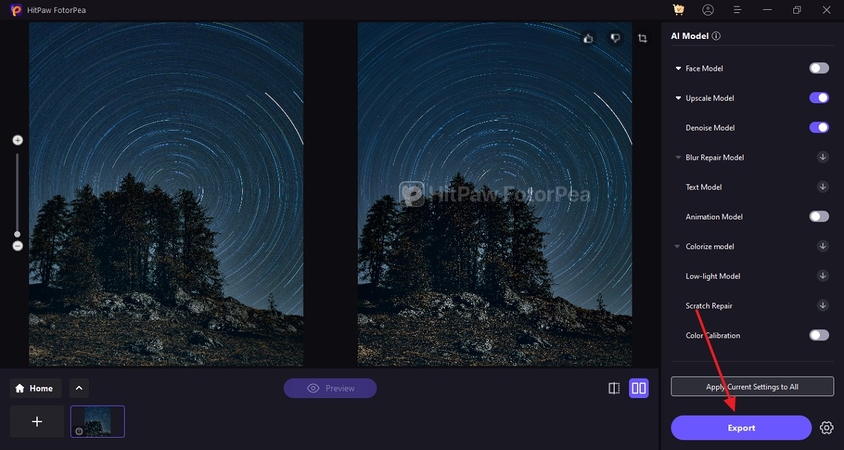
Once the enhanced image appears on the screen, click the “Export” button from the bottom right to save the picture to your device.
Part 6. FAQs on Time-Lapse Photography Night Sky
Q1. How to capture a meteor shower timelapse?
A1. To capture a meteor shower time-lapse, set up your camera with a wide-angle lens and select the right manual exposure and shutter speed. For better results, use a tripod stand and set an intervalometer to give minimum human input.
Q2. What is the right way to capture the time-lapse of a star moving with an iPhone?
A2. Using the Night Mode feature on an iPhone is an ideal way to capture long exposure star time-lapse. You can use a tripod stand or a third-party stabilizing app to avoid a shaky image.
Q3. Is GoPro effective for night sky timelapse?
A3. As a GoPro does not have the manual adjustments as a DSLR, it is not fit to capture starry nights. However, a picture taken by this device can be enhanced using HitPaw FotorPea for effective results.
Q4. What is the timelapse interval for the night sky?
A4. Although the time interval depends on personal preference, the suggested interval is 20 to 40 minutes. This interval choice is ideal for capturing the key moments happening in the sky.
Conclusion
In essence, the time-lapse of the night sky is an attention-requiring photograph. This article shared the top tips that can help you produce perfect images at night. If you still have some voids left in your images, you can use HitPaw FotorPea to enhance the pictures for better results.


 HitPaw Edimakor
 HitPaw VikPea (Video Enhancer)
 HitPaw Univd (Video Converter)



Share this article:
Select the product rating:
Daniel Walker
Editor-in-Chief
This post was written by Editor Daniel Walker whose passion lies in bridging the gap between cutting-edge technology and everyday creativity. The content he created inspires the audience to embrace digital tools confidently.
View all ArticlesLeave a Comment
Create your review for HitPaw articles