[Full Guide] How to Change Color of Object in Illustrator
Adobe Illustrator will give you full control over the artwork, and one of the most essential and popular tasks is altering the color of objects. Regardless of whether you're looking to design the logos, infographics, illustrations, knowing how to change color of object in Illustrator is crucial.
In this post, we are all set to talk about various methods to help you learn how to change object color in Illustrator.
Part 1. How to Change the Color of an Object in Illustrator
Method 1: Using the Color Picker
The Color Picker is the simplest way to modify an object's color in Illustrator. It allows you to select any shade or enter specific color codes manually.
Step 1: To utilize the color picker to modify the item in Illustrator, you must first choose the object you wish to change.
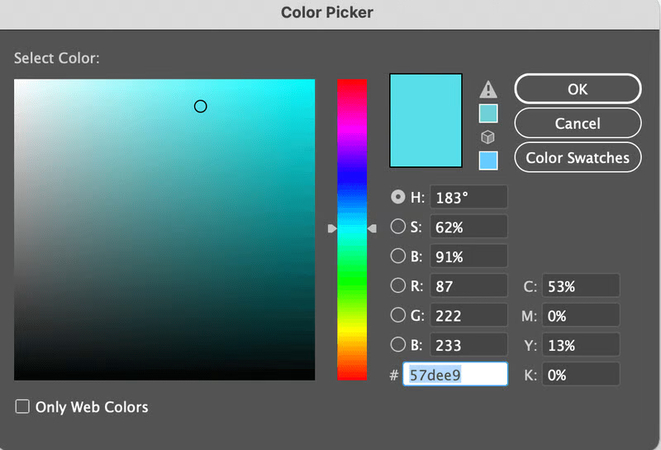
Step 2: Go to the toolbar and double-click the Fill color box. Now, you can see the Color Picker window out there.
Step 3: In this phase, you must choose a new color or enter a HEX, RGB, or CMYK value. Click OK to apply the color.
Method 2: Changing Color with the Swatches Panel
The Swatches Panel is the finest option for ensuring consistency across your design. It allows you to apply predetermined colors or save your own palette for reuse.
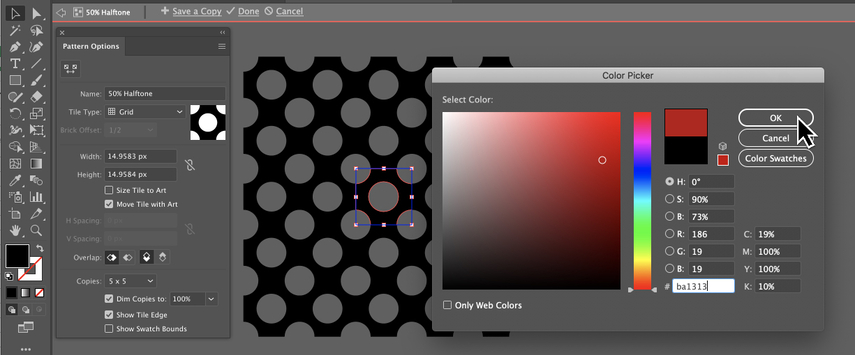
Step 1: You must select the object to begin changing the Objects in Illustrator using Swatches. Then, you'll need to start the Swatches Panel (Window > Swatches). Click on a color swatch to apply it instantly.
Step 2: Click the New Swatch button to create a new swatch and save your chosen color.
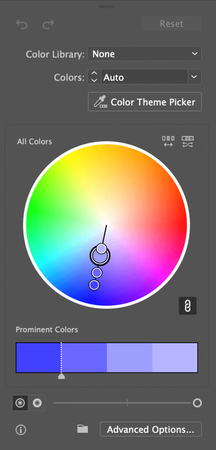
Method 3: Using the Recolor Artwork Tool
The Recolor Artwork tool is powerful when you need to adjust multiple colors at once or try different themes. It's beneficial for branding projects.
Step 1: To utilize the Recolor artwork tool to change the subject in Illustrator, first select your object(s).
Step 2: Then, go to the top menu and click Edit > Edit Colors > Recolor Artwork.
Step 3: In the Recolor Artwork dialog box, you'll need to explore preset themes or adjust colors manually. In the last stage, you'll need to preview the changes and click OK when satisfied.
Part 2. Common Issues and Fixes
Changing colors in Illustrator is usually straightforward, but sometimes you may encounter problems where the color doesn't update or looks different from what was expected. These issues are often caused by locked layers, stroke vs. fill confusion, or appearance effects. The following are the most prevalent issues and how you can solve them.
Why won’t the color change in Illustrator?
There are several reasons why Illustrator may refuse to apply a new color to your object:
1. Locked Layers or Objects:
If your object is on a locked layer, Illustrator won't let you modify it until you unlock the layer.
2. Stroke vs. Fill Confusion
Illustrator separates the fill (inside color) from the stroke (outline). If you accidentally select the stroke, the fill color won’t change.
3. Appearance Overrides
Some objects may have effects, gradients, or multiple fills applied through the Appearance Panel, which can prevent simple color changes.
4. Linked Images Instead of Vector Shapes
If you're trying to recolor an image file (like a JPEG or PNG) instead of a vector object, you won’t be able to change its color directly unless you vectorize it first.
5. CMYK vs. RGB Mode:
If your document is in CMYK color mode (commonly used for print), colors may look dull compared to RGB mode. This can create the illusion that your new color isn't applied correctly.
Fixing locked layers or appearance issues
Here's how to solve these common problems step by step:
1. Unlocking Layers and Objects
Step 1: Open the Layers Panel (Window > Layers). Then, look for the lock icon next to the layer or object.
Step 2: In this phase, you must click the lock icon to unlock it. In the following phase, you must try to recolor the object again.
Making Sure You're Editing Fill, Not Stroke
Step 1: Look at the toolbar, you'll see two overlapping squares (Fill and Stroke).
Step 2: Make sure the Fill box is active before choosing a new color. If you want to change the stroke color, click the Stroke box instead.
Removing Appearance Overrides
Step 1: Navigate to Window > Appearance.
Check if your object has multiple fills, gradients, or effects applied.
Step 2: Simplify by removing extra appearances or applying a new fill color directly.
Fixing Color Mode Problems (CMYK vs. RGB)
Step 1: Go to File > Document Color Mode. Switch to RGB for brighter colors (best for web/digital use).
Step 2: Use CMYK only if you're designing for print.
Recoloring Images or Gradients
Step 1: For images, you'll need to use the Use Image Trace (Object > Image Trace > Make) to convert the raster image into editable vector paths before changing colors.
Step 2: For gradients, you'll need to open the Gradient Panel and adjust the gradient stops instead of the object fill.
Part 3. Best Tool to Fix Image Color with HitPaw FotorPea
If the colors of a photograph are incorrect and you want to address these challenges, you could choose the HitPaw FotorPea. It offers a low-light model that lets you increase the lighting in the images without affecting the overall quality of the photos.
Since it supports batch processing, you'll be able to fix the colors of multiple photos simultaneously. Apart from fixing the colors of images, HitPaw FotorPea can also use several image-enhancing techniques to enhance the photos.
Features
- Helps you to fix the image colors
- Provides a simple user interface
- Works on Mac and Windows
- No image quality loss detected
- Select from 9 AI models, including a low-light model
- Helps you generate the images from a text description
- Allows you to customize the background of the images
- Adjust the Objects of the images amazingly
How to fix the image's color with HitPaw FotorPea?
-
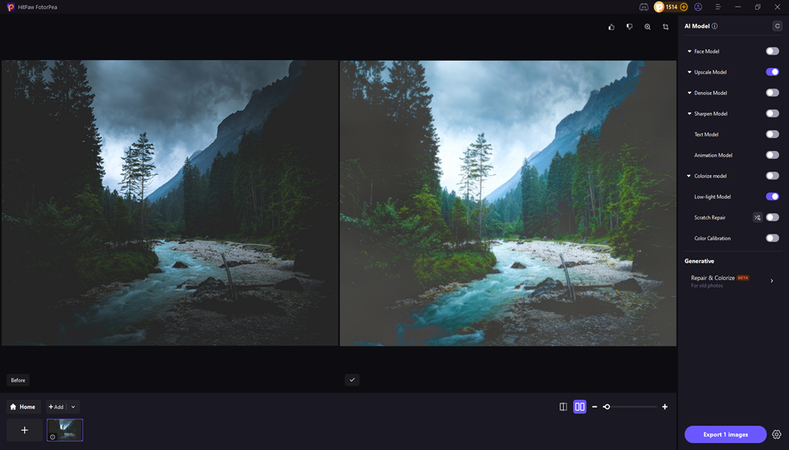
To start fixing the colors of the images, you'll need to install the software, and while starting the tool, press on the AI Enhancer. Now, this tool demands that you import the photos you want to fix the color of. Since HitPaw FotorPea supports batch enhancing, you can improve multiple photos simultaneously.

-
To fix the colors of the photographs, turn on the Upscale Model and Low Light Model toggles.

-
To apply the selected AI model, you'll need to press the Preview icon to implement the changes made to the images. If, after reviewing the images, you're satisfied with the results, tap the Export icon to download the photos.

Final Words
Learning how to change the color of an object in Illustrator has turned into an effortless spectacle. We've provided three excellent approaches in this post that will help you understand how to adjust the cold of an object in Illustrator.
HitPaw FotorPea is the most effective tool for adjusting image color. It provides a simple user interface, and while enhancing the images, it doesn't affect the quality of the photos. With 9 AI models, you can eliminate the shortcomings of several types of images, including low-light photos.
Leave a Comment
Create your review for HitPaw articles


