Lightroom Plugin Guide: Best Plugins to Make Images Look Like Film & More
Plugins really give Adobe Lightroom an extra boost of power, letting you apply cinematic looks, emulate old film, and streamline complex edits with just a few clicks. Whether you're on the hunt for a Lightroom plugin that gives images a film look or want smart AI to do some of the heavy lifting, the right plugin can seriously elevate your workflow and save you a ton of time. Below is a super-focused list of the top Lightroom plugins around, plus a clear step-by-step guide on how to get your plugin installed in Lightroom Classic.
Part 1. The Best Lightroom Plugins - With the Pros and Cons to Know
Below are some of the top Lightroom (and compatible) plugins that bring a range of creative control, efficiency, and that film-style aesthetic you're after.
1. VSCO Film Presets (Classic Film Style)

What's it all about:
VSCO Film Presets are kind of a legend for being able to give your photos that classic film look. They're not technically plugins, but rather presets, and most plugin managers will let you use them through the Develop module.
The Good Stuff:
- Really does a great job of emulating that old film look - like Kodak and Fuji, for example
- Easy enough to apply and tweak to get the look you want
- Great for portrait and street photography
The Not-So-Good Stuff:
- Not a full-on plugin - it's a preset, so that limits what you can do with it
- Not really any AI automation to speak of
2. LUTs Plugin for Lightroom
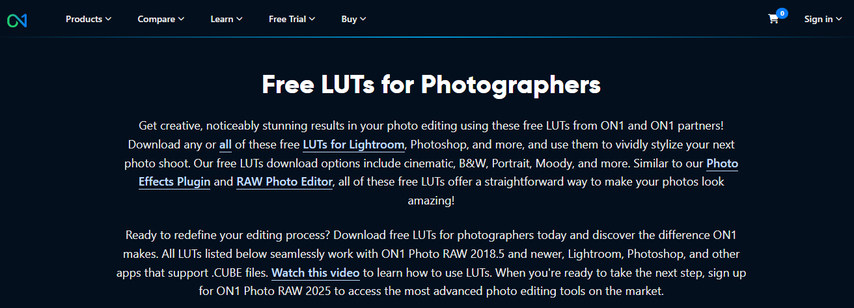
What's a LUT anyway:
LUT stands for Look-Up Table - it's essentially a way of applying complex colour transformations to your photos. With a LUT plugin, you can import those cinematic colour grades designed for video or photo.
The Good Stuff:
- Let's you apply those really complex color transformations to give your photos a cinematic look
- Works well with film colouring workflows
- Pretty flexible - so you can use it across different genres
The Not-So-Good Stuff:
- You'll need to spend some cash on LUT packs if you want to use them
- It can be a bit heavy on noise if you overdo it
3. Nik Collection (Color Efex & Analog Efex)

What's in the Nik Collection:
The Nik Collection is basically a powerful toolset for giving your photos some real edge. Analog Efex Pro, for example, is great for mimicking classic cameras and film stocks - making it perfect for film-like edits.
The Good Stuff:
- Has some really deep creative options
- Emulates classic film filters and cameras really well
- Can be launched right from Lightroom
The Not-So-Good Stuff:
- Takes a bit of getting used to
- Some of the modules can feel a bit old-fashioned
4. Dehancer Pro (Film Emulation Plugin)

How it works:
Dehancer Pro takes a super scientific approach to replicating film stock characteristics and grain, which is especially effective for cinematic imagery.
The Good Stuff:
- Gives you super detailed control over film stock
- Does a really realistic job of adding grain and halation
- Can be used as a plugin or a standalone tool
The Not-So-Good Stuff:
- You'll need to spend some cash on this one
- Not 100% AI-automated - so you still need to put some work in
Part 2. How to Add Plugins to Lightroom Classic (Step-by-Step)
Adding a Lightroom plugin - maybe something like HitPaw FotorPea - is a pretty simple process, but we'll go through each step to make sure you get it right:
1. Get Your Plugin
Head on over to the plugin's official website and either download the installer or plugin file (it'll probably be a .lrplugin or .zip file).
2. Fire Up Lightroom Classic
Just launch Lightroom Classic on your computer - that's about it for this step.
3. Get to the Plugin Manager
To do this, click on File at the top of the screen, then Plug-In Manager.
4. Add a New Plugin
So in the Plug-In Manager window, you're looking for the Add button - click on that.
- You need to find where you saved the plugin, probably in a downloaded folder or with the .lrplugin file - that's where you're looking for now.
- Once you've got it, just click Add Plug-In - it's not rocket science.
5. Turn the Plugin On
So you've just added the plugin - job done, but you need to make sure it's enabled, so check the checkbox next to it to make sure.
6. Fiddle with Plugin Settings
Some plugins have extra settings you can tweak - for example, colour profiles or AI settings. If you see a "Configure" button, go ahead and click on it.
7. Get on and Use the Plugin
- Plugins all work a bit differently, but you'll probably find them in the Develop module or as an external editor.
Part 3. Further-step Photoshop Plugin to Upscale Photo - HitPaw FotorPea AI Plugin
You've nailed the look in Lightroom, now let's perfect the details. Seamlessly transfer your edit to Photoshop to access our advanced retouching tools and creative filters.
HitPaw FotorPea is essentially an AI-powered tool that enhances your Photoshop workflow. Not only can it pick out what needs sharpening and balancin
g in a photo, but it also helps with doing color grading that looks like film, refining texture, and enhancing details.
The Main Features of Photoshop Plugin
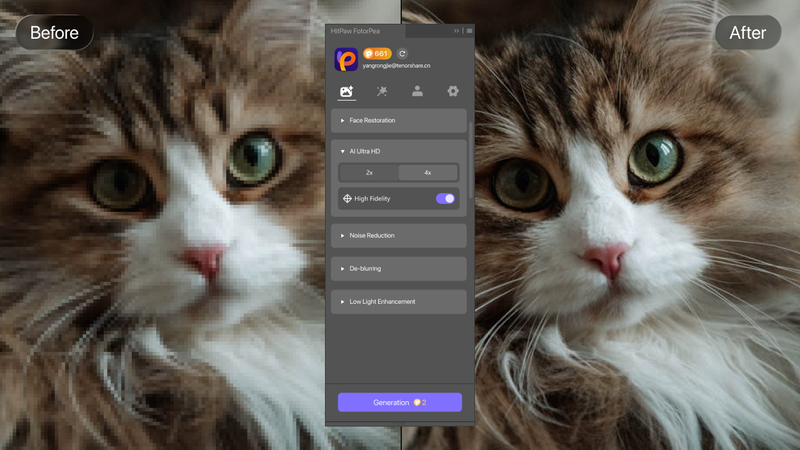
AI Image Enhancer: Professional Quality, Instantly. Transform low-res shots into high-definition masterpieces with a single click. Our advanced AI models specialize in noise reduction, sharpening, and 8K upscaling, restoring lost textures and facial details while keeping the look perfectly natural. From blurry snapshots to professional portraits, elevate every pixel without the manual effort.
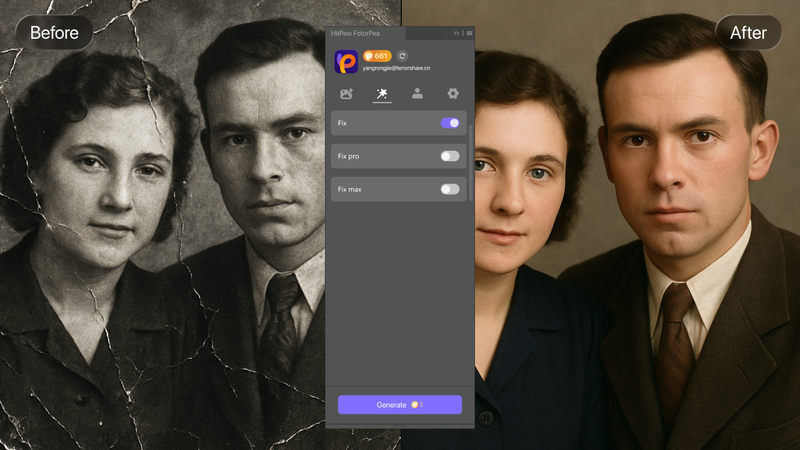
AI Restoration: Flawless Results in Seconds. Say goodbye to distracting objects and damaged memories. Use the Old Photo Restoration tool to fix scratches and bring black-and-white photos to life with AI colorization. It's professional-grade retouching made effortless, allowing you to focus on the creative art, not the technical fix.
Some General Tips for Plugin-Driven Workflows
- Make sure to keep your plugins up to date to avoid any stability issues with new Lightroom releases
- Experiment with presets and AI enhancement to get some really cool, cinematic effects - it's worth trying
- Test your plugins on some sample images before doing any batch processing.
Leave a Comment
Create your review for HitPaw articles


