Adobe Vectorscope in Photoshop: What It Is and How to Use It
Color accuracy plays a brilliant role in photo editing, especially when working with portraits, creative visuals, and product images. Many editors have heard of the term vectorscope but are unsure what it means or how it applies to Photoshop.
While vectorscopes are commonly associated with video editing, understanding their concept can significantly improve your color correction skills in Photoshop as well. In this post, we'll explain what an Adobe vectorscope is, how it compares to other color tools, how to use similar features in Adobe Photoshop, and why HitPaw FotorPea is a powerful alternative to easier color and light adjustments.
Part 1. What Is Adobe Vectorscope Photoshop?
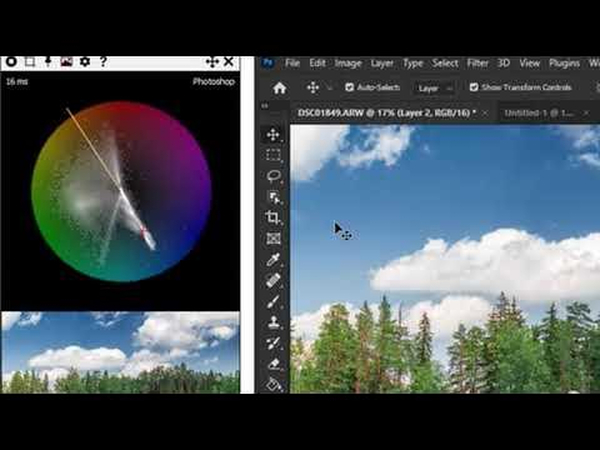
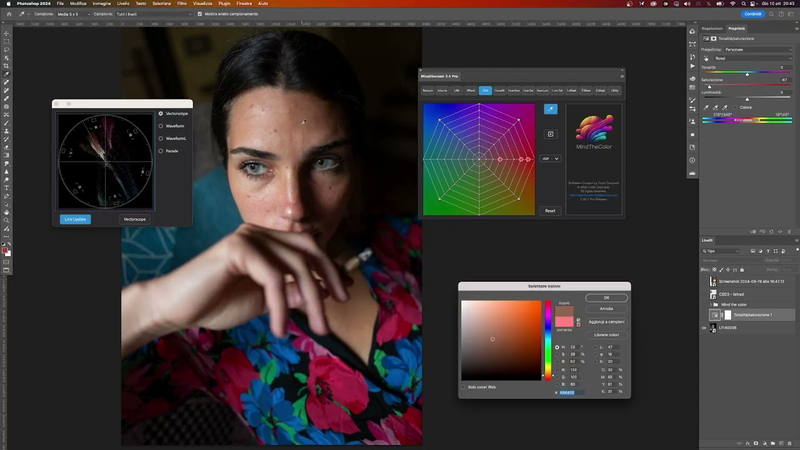
A vectorscope is a color-analysis tool that displays and measures color information in an image. Rather than showing brightness or exposure, it tends to visualize color hue and saturation.
Colors are plotted around a circular graphic, allowing editors to see how balanced or strong each color is.
In simple terms, a vectorscope helps you understand color distribution, check color intensity, maintain natural skin tones, and avoid oversaturated or incorrect colors. Although Photoshop won't include a traditional vectorscope like video software, the concept is still highly relevant for photo editing.

How it differs from Histogram and Waveform
Photoshop provides several tools for exposure analysis and color, but they serve different purposes.
Histogram
It shows brightness level from shadows to highlights.
Waveform
It tends to display luminance and exposure across an image.
Vectorscope
Vectorscope focuses only on color hue and saturation.
Note: While histograms and waveforms can tell how dark or light an image is, a vectorscope shows how colorful it is and whether the colors are balanced correctly.
Why is it essential for color accuracy
Vectorscopes are important when editing portraits and skin tones, matching colors across multiple images, creating consistent brand visuals, and avoiding unnatural color casts.
For instance, skin tones fall along a specific line on a vectorscope. If they drift too far off, the image could be unrealistic.
Part 2. How to Use Vectorscope in Photoshop?
Many beginners expect to find a built-in vectorscope inside Adobe Photoshop, similar to what is available in video editing software. However, Photoshop works differently. Instead of offering a traditional vectorscope panel, it provides a combination of color adjustment tools that help achieve the same goal: accurate color correction and balanced tones.
Understanding how to use these tools properly is essential for improving image quality. By learning to analyze colors, adjust saturation, and correct lighting, you can create more natural-looking photos and maintain consistent color across images. This process is critical when editing portraits, product photos, or professional visuals where color accuracy matters.
Although Photoshop requires more manual control than video software, it offers greater flexibility. With the right workflow, you can monitor color balance, control brightness, and fine-tune hues effectively, even without a dedicated vectorscope display.
Here is how to use Vectorscope in Photoshop?
Step 1.Launch Adobe Photoshop and open the image you want to edit. For safe editing, duplicate the background layer so you can make changes without affecting the original photo.
Step 2.Go to Window > Histogram to view the brightness and tonal distribution of your image. You can also enable the Info panel to monitor RGB color values when adjusting colors, which helps improve color balance and accuracy.
Step 3.Use adjustment layers such as Curves, Hue/Saturation, Color Balance, or Selective Color to fine-tune image colors and lighting. Make small adjustments and continuously check the histogram and image preview to maintain natural and realistic results.

Part 3. The Best Alternative to Adobe Vectorscope Photoshop with HitPaw FotorPea
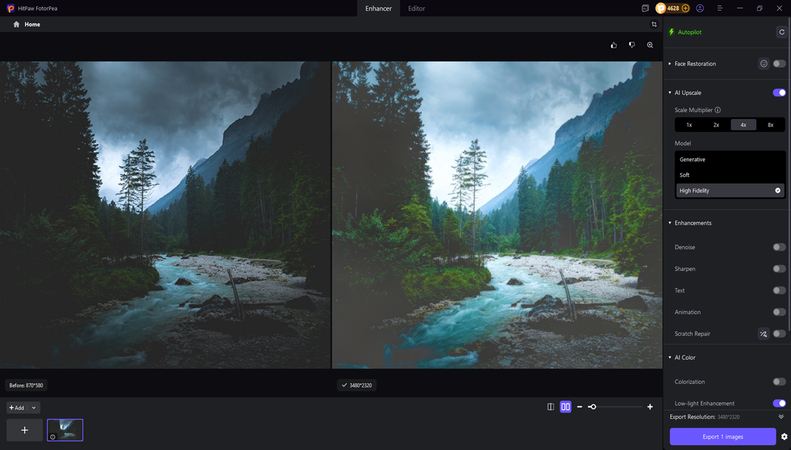
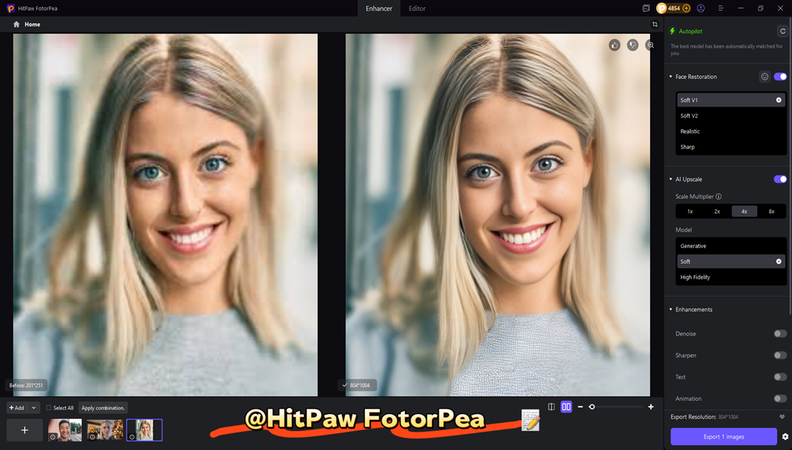
For users seeking easier, more intuitive color correction, HitPaw FotorPea is a powerful alternative. Instead of relying on complex scopes and manual adjustments, it simplifies color and lighting enhancement using intelligent processing. HitPaw FotorPea doesn't affect image quality when correcting colors, and when it comes to adding light to images, this tool doesn't disappoint.
HitPaw FotorPea also enhances photo quality and, while exporting images, doesn't add a watermark. HitPaw FotorPea offers many image editing techniques, and if you want to edit or enhance multiple photos simultaneously, it doesn't disappoint.
Features
- Provides outstanding color correction and enhancement
- Brings in automatic lighting and exposure adjustment
- Allows you to enhance the images significantly
- No image quality loss was observed during color or lighting adjustments.
- Provides a simple user interface
- Allows you to customize the background of the images
- Let's you eliminate the unwanted objects from the images
How to adjust colors and light in images with HitPaw FotorPea?
Step 1.To begin, visit the official website of HitPaw FotorPea and install the software on your computer. Then select the AI Enhancer and import the photo you want to improve.

Step 2.After importing the image, select the Low Light Model to add extra light.

Step 3.Press the Preview icon to review the changes you've made, and then import another photo to adjust the color. Select the Export icon to download the edited images to your computer.

Part 4. FAQs About Adobe Vectorscope Photoshop
Adobe Photoshop lacks a built-in vectorscope, unlike Adobe Premiere Pro or After Effects. Photoshop is primarily focused on photo editing, retouching, and design rather than technical color-scoping tools. Instead of a vectorscope, Photoshop provides histograms, color adjustment layers, and RGB value monitoring, which can still help achieve accurate and balanced colors when used correctly.
Adobe Photoshop does not offer a dedicated vectorscope feature, so there is no direct way to open a vectorscope panel inside the software. Unlike video editing programs, Photoshop focuses more on manual color control rather than visual color-scoping tools.
To work around this, users rely on tools such as the Histogram and Info panels, and on various color adjustment layers, such as Curves, Hue/Saturation, and Color Balance. These tools allow you to monitor color values closely, adjust tones, and correct color imbalances, enabling accurate results even without a traditional vectorscope.
Vectorscopes are most commonly used in video editing, but they are also very helpful for photo editing, especially for understanding color behavior. The vectorscope concept helps editors see how colors are distributed, how saturated they are, and whether skin tones look natural.
For photo editing, applying vectorscope principles can improve color consistency, reduce unwanted color casts, and create more professional-looking results. Even though Photoshop omits a vectorscope, understanding how it works can still significantly improve your color correction skills and overall image quality.
Final Words
Understanding the concept of an Adobe vectorscope helps improve color accuracy, even if Photoshop does not include a traditional vectorscope tool. By using histograms and color adjustments, experienced users can achieve precise results, but the process can be complex for beginners.
When it comes to adjusting the light or color of photos, HitPaw FotorPea comes in handy. With this tool, you can easily enhance image quality without affecting overall image quality.
Leave a Comment
Create your review for HitPaw articles


