How to Change Video Quality on iPhone After Recording: Compress or Enhance Like a Pro
After recording a video on iPhone, many users realize the quality isn't exactly what they want. Sometimes the file size is too large and needs compression, while other times the video looks blurry, noisy, or lacks sharp detail and needs enhancement.
The good news is that you can change video quality on iPhone after recording-either by lowering video quality to reduce file size or by improving video quality using AI-powered enhancement tools. This guide covers both options in detail, helping you choose the right method based on your needs.
Part 1. Can You Improve Video Quality on iPhone After Recording?
The short answer is: Yes, but with caveats. Once a video is "baked" into a file, you are working with the data already captured.
1.1 Lower Video Quality (Reduce File Size)
Lowering quality is straightforward. By reducing the iPhone video recording resolution (e.g., from 4K to 1080p) or compressing the bitrate, you make the file easier to share via email or social media.
Best for: Saving storage and quick sharing.
1.2 Improve Video Quality (Enhance After Recording)
Improving quality involves sharpening details, removing grain (denoising), and correcting colors. While you can't "add" pixels that weren't there, AI-powered tools can intelligently reconstruct frames.
Best for: Fixing blurry, low-light, or shaky footage.
Important Note:
The native iOS Settings app cannot "upgrade" the resolution of a video once it has been filmed. You will need third-party AI software like HitPaw VikPea to actually increase clarity.
Part 2. How to Lower Video Quality on iPhone After Recording
If your goal is to reduce file size rather than improve clarity, the following methods work well.
Method 1: Use the iPhone Photos App
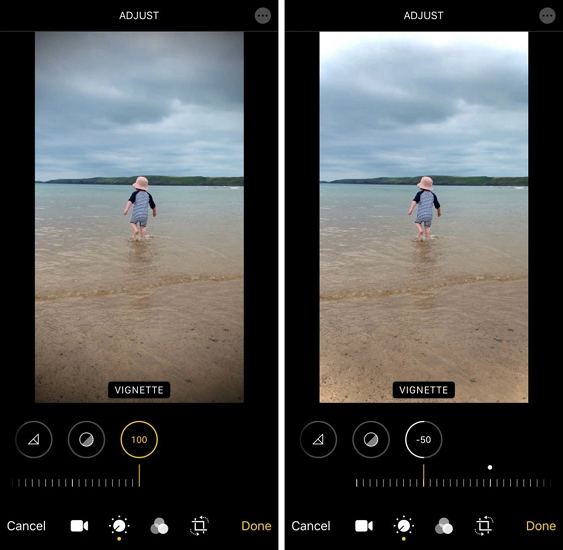
The iPhone Photos app offers a simple way to adjust the appearance of a video after it has been recorded. Although it does not actually increase resolution or repair severe blur, it can help improve visibility by correcting lighting and contrast issues.
- Open the Photos app and choose the video you want to edit.
- Tap Edit in the upper-right corner.
- Use the adjustment tools to refine the video's look.
- Tap Done to save your changes.
Limitations:
Edits made in the Photos app are cosmetic and do not restore lost image detail. Auto Enhance can sometimes make colors look unnatural or overly sharp. For blurry, noisy, or shaky videos, more advanced AI-based video enhancement tools are required to achieve noticeable improvements.
Method 2: Lower iPhone Video Recording Resolution Using iMovie
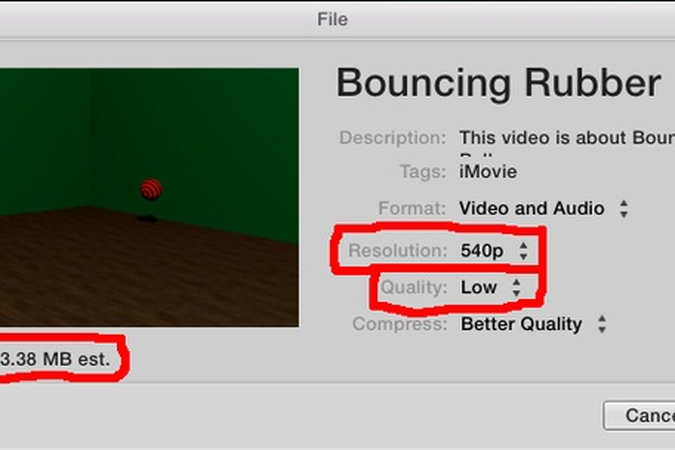
iMovie is a free, powerful tool from Apple that allows you to manually change video quality on iPhone during the export process.
- 1.Open iMovie and start a new "Movie" project.
- 2.Import the recorded video from your library.
- 3.Tap the "Share" icon (square with an arrow) at the bottom.
- 4.Select "Save Video".
- 5.Choose a lower resolution (e.g., 720p or 360p) to significantly reduce the file size.
Part 3. Best Way to Enhance Video Quality on iPhone After Recording
It's very simple to record video on iPhone, but you are not sure that the quality of your video would be excellent. After recording, the video may be blurred or distorted. At this time, you may need a powerful AI tool that can transform shaky, low-resolution clips into polished, share-worthy footage.
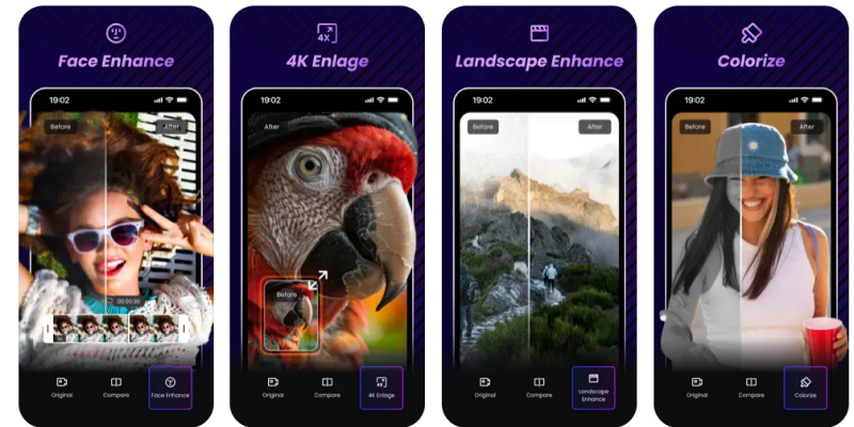
VikPea for iOS is one of the greatest apps for this purpose; Unlike iPhone's built-in editing tools, which only allow basic trimming or compression, VikPea uses AI models to restore lost details, reduce noise, and upscale resolution after recording. It's especially effective for fixing blurry, low-light, or compressed iPhone videos that cannot be improved through iOS settings alone.
Highlighted Features:
- AI noise reduction for low-light footage
- Smart stabilization to reduce shake
- SDR to HDR enhancement for richer color and contrast
- Upscaling videos to native 4K quality
- Restores detail instead of simply compressing
Steps to Upscale Video Recording Quality on iPhone
Step 1.Go to the App Store and download or install VikPea app on your iPhone.
Step 2.After downloading, open the app on your iPhone and select the video that you want to improve the quality.
Step 3.Now select one AI model to upscale you iPhone video.
Step 4.Once you have completed the process click on 'preview' to see the enhanced video. After that, click on " export" and save the video.

Tips: If you have multiple files to enhance, using the desktop version of VikPea Video Enhancer for fast batch processing.
Part 4. Alternative Apps to Change Video Quality
While HitPaw VikPea APP delivers exceptional results for those seeking how to improve video quality on iPhone after recording, you might prefer exploring other mobile options. The App Store hosts a variety of video enhancers designed to tackle tasks from basic sharpening to full AI-boosted upscaling. Below, we cover three notable alternatives so you can compare features, pros, and cons before deciding which best fits your workflow.
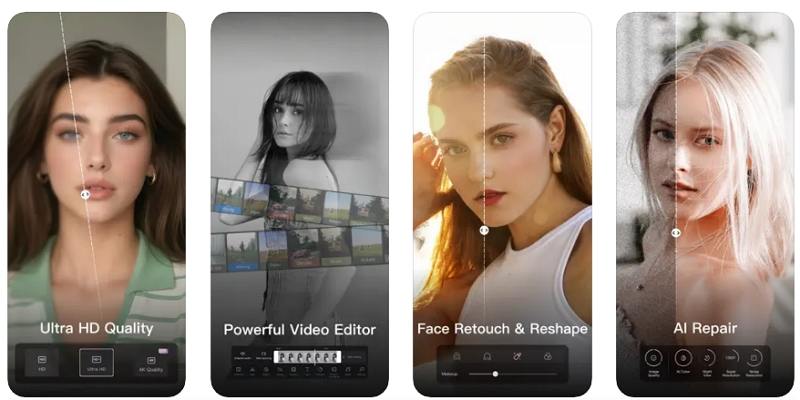
1. Wink - Video AI Enhancement
Wink leverages deep learning to refine each frame, making it a go-to for creators asking how to change video resolution on iPhone after recording. The app excels at frame stabilization and color correction, with simple sliders and presets that eliminate manual tweaking. Wink's streamlined export options let you choose resolution targets and file sizes to meet both social media and archival needs.
Pros
- Real-time previews for instant quality checks
- One-tap stabilization removes camera shake easily
- Auto color balance for consistent tone across clips
Cons
- Limited free usage before watermark appears
- No batch enhancement for multiple clips
- Occasional crashes on older iOS versions
- Lacks advanced noise-reduction settings
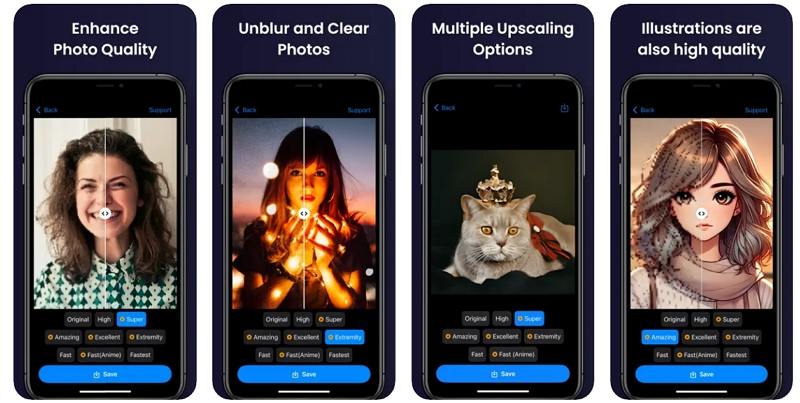
2. Enhance Photo / Video Easily
As the name suggests, Enhance Photo / Video Easily offers a straightforward interface for those curious about iphone change video resolution after recording without delving into AI jargon. Its core strength lies in manual sliders for sharpness, contrast, and saturation, allowing precise control over final output. Though it skips complex upscaling models, it's perfect for quick tweaks and balanced color grading.
Pros
- Intuitive manual controls for creative edits
- Fast export times, even on large files
- No subscription required after purchase
Cons
- No true AI upscaling capabilities
- Preset options are limited
- Struggles with very noisy footage
- No direct social media sharing
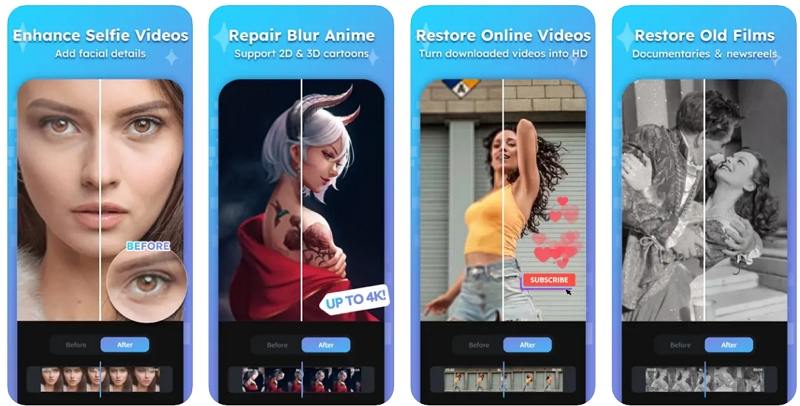
3. AI Video Enhancer - HiQuality
For serious upscalers, AI Video Enhancer - HiQuality harnesses multi-frame analysis and deep convolutional networks to tackle how to lower video quality on iPhone after recording by intelligently remapping pixels, then rebuilding them at higher resolution. The specialty here is portrait mode enhancement-faces become crisper, and backgrounds blend more naturally-making it ideal for vloggers and enthusiasts focusing on talking-head videos.
Pros
- Superior face and portrait enhancement
- Customizable AI strength levels
- Exports up to 4K resolution
Cons
- Long processing times for high-res videos
- Heavy battery usage on older iPhones
- Occasional over-sharpening artifacts
- Requires paid credits for full features
Part 5. Pro Tips: How to Record High-Quality Video on iPhone
Getting the best results starts at capture-here's how to optimize your iPhone footage before you even ask how to improve video quality on iPhone after recording:
- Clean your lens: Most "blurry" videos are just finger smudges!
- Lock Focus/Exposure: Long-press the screen until "AE/AF Lock" appears to prevent pulsing.
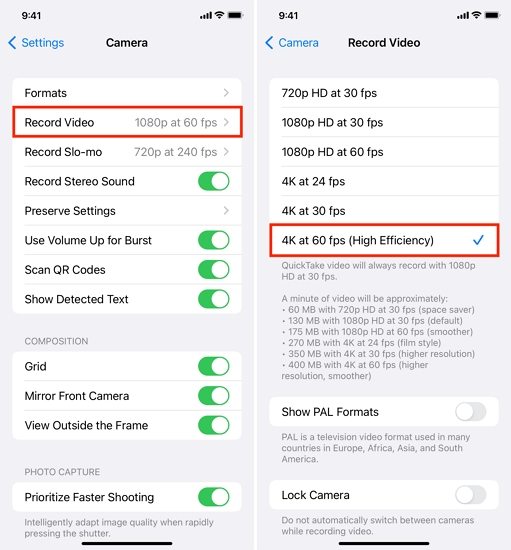
- Check Settings: Go to Settings > Camera > Record Video and ensure you are at 4K at 24fps or 30fps for the best detail.
- Use High Efficiency (HEVC): This keeps quality high while keeping file sizes manageable.
Part 6. FAQs of How to Improve Video Quality on iPhone After Recording
Yes. While iOS native tools are limited, AI video enhancers can reduce blur, restore detail, and improve clarity by analyzing frames and rebuilding missing information.
This usually happens due to low light (causing "digital noise"), a dirty lens, or the camera focusing on the background instead of the subject.
Go to Settings > Camera > Record Video, then select your preferred resolution and frame rate, such as 1080p or 4K at 30 or 60 fps.
Conclusion
Changing video quality on iPhone after recording can mean either reducing file size or improving visual clarity. Built-in iOS tools are useful for lowering resolution and compression, but they cannot truly enhance video quality. For fixing blurry footage and improving overall iPhone video recording quality, AI-powered tools like VikPea provide the most effective results. Choose the method that fits your goal, and your iPhone videos can look significantly better even after recording.
Leave a Comment
Create your review for HitPaw articles


