


A Comprehensive Guide to Color Grading
Introduction
Welcome to our comprehensive guide on mastering Video LUT and elevating your color grading skills to the next level. Whether you're a beginner or an experienced filmmaker, understanding Look-Up Tables (LUTs) is essential for achieving professional-grade video aesthetics. In this guide, we'll cover everything from the basics of color theory to advanced techniques for applying and customizing LUTs to enhance the visual impact of your videos. Let's embark on this journey to unlock the full potential of LUT colour grading in video production.
Part 1. What is Video LUT
A Video Look-Up Table (LUT) is a preset color grading filter used in post-production to ensure consistent color across various footage. Specifically, a cinema LUT aims to replicate cinematic aesthetics, enhancing visual storytelling and mood. By applying a cinema LUT, filmmakers achieve professional-grade colour grading, enriching their videos with depth and maintaining a cohesive cinematic feel across scenes and environments.

Benefits of using LUTs in video editing
- Consistent Color Grading: LUTs ensure uniform color across clips, maintaining visual coherence.
- Time Efficiency: Applying LUTs streamlines editing, reducing manual color adjustments and saving time.
- Professional Results: LUTs emulate cinematic styles, giving videos a polished, high-quality look.
- Creative Flexibility: LUTs offer room for experimentation, allowing editors to explore different looks and styles.
- Enhanced Storytelling: LUTs help convey mood and atmosphere, enriching the narrative and engaging viewers emotionally.
LUTs can elevate a video project by transforming its visual aesthetics. They bring consistency to color grading, ensuring a cohesive and professional appearance across scenes. Additionally, LUTs emulate cinematic styles, enhancing mood and atmosphere, ultimately captivating audiences and immersing them deeper into the narrative experience.
Part 2. Types of LUTs for Cinema
Cinema LUTs play a pivotal role in film production, serving as predefined color grading presets that emulate the cinematic look and feel. They ensure consistency in color grading across scenes, enhancing visual storytelling and evoking specific moods or atmospheres.
There are various types of cinema LUTs available for color grading, each tailored to achieve different cinematic aesthetics. Some common types of Cinema LUT include:
1.Teal and Orange LUTs: These LUTs create a striking contrast between teal shadows and orange highlights, popular in action and adventure films for their dynamic and cinematic appeal.
2.Film Emulation LUTs: These LUTs mimic the characteristics of traditional film stocks, providing a nostalgic or vintage vibe to the footage. They're often used to evoke a specific era or aesthetic.
3.High-Contrast LUTs: These LUTs enhance contrast and saturation, intensifying the visual impact of the footage. They're favored for creating dramatic and stylized looks, commonly seen in thrillers and suspenseful genres.
4.Desaturated LUTs: These LUTs reduce saturation, creating a muted and understated color palette. They're employed to convey a sense of realism or grittiness, commonly used in dramas or documentaries.
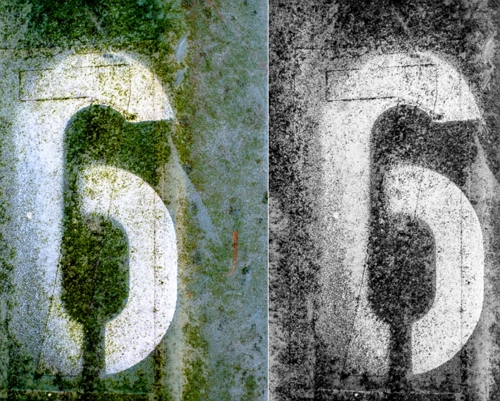
5.Monochrome LUTs: These LUTs convert footage to black and white, emphasizing contrast and texture. They evoke a classic and timeless feel, often used for artistic or dramatic effect.
Examples of popular cinema LUTs in the industry include "Arisa" by IWLTBAP, known for its versatile cinematic look, "VisionColor ImpulZ" for its accurate film emulation, and "Osiris" by VisionColor for its dynamic range and rich colors. These LUTs are widely used by filmmakers to achieve professional-grade color grading and elevate the overall visual quality of their projects.
Part 3. Color Grading with LUTs
Tips and Tricks for Achieving Desired Effects:
- Understand Your LUTs: Each LUT is designed to achieve a specific look or mood. Experiment with different LUTs to find the one that best fits your footage and desired aesthetic.
- Adjust Intensity: LUTs can be too strong or subtle for your footage. Adjust the intensity or opacity of the LUT to achieve the desired effect.
- Layering LUTs: You can layer multiple LUTs or combine them with other color grading techniques to create unique looks.
- Customize Settings: Don't be afraid to customize other color grading settings even after applying a color LUT. This allows you to fine-tune the look and make it more tailored to your specific needs.
- Use Masks and Keyframes: Utilize masking and keyframing techniques to apply LUTs selectively to specific areas of your footage or to animate color grading changes over time
Applying LUTs for Color Grading:
Select Your Footage:
1. Import your video footage into your video editing software and create a new project.
Access Color Grading Tools:
2. Navigate to the LUT color grading or color correction panel in your editing software. This is where you'll apply your LUTs.
Import LUTs:
3. If your software supports it, import the LUTs you want to use. LUT files typically have a .cube extension.
Apply LUT:
4. Select the clip you want to apply the LUT to, then choose the LUT from your imported list and apply it to the clip. You may need to adjust the intensity or opacity of the LUT to achieve the desired effect.
Fine-Tune Adjustments:
5. After applying the LUT, fine-tune other color grading parameters such as exposure, contrast, saturation, and white balance to further enhance the look of your footage.
Preview and Adjust:
6. Preview your footage frequently to see how the LUT is affecting it. Make adjustments as needed to achieve the desired aesthetic.
Comparison with Manual Color Grading:
Manual Color Grading:
- Offers more control over individual color parameters such as hue, saturation, and luminance.
- Allows for precise adjustments tailored to the specific needs of each shot.
- Can be time-consuming, especially for large projects or when working with multiple clips.
Using LUTs:
- Provides a quick and easy way to apply predefined color grading looks.
- Can serve as a starting point for further manual adjustments.
- Offers consistency across multiple clips when applying the same LUT.
Part 4. Pro-tip: How To Colorize & Enhance Color of Your Footages
HitPaw VikPea (formerly HitPaw Video Enhancer), a cutting-edge software leveraging AI algorithms, stands out as the go-to solution for video repair and enhancement. Its latest version introduces innovative models like Frame Interpolation and Stabilize, elevating the editing experience. With HitPaw, users can effortlessly improve video quality, seamlessly integrate LUTs in film for captivating visual effects, and achieve professional-grade results in their LUT video editing endeavors. Experience enhanced videos with HitPaw VikPea's intuitive interface and powerful features.
Features
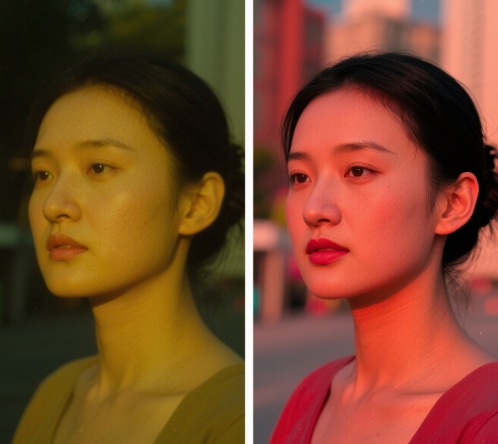
- AI Enhancing Tools: Colorize Model for black and white footage, Color Enhancement Model for vibrant colors.
- Up to 8K Resolution Upscaling: Enhance video quality to crisp and detailed 8K resolution.
- Video File Repair: Easily fix damaged or corrupted video files, saving time and effort.
- Mature AI Technology: Reliable and consistent results powered by advanced algorithms.
- Simple and Clean Interface: Intuitive and easy-to-navigate interface for all levels of users.
- Preview Without Watermarks: Real-time previewing without any distracting watermarks, ensuring full control over the final output.
Steps
Step 1.Download and install the HitPaw VikPea on your computer.


Step 2.Upload the video you want to colorize.
Step 3.Select from the 3 AI enhancing models, i.e., the General Denoise Model, Animation Model, and Face Model.
Step 4.Click on Preview to process the video and wait for a few seconds.
Step 5.Hit Export to download/save the enhanced video.
By following these steps you will gtet a video with enhanced color of your footage.
Learn More about HitPaw VikPea
Conclusion
In mastering video LUTs, you've unlocked the key to professional-grade color grading. By understanding how video LUT works and how to apply them effectively, you've gained the power to transform your videos into cinematic masterpieces, especially when using LUTs for After Effects. Remember, practice makes perfect, so keep experimenting with different LUTs and refining your skills. For an extra edge in video enhancement, consider using HitPaw VikPea. Its intuitive interface and powerful features make it a must-have tool for elevating your video quality to the next level. Upgrade your editing toolkit and unleash your creativity with HitPaw VikPea today.

 HitPaw Univd (Video Converter)
  HitPaw Video Object Remover
 HitPaw VikPea (Video Enhancer)

Share this article:
Select the product rating:
Daniel Walker
Editor-in-Chief
This post was written by Editor Daniel Walker whose passion lies in bridging the gap between cutting-edge technology and everyday creativity. The content he created inspires audience to embrace digital tools confidently.
View all ArticlesLeave a Comment
Create your review for HitPaw articles