


Step-by-Step Guide to After Effects Color Correction
Welcome to our comprehensive guide on mastering After Effects color correction. Whether you're a novice or seasoned editor, understanding After Effects color correction is crucial for elevating your videos. In this step-by-step tutorial, we'll navigate through the intricacies of After Effects color correction, empowering you to enhance your footage with precision and finesse. From basic adjustments to advanced techniques, we'll equip you with the skills needed to transform your videos into visually stunning masterpieces. Let's embark on this journey to unlock the full potential of After Effects color grading.
Part 1. What is After Effects Color Correction
Color correction in After Effects is the process of adjusting and enhancing the colors in video footage to achieve a desired look or to correct any imperfections in the original footage. It involves manipulating various aspects of color, such as brightness, contrast, saturation, and hue, to achieve a visually pleasing result.

At its core, color correction aims to ensure consistency and coherence in the color palette throughout a video project. This process is essential for maintaining visual continuity between different shots and scenes, as well as for achieving a specific mood or aesthetic.
Key aspects of color correction in After Effects:
Here are some key aspects of ae color correction:
1. Brightness: Adjust overall luminance, making the image brighter or darker.
2. Contrast: Enhance the difference between lightest and darkest parts for dynamic or subdued look.
3. Saturation: Control color intensity; increase for vibrancy, decrease for muted tones.
4. Hue: Shift the entire color spectrum; warm with orange tones or cool with blue tones.
5. White Balance: Adjust color temperature for neutral whites; crucial for consistent color in varied lighting.
Some key terms and concepts related to color correction in After Effects include:
- Histogram: A graphical representation of the distribution of brightness levels in the footage. The histogram helps visualise the tonal range of the image and identify areas that may need adjustment.
- Curves: Graphical tools that allow precise control over the brightness and contrast of the footage. Curves can be used to make targeted adjustments to specific tonal ranges within the image.
- Color Wheels: Controls that allow adjustments to the hue, saturation, and brightness of specific colors in the footage. Color wheels are often used to fine-tune the overall color balance of the image.
- LUTs (Look-Up Tables): Predefined color presets that can be applied to the footage to achieve a specific look or style. LUTs are commonly used in color grading to quickly apply consistent color adjustments across multiple clips.
Understanding these basics of ae color grading empowers video editors to manipulate and enhance the colors in their footage to achieve the desired visual impact.
Part 2. Step-by-Step Guide to After Effects Color Correction
Here are steps of adobe after effects color correction:
A. Preparing the Footage for Color Correction
1. Importing the Footage into Adobe After Effects:
- Open After Effects and create a new project.
- Import your video footage by going to File > Import > File and selecting the relevant files.
- Organize your imported footage in the project panel for easy access.
2. Organizing and Labeling the Footage:
- Rename your footage layers to descriptive names (e.g., “Main Shot,” “Close-Up,” etc.).
- Use color labels or markers to differentiate between different types of shots (e.g., green for outdoor scenes, red for indoor scenes).
B. Basic Color Correction Techniques
Here are basics color correction ae techniques:
1. Adjusting Brightness, Contrast, and Exposure:
- Apply the Levels effect to your footage layer.
- Adjust the black and white points to enhance contrast.
- Use the Exposure effect to fine-tune overall brightness.
2. Correcting White Balance and Color Temperature:
- Add the Color Balance (HLS) effect.
- Adjust the hue, lightness, and saturation to correct any color casts.
- Use the Tint effect to fine-tune the overall color temperature.
C. Advanced Color Grading Techniques
1. Using Curves and Levels for Precise Color Adjustments:
- Apply the Curves effect to your footage.
- Adjust the RGB curves individually to fine-tune specific color channels.
- Use the Levels effect to control shadows, midtones, and highlights.
2. Applying Color LUTs for Cinematic looks
Here is how you can Apply Color LUTs for Cinematic Color Grading After Effects:
- Import a color lookup table (LUT) into After Effects.
- Apply the LUT to your footage using the Apply Color LUT effect.
- Experiment with different LUTs to achieve the desired cinematic style.
D. Fine-Tuning the Color Correction
1. Utilizing Masks and Tracking for Selective Color Adjustments:
- Create a mask around specific areas (e.g., a person’s face).
- Apply color correction effects only to the masked region.
- Use tracking to ensure the mask follows the subject throughout the clip.
2. Enhancing Specific Colors or Areas Using Secondary Color Correction:
- Apply the Color Correction (Secondary) effect.
- Isolate specific colors (e.g., the sky or a red dress).
- Adjust hue, saturation, and lightness for those isolated colors.
Part 3. Best Practice: Alternative to After Effects Color Correction
HitPaw VikPea (formerly HitPaw Video Enhancer) sounds like a versatile tool for video repair and enhancement. The addition of new models like Frame Interpolation and Stabilize further extends its capabilities, likely offering users more options to improve their video content. Utilizing AI algorithms for enhancing video quality can be a powerful feature, especially for those looking to enhance the clarity, stability, and overall visual appeal of their videos. This seems like a promising tool for both casual users and professionals seeking to elevate the quality of their video projects. Just take a free trial and colorize video now!
Features
- AI Enhancements: Automatically enhance video color (Color Enhancement Model) or add color to black and white footage (Colorize Model) with advanced AI algorithms.
- Upscaling to 8K: Upscale videos to stunning 8K resolution for enhanced clarity and detail.
- Video Repair: Repair damaged video files, addressing issues like pixelation, artifacting, and other visual distortions.
- Mature AI Technology: Utilize cutting-edge AI technology for reliable and effective video enhancement.
- User-Friendly Interface: Enjoy a simple and clean interface suitable for users of all skill levels, streamlining the enhancement process.
- Watermark-Free Preview: Preview enhancements without watermarks, enabling users to assess changes before finalizing their videos.
-
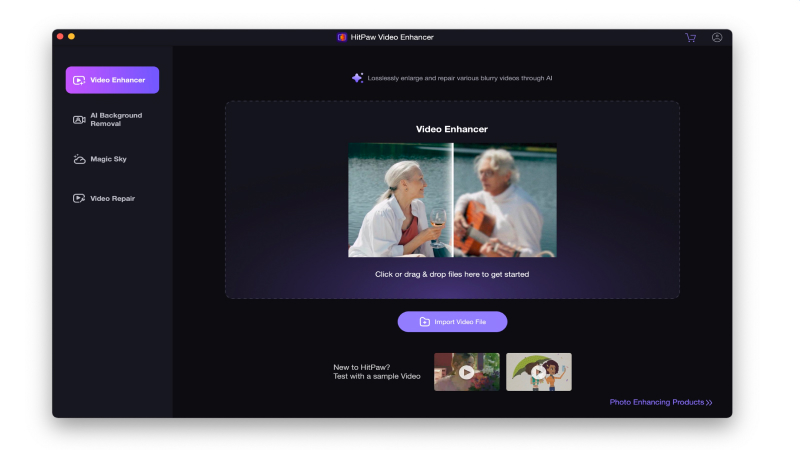
Step 1.Download and install the HitPaw VikPea on your computer.


-
Step 2.Upload the video you want to enhance the software.
-
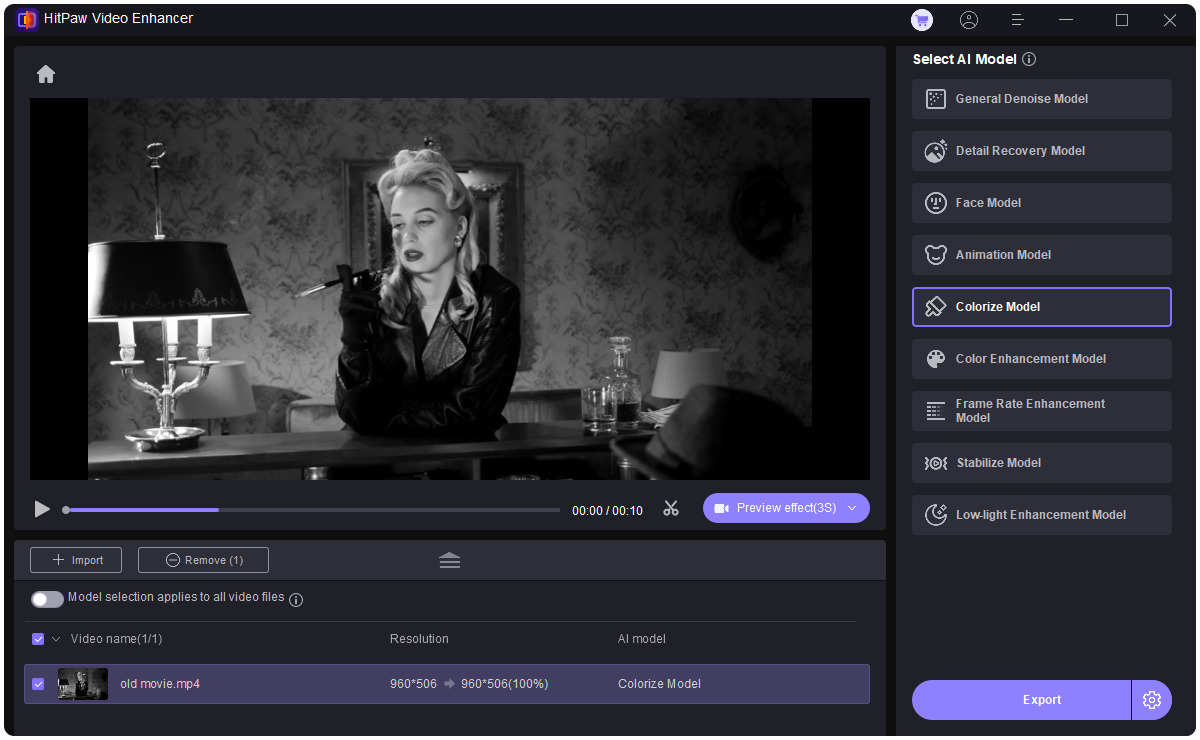
Step 3.Simply choose “Colorize Model”, it will help you upscale black and white video to color.
-
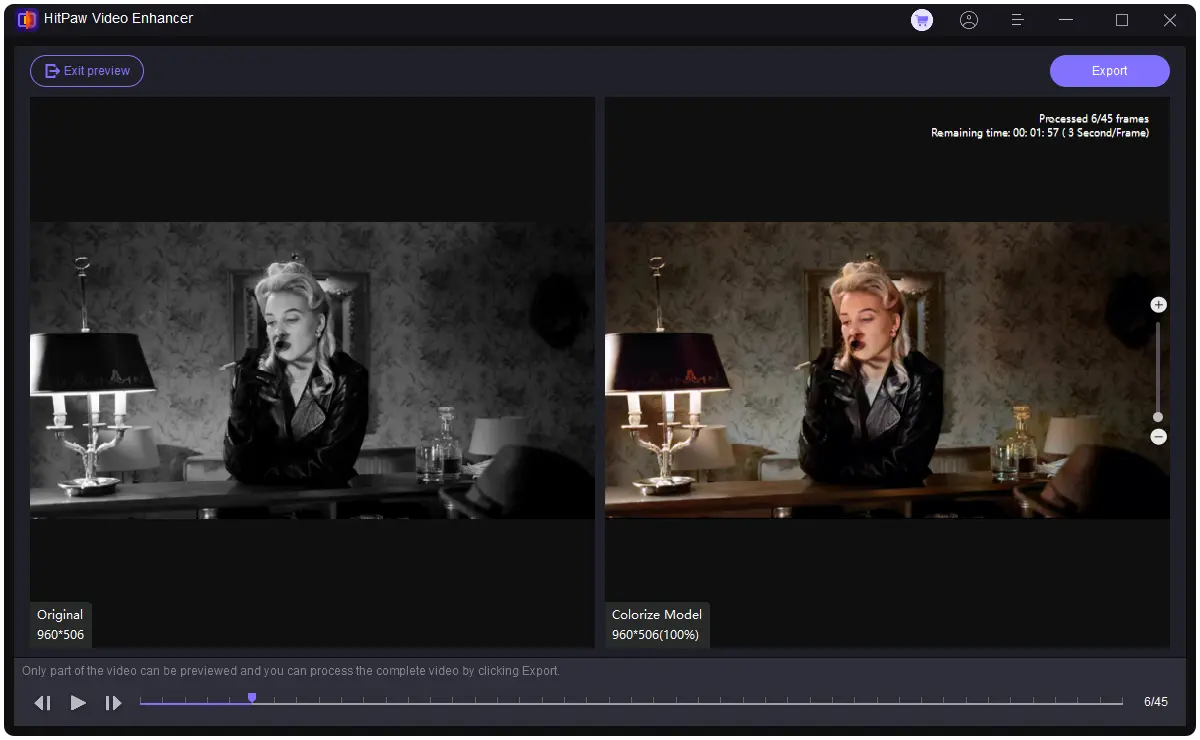
Step 4.Click on Preview to process the video and wait for a few seconds. Once satisfied, click the Export button to save the video file to your computer.


You give a modern and alluring touch to your favorite old videos with just a few clicks.
If you’re satisfied with the preview, click the “Export” button to save the enhanced video to your desired location.
Conclusion
Mastering After Effects color correction is an essential skill for video editors seeking to elevate their projects to professional levels. With the techniques outlined in this step-by-step guide, you can confidently enhance your footage, achieving stunning color grading after effects effortlessly.
However, for those looking for an alternative approach to video enhancement, HitPaw VikPea offers a user-friendly solution. With its AI-powered features, including color enhancement and upscaling capabilities, HitPaw empowers users to effortlessly improve video quality. Whether you're a beginner or a seasoned editor, HitPaw VikPea provides a convenient and effective tool for enhancing your video projects.

 HitPaw Photo Object Remover
 HitPaw Univd (Video Converter)
  HitPaw VikPea (Video Enhancer)


Share this article:
Select the product rating:
Daniel Walker
Editor-in-Chief
This post was written by Editor Daniel Walker whose passion lies in bridging the gap between cutting-edge technology and everyday creativity. The content he created inspires audience to embrace digital tools confidently.
View all ArticlesLeave a Comment
Create your review for HitPaw articles