


How to Deinterlace Video with FFmpeg (YADIF, BWDIF, IDET Explained)
FFmpeg deinterlacing removes horizontal combing lines from interlaced videos so they play smoothly on modern displays. These artifacts are common in old TV recordings, DVDs, and camcorder footage.
In this guide, you’ll learn what FFmpeg deinterlace is, which filters to use (YADIF, BWDIF, IDET), and the exact commands to deinterlace videos correctly—plus how to fix visual issues caused by wrong parameters.
Part 1. What Is FFMPEG Deinterlace?
Imagine you've got an old family video, one that's precious but looks a bit like you're watching it through a picket fence because of all those lines. That's because it's interlaced. Back in the day, videos were made this way to fit the TV tech of the times. But now, we want our videos smooth, without those lines, especially when we're watching on modern screens. That's where FFMPEG deinterlacing comes into play.
FFMPEG is a powerhouse tool, free software that can convert, stream, or process video and audio files. Deinterlacing is one of its many tricks. It takes those old, interlaced videos and transforms them, removing the lines and making the video playback smooth.

Part 2. Filters in FFmpeg Deinterlace
FFmpeg isn't just a one-trick pony. It offers several filters for deinterlacing, each with its own way of smoothing out those lines. Let's talk about three popular ones: yadif, bwdif, and idet.
1. Yadif (Yet Another DeInterlacing Filter):
This filter is like a friendly neighbor who knows a bit about everything. It works by comparing frames and deciding the best way to fill in the lines. It's great because it can handle most videos you throw at it, making it a go-to choice for general use.
2. Bwdif (Bob Weaver Deinterlacing Filter):
Think of bwdif as the craftsman, taking a bit more time to get things just right. It uses a method that checks both the past and future frames to decide how to fill those lines. This results in higher quality, especially in videos with lots of motion.
3. Idet (Interlace Detection):
Idet is like the detective, analyzing the video to figure out exactly where and how it's interlaced before it even starts the deinterlacing process. This filter helps you make smart decisions and is especially useful for videos where it's not clear how they were interlaced in the first place.
Part 3. How to Use FFMPEG Deinterlace?
Getting rid of those pesky lines in your videos with FFMPEG deinterlacing is like giving them a new lease on life. It's not just about choosing a filter; it's about fine-tuning it to perfection. With the right filter and adjustments, your old videos can look as smooth and clear as the day they were shot. Here's how you can do it:
Step 1. Choose Your Filter: Start by picking a deinterlacing filter. Remember, yadif is great for general use, bwdif is perfect for high-motion videos, and idet is your go-to for tricky interlacing patterns.
Step 2. Install FFMPEG: If you haven't already, download and install FFMPEG from its official website. Make sure it's accessible from your system's command line or terminal.
Step 3. Open Your Command Line or Terminal: The magic happens in the command line or terminal. This is where you'll type your commands to work with FFMPEG.
Step 4. Craft Your Command: To deinterlace a video, you'll use a command that looks something like this:
Step 5. Execute the Command: Once you're happy with your command, hit Enter. FFMPEG will start the deinterlacing process. Depending on the size of your video and the power of your computer, this might take a little time.
Step 6. Check Your Video: After the process is complete, watch your deinterlaced video to ensure it looks as expected. If something's off, you might want to try different filters or parameter settings.
Tips
Be careful when adjusting the parameters of your deinterlacing filter. If not done correctly, you might end up with visual artifacts that can distract from the viewing experience.
Part 4. Fix Your FFMPEG Deinterlace Video Due to Wrong Parameters
Setting the wrong parameters in FFMPEG deinterlace can lead to less-than-ideal video quality, or in the worst cases, a damaged file. And this is why HitPaw VikPea (formerly HitPaw Video Enhancer) is reliable.
HitPaw VikPea is your go-to professional video repair toolkit, designed to address a myriad of video quality issues with ease. What sets it apart is its reliance on AI technology, which not only saves precious time but also guarantees a polished output.


Key Features of HitPaw VikPea
- AI-powered repair with advanced AI algorithms
- User-friendly interface suitable for both novices and professionals
- Versatile video support in a one-stop solution
- Batch processing without long time waiting
- Real-time preview for adjustments before finalizing the output
Steps to Fix Your FFMPEG Deinterlace Video
Step 1. Download and Install: First, grab the latest version of HitPaw VikPea from the official website and install it on your computer.
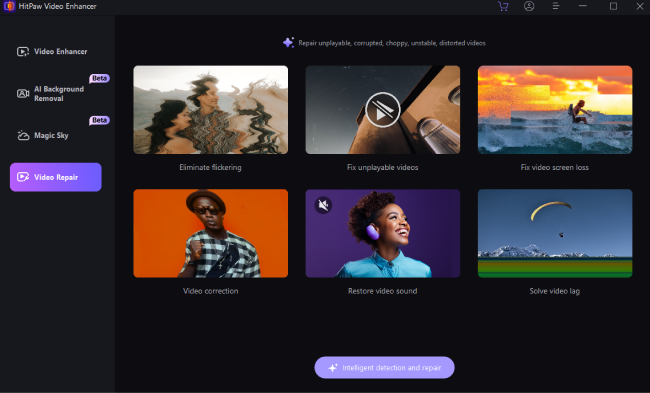
Step 2. Choose Repair Mode: Open HitPaw VikPea and navigate to the video repair section. Choose the corruption mode or click on “Intelligent repair detection and repair” to drag and drop your damaged video file into the software.
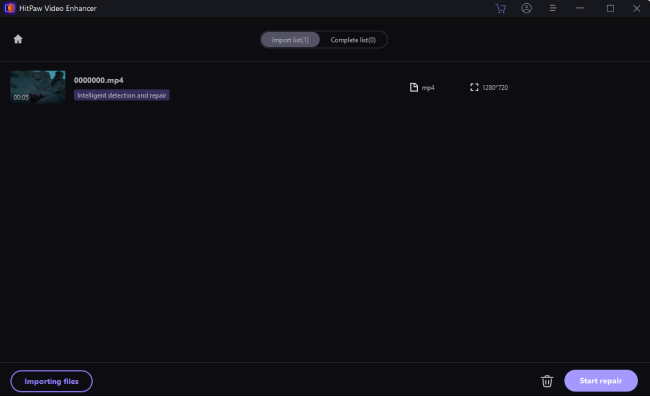
Step 3. Start the Repair Process: Hit the 'Start Repair' button to let the software do its magic. The AI will analyze and fix the video issues automatically.
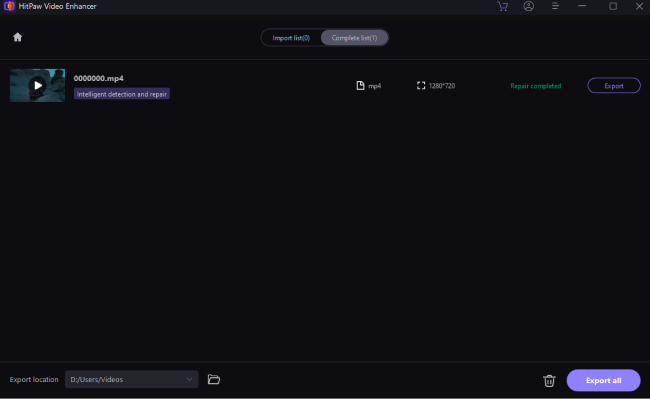
Step 4. Preview and Save: Once the repair is complete, preview the video within HitPaw to ensure the quality meets your expectations. If satisfied, save the repaired video to your desired location.
FAQs of FFMPEG Deinterlace
1. How do I avoid damaging video when using FFmpeg deinterlace?
Use idet to confirm the video is interlaced before processing. Choose the correct filter (YADIF or BWDIF) and avoid unnecessary frame doubling. Always keep a backup of the original file before encoding.
2. Does deinterlacing reduce quality?
Deinterlacing can slightly soften images because it reconstructs missing lines. High-quality filters like BWDIF minimize this effect, but some detail loss is unavoidable with interlaced sources.
Conclusion
FFmpeg deinterlacing is an effective way to convert interlaced footage into smooth, modern-ready video. By choosing the right filter and parameters, you can eliminate combing artifacts without sacrificing motion clarity. If incorrect settings introduce blur or artifacts, AI enhancement tools like HitPaw VikPea can restore detail and improve overall visual quality.

 HitPaw Video Object Remover
 HitPaw Watermark Remover
  HitPaw VikPea (Video Enhancer)

![[2026] Full Tutorial of Wong Kar-wai Color Grading](https://images.hitpaw.com/topics/video-tips/wong-kar-wai.jpg?1708249409)

Share this article:
Select the product rating:
Daniel Walker
Editor-in-Chief
This post was written by Editor Daniel Walker whose passion lies in bridging the gap between cutting-edge technology and everyday creativity. The content he created inspires audience to embrace digital tools confidently.
View all ArticlesLeave a Comment
Create your review for HitPaw articles