


Step-by-Step Guide: Take a Professional Headshot on iPhone
You can take a nice headshot with your iPhone. You do not need a big camera or a photo studio. The iPhone camera is clear and good for headshots. Many people use it for job photos, LinkedIn, and online profiles. This guide will show you how to take a headshot with iPhone in easy steps to take a good photo. You will learn about light, camera settings, how to stand, and how to edit your photo. If you want your photo to look clean and professional, just follow this simple guide. It is easy to do, and anyone can try it.
Part 1: Why iPhone Works Well for Headshots
Taking a headshot with iPhone is not difficult. iPhones have good cameras that take clear and nice photos. Many people use iPhones to take photos for work or personal use. You don't need a big or expensive camera. iPhone can do the job well. If you are a student, looking for a job, or updating your profile, iPhone can help you. Just follow some easy steps on how to take a headshot with iPhone, and your photo will look better. iPhone makes it simple for everyone to take a good headshot.
1. High-Resolution Camera
iPhones now come with cameras that capture sharp and clear images. Even small details of your face can be seen, which makes them great if you're learning how to take headshots with iPhone.
2. Easy Focus Feature
Tap once on your face to set focus. This keeps your head clear and your background soft or blurred.
3. Headshot Mode
Portrait mode adds a soft background blur which helps your face stand out. It looks clean and professional, making it easier to take professional headshot with iPhone.
Part 2: How to Take a Headshot with iPhone Camera Settings
Your iPhone camera has many useful settings. Learning how to take a headshot with iPhone means knowing how to use them the right way. These small settings help improve your photo without using extra gear or apps. From focusing to using built-in camera tools, these settings can make your headshot more balanced and sharper. Use the tips below to control your shot and take the best headshot possible with just your phone.
1. Use Gridlines
Turn on gridlines in camera settings. This helps you place your face in the center and keep the shot straight.

2. Lock Focus and Exposure
Hold your finger on the screen to lock focus and brightness. This keeps your lighting even and face clear.
3. Use Headshot Mode
When learning how to take headshot with iPhone, use portrait mode to blur the background. It gives a clean look that brings more attention to your face.
Part 3: How to Set Up iPhone for Headshot Photography
Now that you know the camera settings, it's time to place your iPhone the right way. A stable setup helps you get a steady and clear photo. This step is very important, especially if you are taking your headshot without any help. A shaky phone can make your photo look blurry. Here are five simple ways to keep your iPhone steady and ready:
- Use a phone tripod to keep your iPhone still while taking your headshot.
- Place your phone on a shelf or table at eye level for better framing.
- Use books or boxes to raise your phone if you don't have a tripod.
- Set a timer on the camera so you can pose without holding the phone.
- Try using a Bluetooth remote to take the photo without touching the phone.
Part 4: Best Lighting Tips for iPhone Headshots
Lighting makes a big difference in how your headshot turns out. Even the best iPhone camera can give bad results if the lighting is poor. When learning how to take a headshot with iPhone, do not forget about good light. You don't need a fancy light setup. Basic light tips can help your face look fresh and your photo look bright. Here are five easy lighting tips you can try:
- Use daylight from a window for soft and clean lighting on your face.
- Avoid standing directly under ceiling lights to stop dark shadows on your face.
- If outside, choose early morning or late afternoon light for soft results.
- Do not stand with your back to the light, or your face will look dark.
- Use a white wall or board to bounce light and brighten your face evenly.
Part 5: How to Edit a Headshot on iPhone with Free Apps
After taking your headshot, editing can help make it look nicer and cleaner. You do not need to know anything about editing to do this. Your iPhone and some free apps can do the job for you. These tools can fix lighting, smooth your skin, and crop your photo properly. If you're learning how to take a headshot with iPhone, editing is good if you want your photo to look fresh and clear without doing too much work. Below are five easy apps you can use on your iPhone.
1. iPhone's Built-In Photos App
This app is already on your iPhone and is perfect for quick and basic edits. You can crop, adjust light, and fix colors in just a few taps. It's a good choice if you only need small changes to your headshot and want to learn how to take a headshot with iPhone easily.
![]() Pros:
Pros:
- Easy to use with simple tools for brightness, color, and contrast
- You don't need to download anything extra
- Safe and keeps photo quality good
![]() Cons:
Cons:
- Does not have skin smoothing
- Limited advanced editing options
2. Snapseed
Snapseed is a free photo editing app from Google. It offers more tools than the iPhone's built-in editor. You can smooth skin, brighten certain parts, and fix light problems. It's great if you want to make more changes while still keeping your photo looking natural and clear.
![]() Pros:
Pros:
- Has tools like healing, brush, and face touch-up
- You can brighten or darken only some parts of the photo
- Easy to control filters and effects
![]() Cons:
Cons:
- Some tools may take time to learn
- Can be slow on older iPhones
3. VSCO
VSCO is a popular editing app with soft filters that give your headshot a clean and calm look. It's great if you want to add a little style without making the photo look fake. You can also change the shadows, colors, and skin tone in just a few steps.
![]() Pros:
Pros:
- Nice filters that look natural
- You can adjust skin tone, shadows, and colors easily
- Clean and simple design
![]() Cons:
Cons:
- Some good filters are not free
- No skin smoothing tool in free version
4. Lightroom Mobile
Lightroom Mobile is a free app made by Adobe. It's a little stronger than other apps and gives you more control. You can fix colors, light, and sharpness. It's a good tool if you want your headshot to look clean and professional, even with simple edits.
![]() Pros:
Pros:
- Strong tools to fix lighting and colors
- Presets make editing fast and easy
- Supports RAW photos
![]() Cons:
Cons:
- Needs an account to use
- Some features are locked in the free version
5. AirBrush
AirBrush is a simple app that helps fix small things on your face, like spots or dark circles. It has tools for smoothing skin and whitening teeth. If you want your face to look fresh without heavy editing, this app works well and doesn't need much time to learn.
![]() Pros:
Pros:
- Has easy skin smoothing and blemish tools
- Great for whitening teeth or brightening eyes
- Works quickly without making the face look fake
![]() Cons:
Cons:
- Shows ads in the free version
- Some features require payment
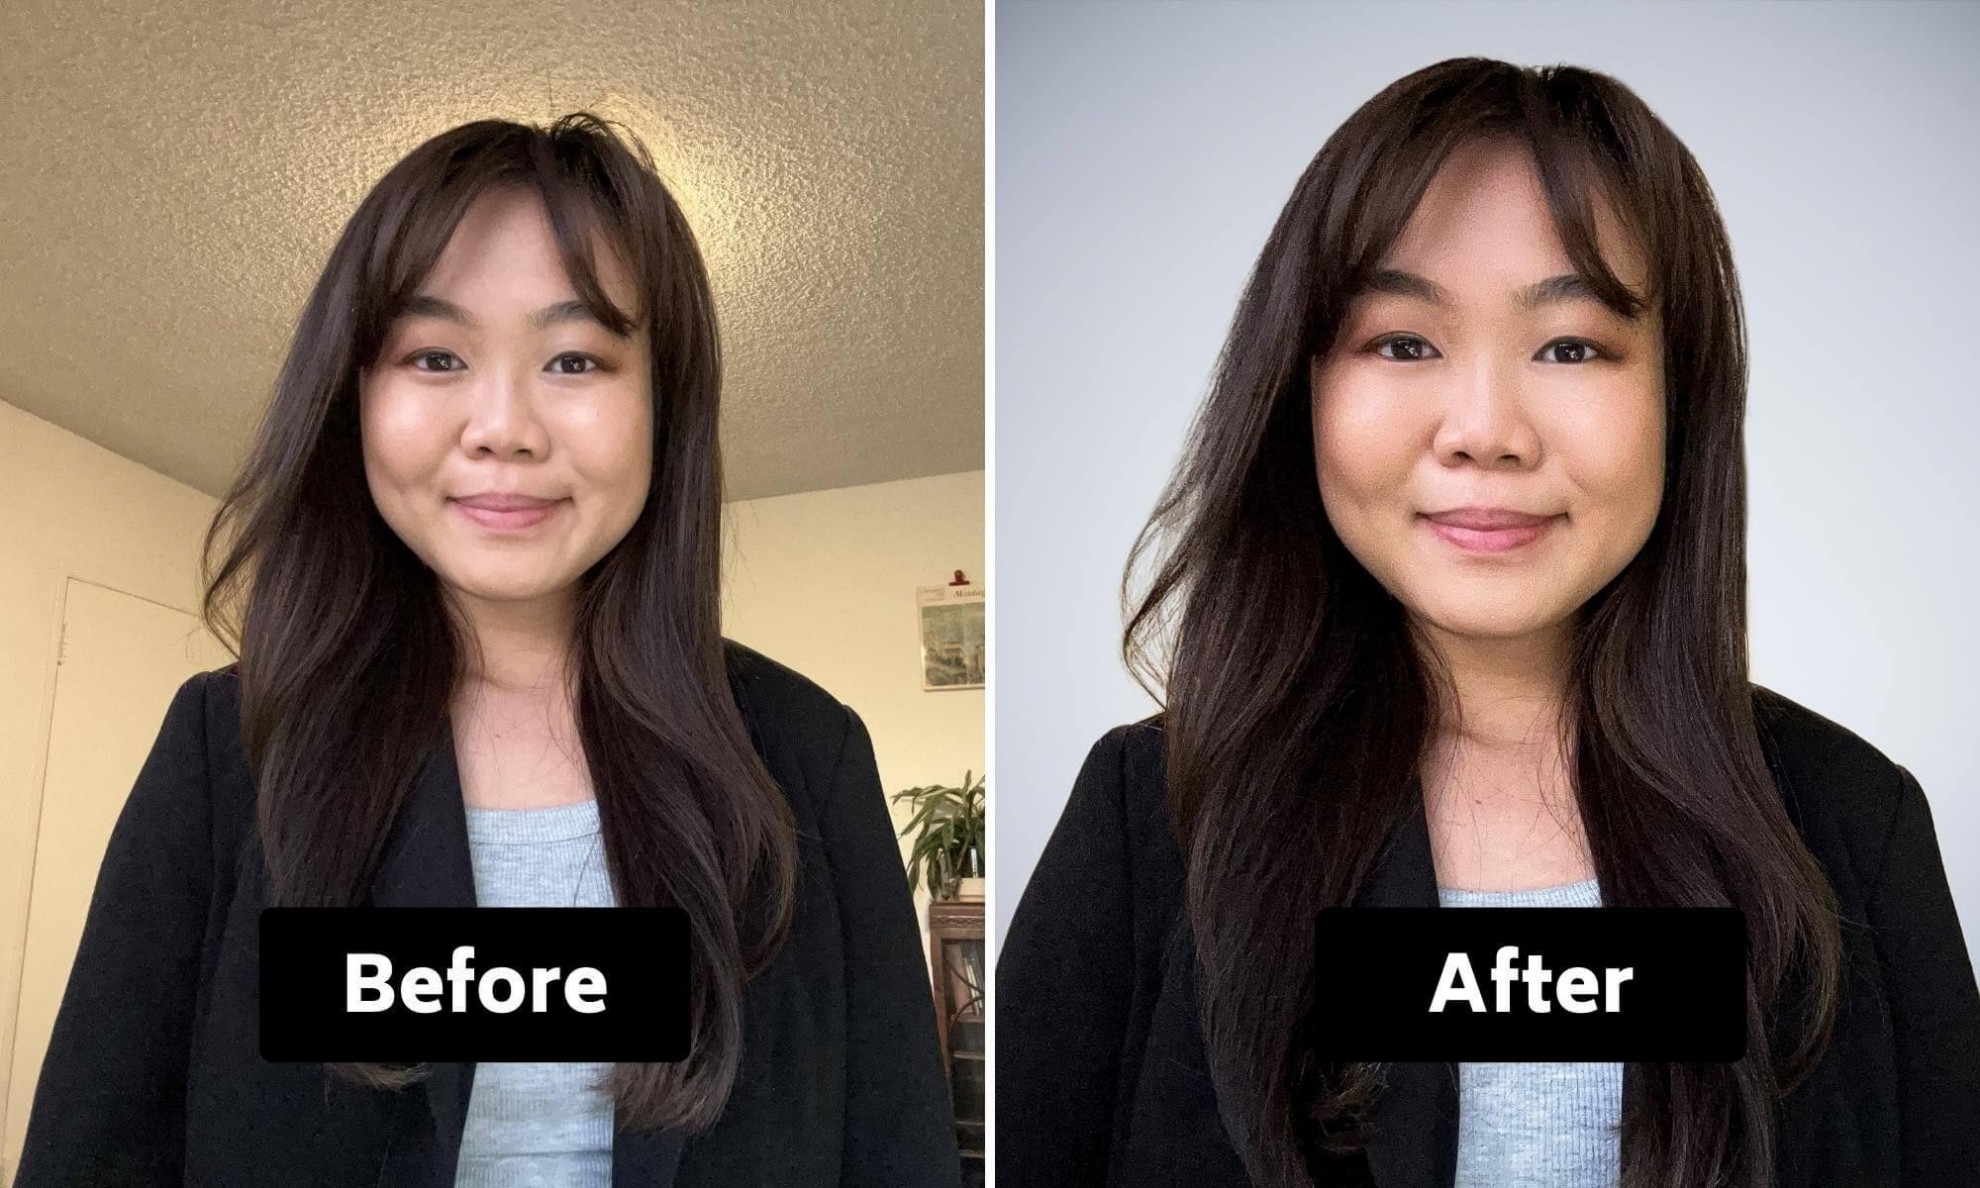
Part 6: [Bonus Tip] Use HitPaw FotorPea to Polish iPhone Headshots
Even after editing your iPhone profile photos with the free app, you may want to improve it further as a photo for work or identification. HitPaw FotorPea is a simple tool to help in such cases. Easy to use and perfect for profile photos. One useful feature is "ID Photo." This feature allows you to match your passport and job photo size. It is also possible to change the background to a simple white, blue or any single color. This tool saves time and makes photos clean and easy to use.
Key Features of HitPaw FotorPea:
- Use an AI photo enhancer to make your iPhone headshot clearer and more colorful.
- Try a passport photo maker app to get the right size for official use.
- Use an AI portrait tool to get smooth and natural-looking photos from your iPhone.
- Use a simple tool to remove unwanted things and keep the background clean.
- Generate AI headshots with studio-quality detail.


Quick Steps to Edit Your Headshot with HitPaw FotorPea
Step 1:Open the ID Photo tab in HitPaw FotorPea and click Create to upload your portrait, or drag and drop the image directly into the editor.
Step 2:The AI will instantly remove the background from your photo. To fine-tune details, use the Brush or Erase Selection tool located at the bottom of the interface.
Step 3:Click the Size button and choose your country. HitPaw offers pre-set sizes for common standards like those in the United States, United Kingdom, Japan, and Spain.
Step 4:Align your photo within the frame, select a suitable background color if necessary, and preview the result. Once everything looks right, click Export to download your ready-to-use ID photo.
Conclusion
In this article, we simply explained how to take a headshot with iPhone. From camera settings, lighting tips, smartphone setups to simple editing apps everything can help you shoot clear photos. These procedures are ideal for work profiles, LinkedIn, or personal use. No special tools required, iPhone is enough. If you want to make your photos better with your ID or official use, you can also try the HitPaw FotorPea tool. This tool helps you change the background and size with a few clicks.

 HitPaw Univd (Video Converter)
 HitPaw VoicePea
  HitPaw VikPea (Video Enhancer)


Share this article:
Select the product rating:
Daniel Walker
Editor-in-Chief
This post was written by Editor Daniel Walker whose passion lies in bridging the gap between cutting-edge technology and everyday creativity. The content he created inspires the audience to embrace digital tools confidently.
View all ArticlesLeave a Comment
Create your review for HitPaw articles