What is Exposure Compensation? A Complete Guide
Photography is an art that captures moments, emotions, and stories, often relying on the right exposure to convey the intended message. One critical aspect of achieving the perfect exposure is understanding exposure compensation. In this article, we'll explore what exposure compensation is, when to use it, and how it can enhance your photography skills. Whether you're a beginner or an experienced photographer, mastering this technique can take your images to the next level.
1. Understanding Exposure Compensation
What is Exposure?
At its core, exposure refers to the amount of light that reaches your camera's sensor. The right exposure ensures that your images are neither too bright (overexposed) nor too dark (underexposed). Understanding exposure involves grasping the exposure triangle, which consists of three key elements:
- Shutter Speed: This controls how long the camera's shutter remains open. Faster shutter speeds freeze motion, while slower speeds can create motion blur.
- Aperture: This is the size of the lens opening, measured in f-stops. A wider aperture (lower f-stop number) allows more light and creates a shallow depth of field, while a smaller aperture (higher f-stop number) reduces light and increases depth of field.
- ISO: This measures the sensitivity of your camera's sensor to light. Higher ISO settings are useful in low-light situations but can introduce noise or graininess.
How Exposure Compensation Works
Exposure compensation allows photographers to override the camera's automatic exposure settings to achieve the desired brightness level. When you take a photo, your camera's light meter evaluates the scene and sets exposure based on an average middle gray (18% reflectance). This means it tries to balance light and dark tones.
However, in certain situations-like shooting a bright snow scene or a dark subject against a bright background-the camera may misjudge the exposure. Here, exposure compensation comes into play, giving you control over the brightness of your image by manually increasing or decreasing exposure.

2. The Importance of Exposure Compensation
When to Use Exposure Compensation
Exposure compensation is particularly useful in the following scenarios:
- Shooting in Bright Conditions: When photographing snow, sand, or other reflective surfaces, the camera may underexpose the image, thinking it's too bright. Applying positive exposure compensation can help brighten the image.
- Backlighting: When your subject is backlit, the camera may try to balance exposure, resulting in a dark subject. Using exposure compensation to brighten the image will help bring out details.
- Night Photography: In low-light conditions, the camera may attempt to brighten the image too much. Negative exposure compensation can help maintain the darkness of the scene.
Benefits of Using Exposure Compensation
- Creative Control: Exposure compensation allows you to manipulate the brightness of your images, adding depth and drama based on your artistic vision.
- Improved Image Quality: By adjusting exposure, you can avoid common pitfalls like blown highlights or lost details in shadows.
- Enhanced Learning: Understanding how to use exposure compensation helps you learn more about your camera's metering system and exposure settings, empowering you as a photographer.
3. How to Use Exposure Compensation
Camera Modes that Utilize Exposure Compensation
Exposure compensation is available in several camera modes:
- Aperture Priority (Av): You set the aperture, and the camera automatically adjusts the shutter speed. Exposure compensation adjusts the shutter speed to achieve the right exposure.
- Shutter Priority (Tv): You manually set the shutter speed, while the camera adjusts the aperture. Here, exposure compensation impacts the aperture.
- Program Mode (P): This mode allows you to set both aperture and shutter speed. Exposure compensation will adjust the shutter speed.
- Scene Modes: Many cameras have preset scene modes (e.g., portrait, landscape) that also utilize exposure compensation.
Finding the Exposure Compensation Feature
The location of the exposure compensation feature varies by camera brand:
- Canon Cameras: Look for the "Av" button on the back, or use the main dial to adjust exposure compensation.
- Nikon Cameras: Typically, there's a dedicated button near the shutter release.
- Mirrorless Cameras: Some models have a dial on the top, making it easy to adjust exposure settings.
If you're unsure, consult your camera manual for specific details.
Adjusting Exposure Compensation Values
Using exposure compensation is straightforward:
- Positive Exposure Compensation (+EV): If your image appears too dark, dial in a positive value (e.g., +1 or +2). This will brighten your image.
- Negative Exposure Compensation (-EV): If your image is too bright, dial in a negative value (e.g., -1 or -2). This will darken the image.
Common Mistakes to Avoid
- Ignoring Metering Modes: Different metering modes can affect how your camera interprets exposure. Familiarize yourself with these options to make better adjustments.
- Not Resetting Compensation: After making adjustments, remember to reset the exposure compensation to zero. Forgetting this can lead to unintended exposure issues in subsequent shots.
- Overcomplicating Settings: Don't hesitate to experiment, but keep it simple. Start with small increments and adjust based on your results.

4. Practical Tips for Using Exposure Compensation
Assessing the Scene
Before taking a shot, evaluate the lighting conditions. Are there bright highlights or deep shadows? Understanding the scene will guide your exposure compensation adjustments.
Using the Histogram
The histogram is a powerful tool that visually represents the exposure of your image. A well-balanced histogram should stretch across the entire graph without clipping on either end. Use it to determine if your image is underexposed (bunched to the left) or overexposed (bunched to the right).
Tip:
A best photo enhancer tool(Hitpaw Fotorpea) for you! Learn more right now!

Experimenting with Different Scenes
Practice makes perfect. Try taking photos in various lighting conditions and adjust your exposure compensation accordingly. This will help you develop an intuition for when and how much to adjust.
5. Advanced Techniques with Exposure Compensation
Exposure Compensation with Advanced Metering Systems
Modern cameras come equipped with advanced metering systems that can recognize scenes and adjust exposure automatically. This technology minimizes the need for manual adjustments but knowing how to use exposure compensation allows you to push creative boundaries.
Exposing to the Right
"Exposing to the right" (ETTR) is a technique where you aim to capture images as bright as possible without blowing out highlights. This technique is particularly effective when shooting in RAW format, as it preserves more detail in the highlights and shadows. It requires a good understanding of your camera's capabilities and careful adjustments using exposure compensation.
6. Real-World Examples
Case Studies
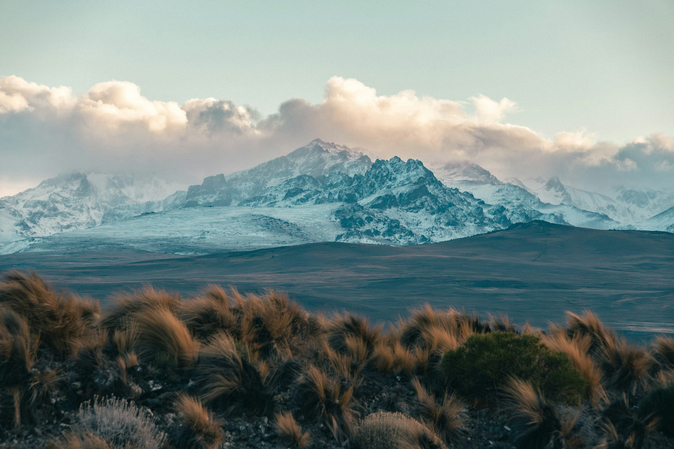
- Bright Snowy Landscape: Imagine photographing a snowy landscape. The camera's meter may underexpose the scene, thinking the bright snow is too bright. By applying +1 to +2 EV, you can capture the stunning details in the snow and maintain the overall brightness.
- Backlit Portrait: In a backlit situation, your subject might appear too dark. By using +1 EV, you can ensure that your subject is well-lit, creating a more flattering portrait.
User Testimonials
Many photographers have found exposure compensation to be a game-changer. For example, a landscape photographer shared that using exposure compensation allowed them to capture the vibrant colors of a sunset without losing detail in the shadows.

7. Conclusion
In conclusion, exposure compensation is a vital tool in a photographer's arsenal. It empowers you to take control of your images, ensuring that they reflect your artistic vision. By understanding how to use exposure compensation effectively, you can enhance your photography skills and create stunning images in various lighting conditions.
Now that you know the ins and outs of exposure compensation, it's time to practice! Grab your camera, head outside, and start experimenting with different settings. Don't forget to share your experiences and any questions you have in the comments below. Happy shooting!
FAQS
Q1. What is the difference between ISO and exposure compensation?
A1.
Q2. Is exposure the same as ISO?
A2. No, exposure is determined by three factors: aperture, shutter speed, and ISO. ISO is just one part of exposure-it brightens the image digitally, whereas aperture and shutter speed control how much light physically reaches the sensor.
Q3. Do professional photographers use exposure compensation?
A3. Yes, professionals frequently use exposure compensation, especially in semi-automatic modes (like Aperture Priority or Shutter Priority). It allows them to quickly adjust brightness without switching to full manual mode, ensuring proper exposure in tricky lighting conditions.
Q4. What is an ISO in compensation?
A4.
There is no direct term called "ISO in compensation." However, in some cameras, Auto ISO can work alongside exposure compensation:
Remember: Exposure Compensation works differently in Manual Mode (it only adjusts the light meter's suggestion, not actual settings). For full control, learn how ISO, aperture, and shutter speed work together!


 HitPaw Univd (Video Converter)
 HitPaw VoicePea
  HitPaw VikPea (Video Enhancer)


Share this article:
Select the product rating:
Daniel Walker
Editor-in-Chief
This post was written by Editor Daniel Walker whose passion lies in bridging the gap between cutting-edge technology and everyday creativity. The content he created inspires the audience to embrace digital tools confidently.
View all ArticlesLeave a Comment
Create your review for HitPaw articles