Audacity Noise Removal Guide & Faster AI Alternative
Background noise can seriously degrade the quality of your audio, especially in scenarios like podcasting, online meetings, interviews, or voiceover recordings. Whether it's keyboard clicks, air conditioning hum, or distant traffic, these distractions reduce clarity and professionalism.
One popular solution to clean up audio is Audacity-a free and widely-used audio editor. In this guide, you'll learn how to remove background noise in Audacity step by step. In addition, we'll introduce a smarter and faster AI alternative for anyone looking to save time and get better results with less effort.
Part 1. A Brief Overview of Audacity
Audacity is a free, open-source audio editor supporting Windows, macOS, and Linux. Since its 2000 launch, it's become the go-to tool for:
- Podcasters editing interviews
- Musicians recording demos
- Content creators processing voiceovers
- Educators preparing lecture recordings
Its noise reduction feature (under Effects > Noise Reduction & Repair) uses spectral subtraction technology. While powerful for basic edits, Audacity requires manual sample selection and lacks AI-powered precision. Other features include multi-track editing, audio effects, and format conversion - though video files require separate processing.

Part 2. How to Remove Background Noise in Audacity
Step 1: Import Your Audio File
Open Audacity and drag your audio file into the editor, or go to File > Import > Audio.

Step 2: Select a Noise Profile
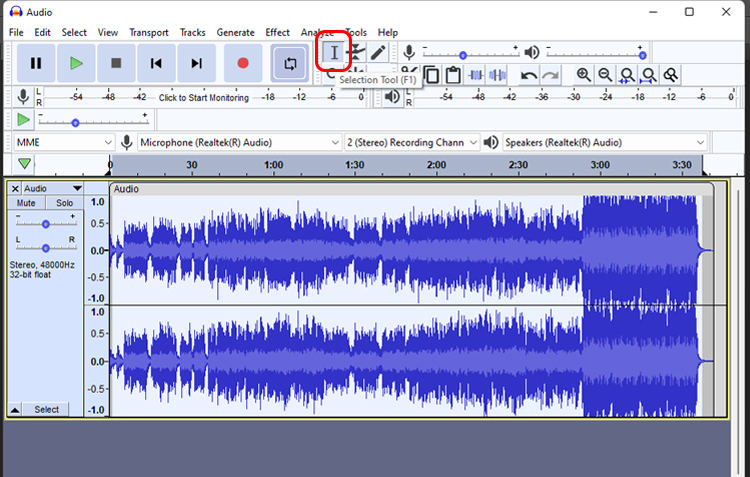
To remove the unwanted noise from the audio file, you need to click on the Selection Tool from the top menu bar. Then highlight a segment of the waveform that contains background noise.
Step 3: Apply Noise Reduction
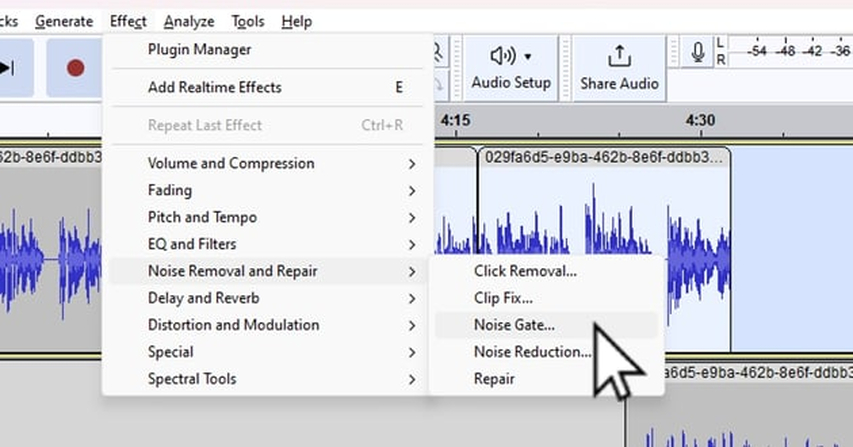
Go to the Effect menu, and select Noise Reduction option.
Step 4: Adjust Parameters
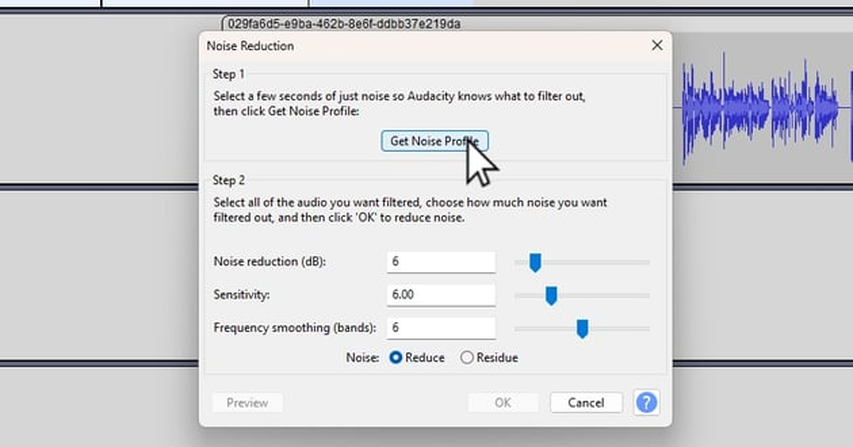
In the dialog box, you'll see three sliders:
- Noise Reduction (dB): how much noise to remove
- Sensitivity: how sensitive the tool is to noise
- Frequency Smoothing (bands): how smoothly to blend affected areas
Click Preview to hear the result, then adjust accordingly.
Step 5: Apply and Export
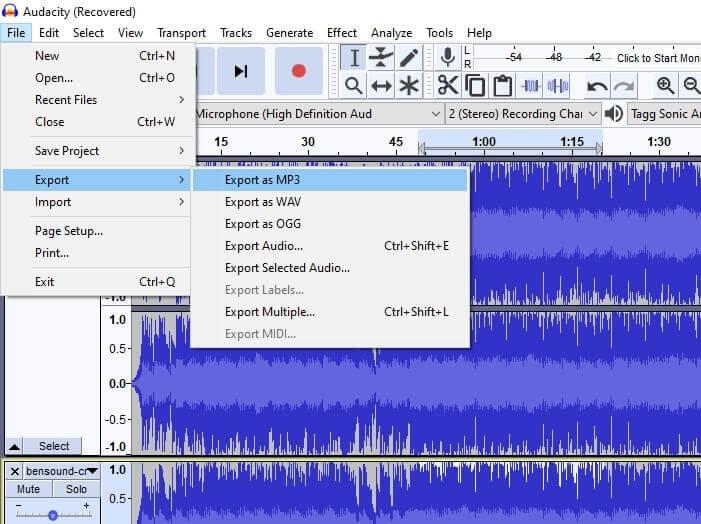
Once satisfied, click OK to apply. Export the cleaned file via File > Export > Export as MP3/WAV.
Limitations of Audacity Noise Removal:
- Requires manual selection of noise profile
- Complicated parameters may confuse beginners
- Risk of damaging vocal quality
- Time-consuming for multiple files or complex audio
Part 3. A Smarter Way: Use AI to Remove Noise Effortlessly
If you're looking for an easier and more intelligent way to remove background noise-without worrying about technical settings or quality loss-there's a better solution.
HitPaw Univd is a comprehensive multimedia toolkit designed for anyone who works with video, audio, or image files. It combines over 30+ powerful tools into one intuitive interface, including video converter, editor, compressor, enhancer, and AI tools.
Among these, the AI-powered Background Noise Remover feature stands out for its simplicity and precision. It uses advanced deep-learning models to automatically detect and eliminate background noise-like fans, static, wind, or ambient room sounds-without harming the original vocal quality.
Key Benefits:
- One-click removal of background noise
- Works with both audio and video files
- Maintains 100% voice clarity and tone
- Supports MP3, WAV, MP4, M4A, MOV, and more
- Beginner-friendly with no audio editing knowledge required
Step 1: Download and Launch
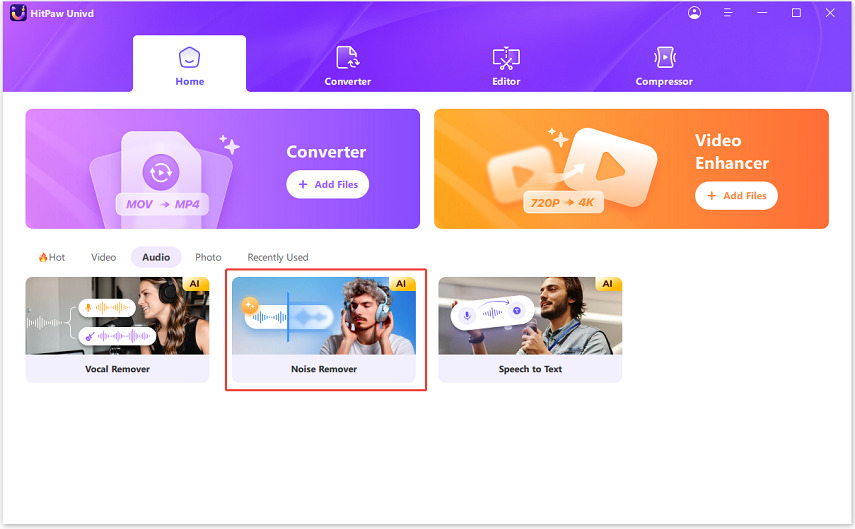
Install HitPaw Univd from the official website and open the program. On the homepage, find Noise Remover feature from the Audio category.
Step 2: Import Your Audio or Video File
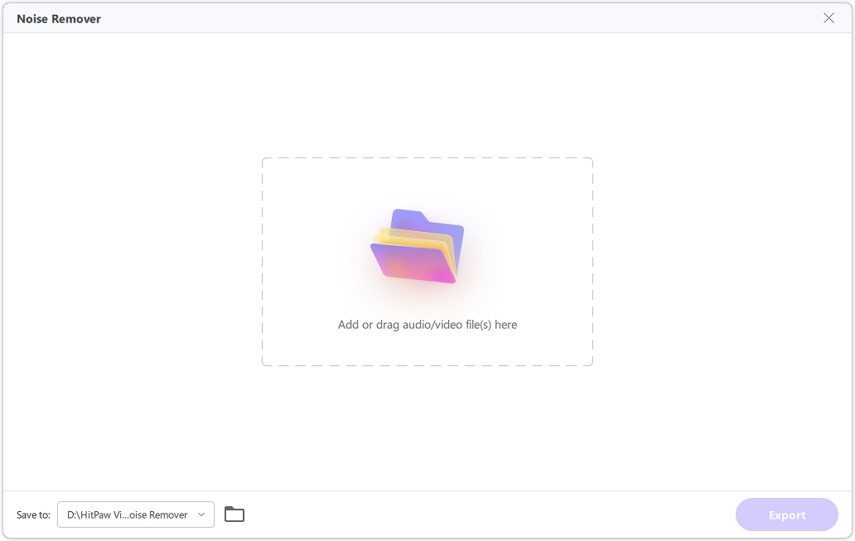
Click "Choose File" or drag and drop your file into the workspace. The tool supports various formats like MP3, WAV, MP4, M4A, and MOV.
Step 4: Let the AI Analyze
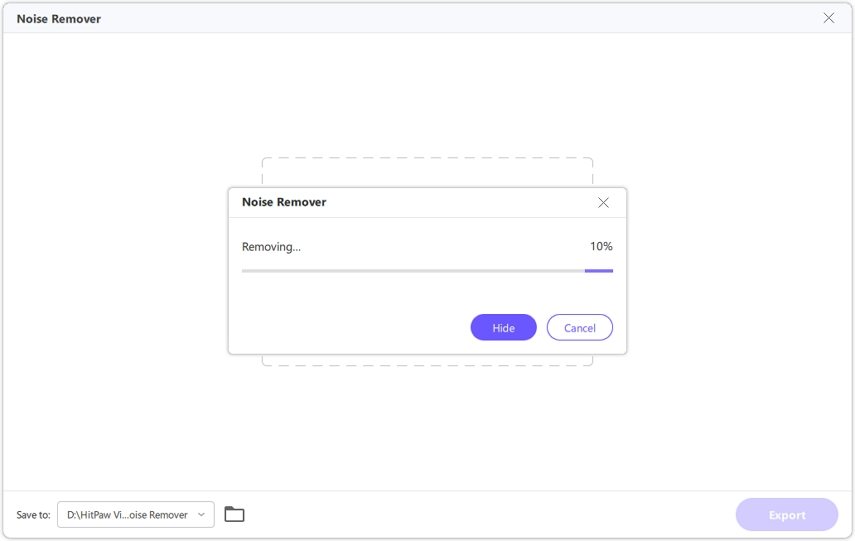
Once your file is loaded, this program will automatically detect background noise patterns, and remove them intelligently.
Step 5: Preview the Result
After processing, use the built-in preview to compare the before and after. You'll immediately hear the difference-clearer vocals, reduced static, no distortion.
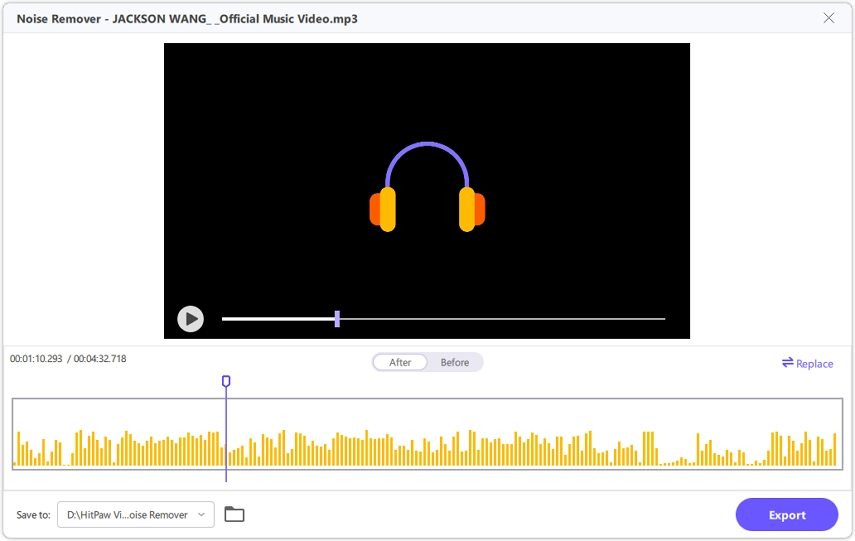
Step 6: Export the Cleaned File
Satisfied with the result? Click "Export" to save the file to your device.
Part 4. Audacity vs. HitPaw UniVD: Side-by-Side Comparison
| Feature | Audacity | HitPaw Univd |
|---|---|---|
| Ease of Use | Complex (requires knowledge) | One-click simplicity |
| Processing Speed | 2-5 minutes per file | Under 30 seconds |
| Voice Quality | May distort vocals | AI-preserved original voice |
| Format Support | Mainly audio only | Audio & video (MP3, MP4, WAV, etc.) |
| Extra Features | Basic editing tools | Converter, editor, compressor, enhancer & AI tools |
Conclusion
Audacity is a solid, free option for basic audio editing and noise removal-but it comes with a steep learning curve and mixed results. If you want a modern, AI-powered, one-click solution, look no further than HitPaw Univd. Whether you're a content creator, teacher, or just someone cleaning up voice recordings, it saves time and delivers studio-quality results.


 HitPaw VoicePea
  HitPaw VikPea (Video Enhancer)
 HitPaw FotorPea


Share this article:
Select the product rating:
Daniel Walker
Editor-in-Chief
This post was written by Editor Daniel Walker whose passion lies in bridging the gap between cutting-edge technology and everyday creativity. The content he created inspires the audience to embrace digital tools confidently.
View all ArticlesLeave a Comment
Create your review for HitPaw articles