How to Identify Old Photos: Learn 17 Ways to Tell the Age of Your Pictures
Old pictures can show up in your attic, tucked in a book, or bought at a flea market, and you're left wondering who's in them or when they were taken. You can't just guess by the faces alone. There are details hidden in the material, corners, and what people wore. If you know where to look, you can identify old photos back to their time and maybe even to their story.
Part 1. How to Identify Old Photos by Their Type?
Before you even think about dates or people, you've gotta figure out what kind of old photo you have. The material and size already say a lot.
1. Daguerreotypes (1840s-1860)
These are the earliest ones, and they're easy to spot once you know what to look for. Daguerreotypes are mirror-like images on shiny metal plates, usually stored in little hinged cases with velvet lining. If you tilt the photo and see your reflection in it, you're likely holding a daguerreotype.
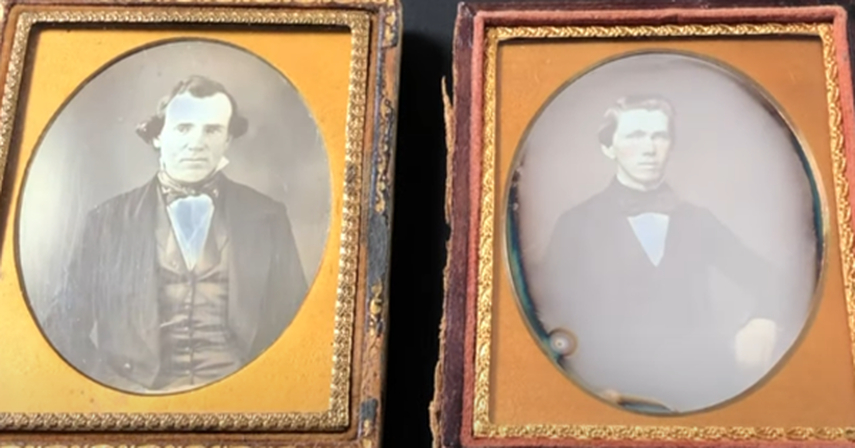
Most of them came from the 1840s to the early 1860s, so if your photo fits this style, it's one of the oldest types you'll ever find.
2. Ambrotypes (1855-1865)
Ambrotypes look a lot like daguerreotypes at first, but they're made using glass instead of metal. You'll also find them in small, hinged cases, but they won't reflect like a mirror. The image is actually backed with dark material to make it visible. If the surface feels like glass and the photo looks kind of ghostly or soft in contrast, you're probably dealing with an ambrotype. These were popular for about a decade in the mid-1800s.
3. Tintypes (1856-1890s)
These ones don't feel like glass or paper because they're printed on thin iron. Tintypes were popular in carnivals and on street corners since they were cheap and quick to make. You'll usually find them in little paper sleeves or mounted loosely in albums. The surface can look a bit rusty or dull over time.
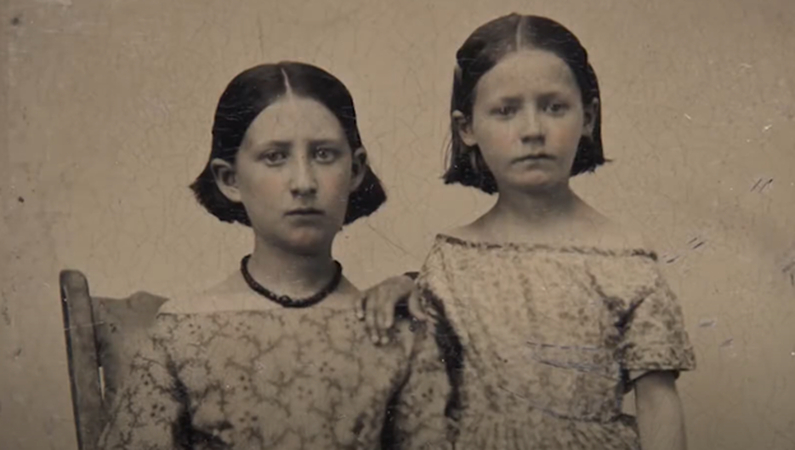
If it bends slightly but doesn't break, that's a dead giveaway of a tintype photo. These ran long, from the late 1850s through the 1890s.
4. Cartes de Visite (1859-1890s)
Cartes de visite, or CDVs, were calling card-sized photos mounted on cardboard. These are formal portraits with square or sometimes rounded corners. The cardstock is usually thin, and the photographer's name and location are printed on the back. These were exchanged between friends or handed out like business cards. If your photo's the size of a playing card and has some printed info on the back, chances are you've got a CDV on your hands.
5. Cabinet Cards (1860-Early 1900s)
Cabinet card photos are larger than CDVs and were often meant for display. The card is thicker, sometimes with beveled edges or gold trim.
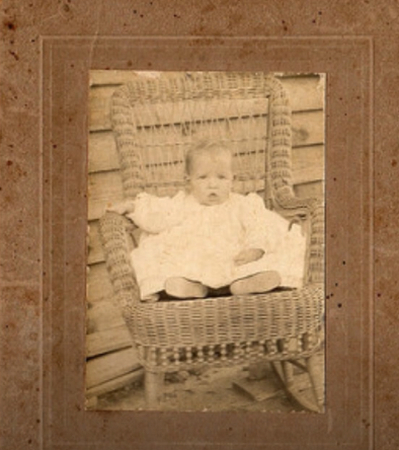
Most cabinet cards have the studio name printed right on the front or back, usually in fancy lettering. You might also see artwork or floral patterns around the border. These features help date it to the 1880s or 1890s. If the card's around 4 by 6 inches and feels stiff, it's probably a cabinet card.
Part 2. How to Identify Old Photos with Back Prints, Borders, and Physical Clues
Now that you've figured out the photo type, flip it over. The back, the edges, even the paper feel can tell you more than you'd expect.
1. Photo Edges and Corners
One of the quickest clues is how the corners are shaped. Earlier photos usually had square corners, while rounded ones started showing up later, especially by the 1870s and 1880s. If you spot decorative cuts or scalloped edges, that likely puts the photo closer to the 1890s.
Also, check for sharp trimming or machine-cut edges. These tiny physical details might sound minor, but they were actually tied to printing trends, so they help a lot when placing your photo on a timeline.
2. Color, Paper Type, and Thickness
The first thing is to take a good look at the color tone and texture. Older photos often have a sepia tone or a slightly purple wash from albumen printing. The card stock they're mounted on also changed through the years, starting with thick, cardboard-like materials and later shifting to thinner, stiffer paper.
That contrast in weight between thick and thin mounts gives you a real clue about which time period it belongs to.
3. Borders, Mount Color, and Bevels
Mounts with colored backgrounds, especially dark green, maroon, or black, were common in the 1880s and 1890s. Some of these cards even had beveled edges or gold-painted sides. If you see any embossing or stamped patterns, that puts it late in the cabinet card timeline. White or cream backgrounds usually point to earlier prints.
Gold trim and scalloped designs didn't just add flair. They marked the style of the decade. A quick scan with your eyes of those border details can narrow things down more than you'd think.
4. Studio Logos and Stamp Art
By the late 1800s, studios loved showing off their names with flowers, scrolls, or border illustrations. A few even included their street address or city, which helps you connect it to a time period and place. If you flip the photo over, you might notice fancy fonts, logos, or printed artwork on the back.
Really old photos may have a simple printed line, while later ones might fill the entire back with decoration. If the design looks flashy or commercial, it likely came toward the end of the 19th century.
Part 3. Use Context to Match Timeframes and Identify Old Photos
Once you've figured out the type and physical details of a photo, it's time to look inside the frame to identify it. Here are some clues you can spot in the people, setting, or background.
1. Hairstyles, Clothing, and Fashion
If you're looking at a woman in your photo and she's wearing a wide skirt that stretches out like a dome, that's a crinoline, and those were common in the 1850s. Right after that, you'll see tighter bodices with bustles coming in around the 1870s and 1880s.
Now, if you check the hair, center parts with a low bun often point to the 1860s.
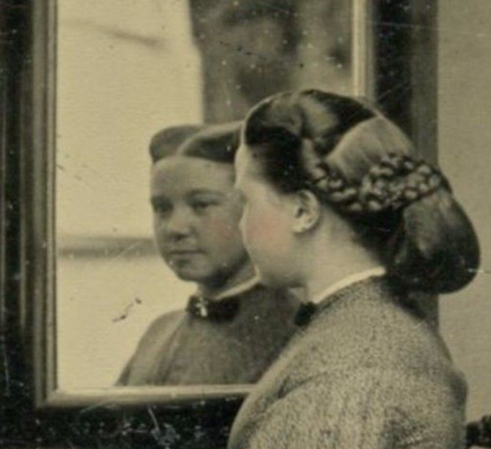
For men, stiff collars or wide lapels help you figure out the decade. These little fashion details give you a better shot at placing the date.
2. Furniture, Buildings, and Landscapes
Now look around the edges of your photo. Studio shots usually came with props, and stuff like velvet chairs, column backdrops, or painted garden scenes tell you what was in style at the time. If your photo was taken outside, pay attention to fences, cars, or street signs. For example, if you see an old wooden bench or an early car tucked in the background, you're not guessing anymore-you've got a time clue. Even a shop window or house trim can help match your photo to a certain decade.
3. Envelope Stamps and Sleeves
Sometimes the clues aren't even on the photo itself but on the stuff that came with it. If you've got an envelope or a photo sleeve that looks old, check every corner for a stamp or handwritten date. You might spot a photographer's business address or a printed year that tells you when it was developed. That kind of detail can save you a lot of guessing. Also, if the sleeve or backing has a product name or brand on it, you can look that up to figure out the time range.
4. Photo Albums and Scrapbooks
If your photo came from an album, this is just as helpful to identify it. The type of album gives you a rough idea of when it was put together. Thick black paper with photo corners points to the early 1900s. If the album has sticky pages or plastic sheets, that usually came much later, around the 1970s or 1980s.
Also, check the album cover. Some had printed dates or art styles that followed design trends. When you put those little things together, it gives you a better idea of when your photo was stored or shared.
Part 4. How to Identify Old Photos with External Sources and References
If your photo doesn't come with any names or dates, you can still track it down using other sources. There are a few places where old photos often turn up:
1. Orphan Photo Websites
Some websites are actually made for lost photos, and they're worth checking if your picture has no clear history.
If you upload your picture to places like DeadFred.com, you might find a match with someone else's family records.
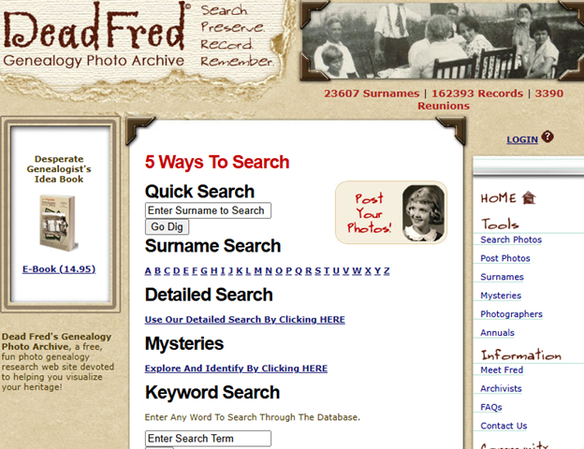
Some people scan old portraits from flea markets or antique shops and tag them on this website with names when they figure them out. If your photo shows a clear face or has anything written on it, that increases your chances of someone recognizing it.
Sites like Deadfred let you sort by surname or location, which makes it easier to connect your photo to the right family line.
2. eBay and Online Auctions
You wouldn't expect it, but eBay has tons of old family photos floating around. Most people just list them as antique portraits or vintage photo lots, but these pictures came from someone's real life. If your photo looks like it got separated from its album or family, try checking what's already posted there.
Some listings might match the style or time period, and even if they are not labeled, they still hold a piece of someone's history. That's why eBay's one of the first places worth checking when you have an old photo with no name.
3. Distant Relatives and Family Lines
Sometimes, it just takes one message to a cousin or distant relative to get things moving. They might be holding onto albums you've never seen. If you show them your photo, they might recognize the background, the clothing, or even the person.
A single response could give you a name or a date. That's how some people end up reconnecting entire sides of their family tree.
4. Local Libraries or History Books
Another place worth checking is your local library, especially the history section, where photos and directories are stored. If you know the city where your photo came from, visit the local history section or ask the librarian for archived images, and you might get lucky..
Part 5. Convert Your Old Black and White Photos to Color or Restore Them Using HitPaw FotorPea
If you've got an old photo that's black and white or one with scratches, bent corners, or faded spots, there's a simple way to bring it back to life. HitPaw FotorPea is the tool you need for that. It lets you fix damage and even colorize images in just a few clicks. Here's how to do it.
Step 1.Download HitPaw FotorPea on your computer and launch it. On the main dashboard, select the "AI Photo Editor" option.

Step 2.Upload your old image into the editor.

Step 3.Click on "Colorize B&W Photo" to convert the black and white image into color.

Step 4.After that, select "Scratch Remover" to fix the bends and lines in the scanned photo so it looks brand new.

Step 5.Click Export to save.

Part 6. FAQs of Identifying Old Photos
Q1. How do I use Google to identify a photo?
A1. Open Chrome and tap the Google Lens icon in the search bar. Once it opens, either upload the old photo or point your camera at it. Google will then scan the image and show visually similar results or possible matches.
Q2. How to find old photos from years ago?
A2. You can check websites that collect historical family photos, like Ancestry.com, AncientFaces, DeadFred, FamilySearch, or Flickr. Some public libraries, like the Denver Public Library or the Library of Congress, also have searchable photo archives. These platforms often include names, locations, or dates that help connect the images to people or timelines.
Conclusion on Identifying Old Photos
Now that you've learned how to identify old photos using their photo type, background details, borders, and physical clues, and by matching time frames through fashion or scenery, you've got a clear way to trace their history. You can even dig deeper by using lost photo websites, family records, or local archives.
After you know the origin of the photo, HitPaw FotorPea helps you take the next step. It removes scratches, fills in damaged spots, and colorizes black and white photos so they look sharp again. So if that old image means something to you, now's the time to restore it.





 HitPaw Univd (Video Converter)
 HitPaw VoicePea
  HitPaw VikPea (Video Enhancer)



Share this article:
Select the product rating:
Daniel Walker
Editor-in-Chief
This post was written by Editor Daniel Walker whose passion lies in bridging the gap between cutting-edge technology and everyday creativity. The content he created inspires the audience to embrace digital tools confidently.
View all ArticlesLeave a Comment
Create your review for HitPaw articles