How to Add Watermark to Video with 8 Ways on Windows, Mac and Online
A watermark is a quiet mark that speaks loudly about who made a video. It can be a short line of text, a small logo, or even a symbol that moves with the picture. Once you add watermark to video, every frame that follows carries the same badge.
That single step protects the work, helps viewers remember the brand, and makes any copyright dispute easier to settle. In the sections below, you will find eight solid ways-four desktop programs and four browser-based tools-to stamp that badge onto your clips without fuss.
Part 1: Why Add a Watermark to Your Video in 2025?
The speed of sharing has never been higher. One swipe sends a clip from a phone in New York to a screen in Chicago. In that quick jump the owner's name often disappears. When you add watermark to video free, three things happen:
A discreet watermark simultaneously serves three critical purposes: it discourages opportunistic misappropriation, perpetually reinforces brand attribution, and furnishes verifiable evidence to uphold copyright.
In today's era of instantaneous content dissemination, this unobtrusive signature can spare considerable effort and expense in defending rightful ownership.
A simple mark can save hours of chasing later.
Part 2: The Best 4 Ways to Add Watermark to Video on Windows and Mac
1. HitPaw Univd
HitPaw Univd is an AI-driven multimedia toolkit for Windows and macOS that combines fast conversion with lightweight editing. It can batch-transcode 8 K/4 K/1080 p video and audio into more than 1,000 formats at up to 170 × real-time speed while preserving quality, then compress the result for easy sharing.
HitPaw Univd stands out because it treats watermarking as a core task, not an afterthought hidden behind extra menus. When you open the program the Add Watermark tile sits on the first screen, ready in one click. New users can drag a clip onto the timeline and place a logo within minutes, yet the engine behind the interface is strong enough to render 4K H.265 files at full speed on modern laptops.
Key Features of HitPaw Univd
- Direct Watermark Module: Access it from the main dashboard without diving through sub-menus.
- Text and Image Support: Lay a channel name and a logo in the same pass.
- Full Style Control: Change font, color, outline, drop shadow, opacity, and rotation.
- Drag-and-Move Handles: Place the mark by hand anywhere inside the safe zone.
- Batch Resolution Converter: Resize clips before stamping so all watermarks line up.
- Hardware Acceleration: Uses GPU for H.264, HEVC, and ProRes exports, cutting wait times.
- Integrated Editor: Trim, split, fade audio, or add filters in the same project window.
How to Add Watermark to Videos Using HitPaw Univd
Step 1.First, you need to 'Download' the HitPaw Univd. You can do so by clicking the 'Download' button below.
Step 2.Install & Launch HitPaw Univd, choose Editor > Add Watermark. Import the video you want to brand.

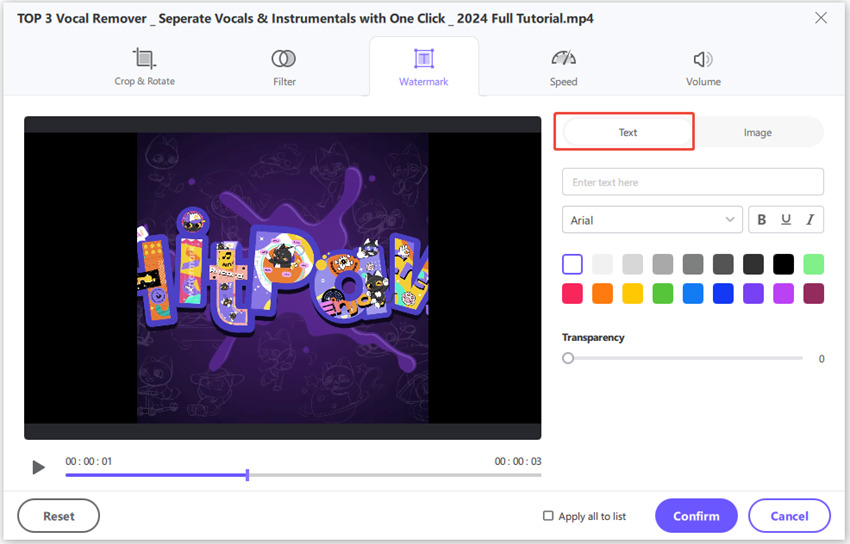
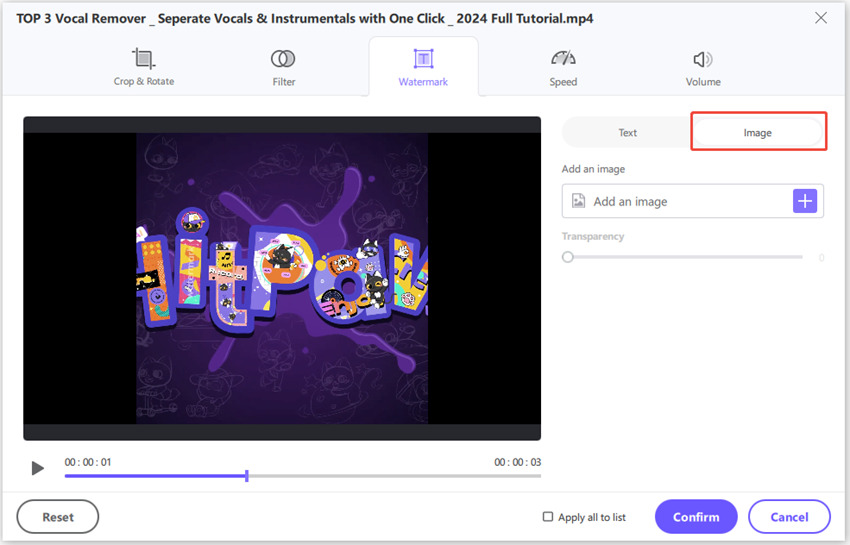
Step 3.Select Text or Image. Type your brand or load a PNG logo with transparency.

Step 4.Adjust Style: pick font, size, color, and opacity. Drag the mark to a corner.

Step 5.Export. The video renders with the watermark embedded frame by frame.
2. FFmpeg
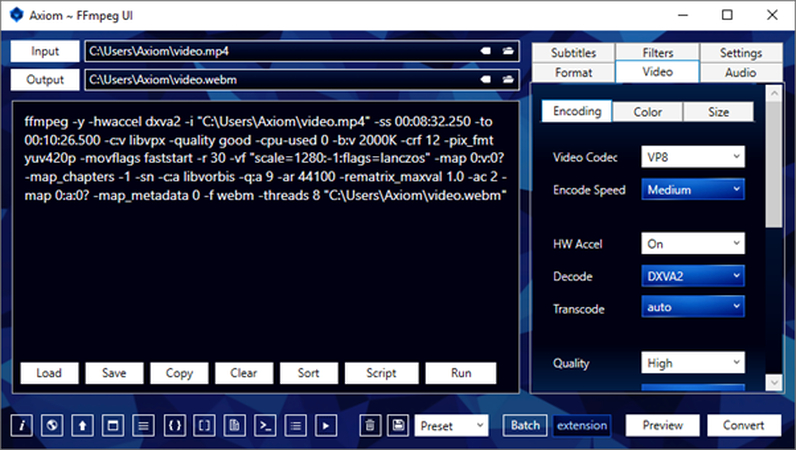
FFmpeg is not pretty, but it is powerful. This small command-line utility works like a Swiss Army knife for video and audio. You type one line, press Enter, and it transforms files faster than many visual editors. When it comes to add watermark to video FFmpeg, it overlays a logo or stamps plain text onto every frame without opening a single window.
Features
- Runs on Windows, macOS, Linux, even Raspberry Pi.
- Command syntax lets you automate endless batches.
- Supports nearly every codec, from ancient AVI to modern AV1.
Pros
- Free and open source.
- Ultra-lightweight; no installer, runs from one folder.
- Fast because it skips a heavy interface.
- Fits easily into cron jobs or CI pipelines.
Cons
- Steep learning curve for users new to command lines.
- No live preview; mistakes appear only after rendering.
- Typing overlay filters can be error-prone.
3. Adobe Premiere Pro
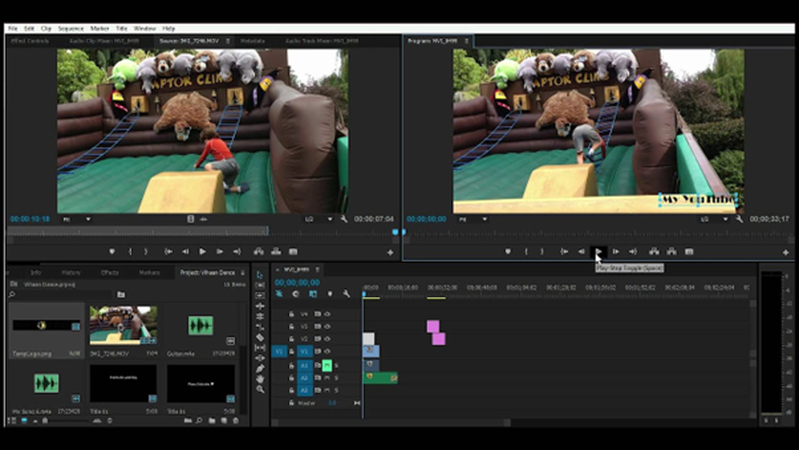
Adobe Premiere Pro is the long-standing workhorse of broadcast studios and creative houses. Watermarking inside Premiere sits within the Essential Graphics panel, the same panel used for lower thirds and animated titles. Drag in a logo, place it, lower opacity, and the mark rides across the timeline from first frame to last.
Features
- Essential Graphics panel for logos, shapes, timed text.
- Keyframe support to fade watermarks in or out.
- Export presets tuned for YouTube, Facebook, TikTok, and more.
Pros
- Deep toolkit beyond watermarking (color, audio, captions).
- Team Projects allow real-time collaboration.
- Plug-ins extend features, such as motion-tracking watermarks.
- Same layout on Windows and Mac, easing cross-platform teams.
Cons
- Subscription cost adds up over months.
- Needs a strong GPU for smooth 4K playback.
- Interface may overwhelm beginners seeking only watermark tasks.
4. DaVinci Resolve
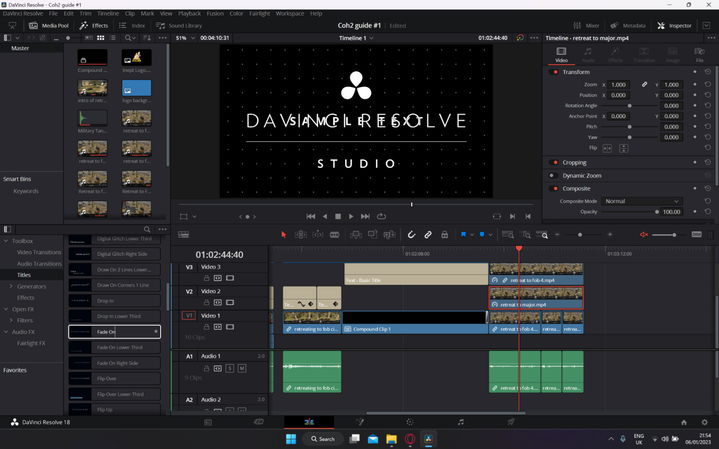
DaVinci Resolve began life as a color-grading suite, yet its free edition now packs a full non-linear editor, audio studio, and motion graph node system. Watermarking in Resolve is done either in the Edit page as a normal image layer or inside Fusion for advanced motion and glow effects.
Features
- Drag-and-drop image and text generators in Edit page.
- Fusion nodes for animated or glowing watermarks.
- Deliver page exports to H.264, H.265, ProRes, DNx, and more.
Pros
- Free version includes all watermark tools.
- Class-leading color accuracy protects brand colors.
- Community tutorials cover every feature in detail.
- Upgrades to Studio add GPU AI tools if needed.
Cons
- Steeper learning curve than basic editors.
- Heavy install size and high RAM needs.
- Fewer quick templates compared with paid add-ons in Premiere.
Part 3: How to Add a Watermark to Video Using 4 Online Tools for Free
Browser-based services skip downloads and help when you need to add a watermark to a video. All four tools below run on Chrome, Safari, or Edge with no plug-ins.
1. HitPaw Add Watermark Online

HitPaw's online watermark tool feels like the desktop app stripped down to the essentials for speed. You land on a white page, drag a clip, and see an instant preview. The servers take over the heavy lifting, so even an older Chromebook can brand a 1080p video without breaking a sweat. It is the best way to add watermark to video online free.
Steps
- 1.Drag or drop the video to upload.
- 2.Add text or image watermark and drag it to the spot you like.
- 3.Click Save and wait for the download link.
Pros
- No software installation.
- Works on phones, tablets, and laptops alike.
- Auto-deletes files for data safety.
- Free tier generous up to 500 MB.
Cons
- Needs a steady internet line.
- Limited style controls versus desktop.
- Queue times may rise at peak hours.
2. Clideo
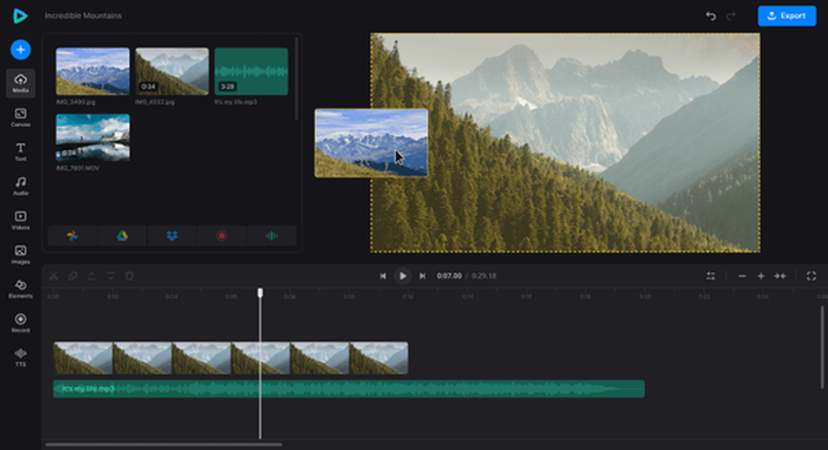
Clideo offers a stack of bite-size video utilities, and its watermark tool fits right into that modular lineup. Instead of a full timeline, you get a clean frame with resize handles that let you scale and nudge a logo in seconds. Uploads can come straight from Google Drive or Dropbox, which makes it handy for remote teams sharing cloud folders.
Steps
- 1.Go to Clideo's Add Watermark page.
- 2.Upload from local drive, Dropbox, or Google Drive.
- 3.Place logo or text, tweak opacity.
- 4.Click Export, then download.
Pros
- Cloud-to-cloud transfers save time.
- Simple opacity slider.
- Works on any modern browser.
- Extra mini-apps (trim, loop, crop) sit one click away.
Cons
- Free exports show Clideo branding.
- File-size cap unless you subscribe.
- Maximum 1080p on the free tier.
3. Vimeo Editor
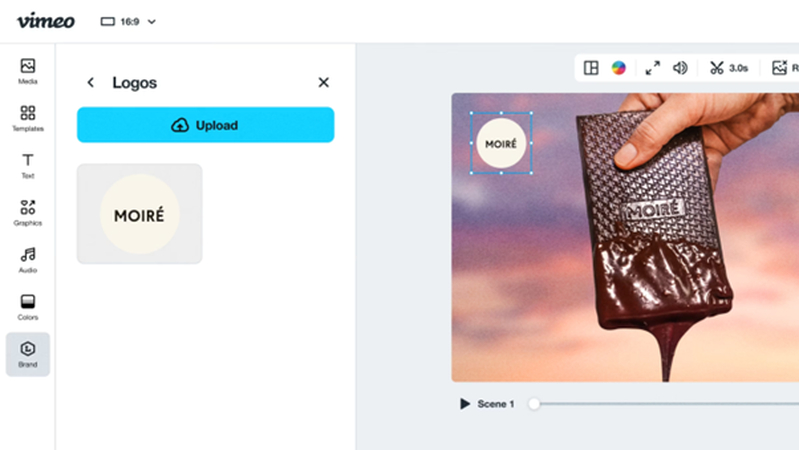
Many people know Vimeo for high-quality hosting, but its built-in editor also handles light post-production, including watermarking. You can pull footage from your existing Vimeo library or upload a fresh file, then open the Branding panel to drop in a PNG logo. Because the clip lives inside the same ecosystem where you plan to publish, there is no second export or upload step-one render and your branded video is live.
Steps
- 1.Log in to Vimeo, select Create Video > Editor.
- 2.Upload a video or pick one from your account.
- 3.Open Branding, load a logo, set position.
- 4.Press Export to publish or download.
Pros
- Direct publish to Vimeo on completion.
- Saves brand kit for future edits.
- Basic trim and caption tools in the same screen.
- Secure, ad-free playback page.
Cons
- Requires a Vimeo account.
- Free plan limits resolution.
- Editor may lag on long timelines in older browsers.
4. Echowave.io

Echowave.io targets social-media storytellers who pair audio with eye-catching visuals. Its main hook is an animated waveform that dances to your soundtrack, but the same canvas lets you drop a logo, channel tag, or hashtag. Choose a square, vertical, or wide layout depending on the platform, then drag the watermark into place.
Steps
- 1.Open Echowave's editor and upload your file.
- 2.Pick a template size (square, vertical, wide).
- 3.Add your logo, adjust size and timing.
- 4.Hit Render, then download.
Pros
- Animated waveform boosts engagement.
- Pre-set formats for each social network.
- Cloud render frees local resources.
- No sign-up required for short clips.
Cons
- Branding options not as deep as full editors.
- Length caps on the free plan.
- Peak-time queues may slow output.
Part 4: Who Should Use Watermarking Tools and How to Choose the Right One
User Group
Recommended Tool(s)
Reason
Content creators & YouTubers
HitPaw Univd, Adobe Premiere Pro
Fast batch watermarking, high bit-rate export, extra edit options.
Marketers & Agencies
Vimeo Editor, Clideo
Quick cloud workflow, easy brand kit reuse, no local software upkeep.
Educators & Trainers
DaVinci Resolve
Free, stable, clear color fidelity for slides and lecture clips.
Freelancers & Small Studios
FFmpeg (for automation) plus HitPaw Online (when mobile)
Scripted bulk runs overnight, browser tool on shared machines.
Decision Tips
- Check Hardware. If your laptop struggles with 4K, lean on cloud tools.
- Count Exports per Week. Heavy schedules favor desktop programs with batch queues, such as HitPaw Univd.
- Mind the Budget. FFmpeg and Resolve cost zero; Premiere requires a subscription.
- Think Collaboration. Vimeo's cloud editor and Clideo's Drive links help remote teams.
FAQs About Adding Watermark to Video
Q1. How do I add a watermark to any video?
A1. Choose a tool, import your clip, insert a text or logo layer, place it, lower opacity if needed, and export. HitPaw Univd does this in one guided panel.
Q2. How do I add a watermark to a YouTube video?
A2. Inside YouTube Studio go to Customization > Branding, upload a 150×150 px PNG, and set when it appears. For more style control, embed the logo in the video itself before you upload with any method above.
Q3. Can I add a watermark online without installing software?
A3. Yes. Tools such as HitPaw Online, Clideo, Vimeo, or Echowave let you drag a video into your browser, add a watermark, and download the finished file-all inside a tab.
Conclusion
Watermarking secures your credit and strengthens brand presence at a glance. Among the eight options outlined here, HitPaw Univd offers the smoothest blend of speed, style control, and export quality for everyday creators. Whether you choose a lean command-line tool, a full studio suite, or a fast browser service, the right approach keeps your name visible every time your video is shared.



 HitPaw VoicePea
  HitPaw VikPea (Video Enhancer)
 HitPaw FotorPea


Share this article:
Select the product rating:
Daniel Walker
Editor-in-Chief
This post was written by Editor Daniel Walker whose passion lies in bridging the gap between cutting-edge technology and everyday creativity. The content he created inspires the audience to embrace digital tools confidently.
View all ArticlesLeave a Comment
Create your review for HitPaw articles