Master the Art of Snake Photography in the Wild and Captivity
Snake photography is an exhilarating genre that merges the thrill of wildlife exploration with the precision of macro and telephoto techniques. If you are shooting a slithering cobra in the jungle or a ball python in a terrarium, you will need more than a steady hand to get it right.
What helps extremely in post-production is the use of AI tools like HitPaw FotorPea Photo Enhancer. This software enhances clarity, texture, and color vibrancy, helping your snake shots look more dynamic and realistic. Let's explore how to master this unique craft from the ground up.
What is Snake Photography?
Snake photography is a subgenre of wildlife photography that focuses on capturing snakes in their natural habitat or controlled environments like studios or enclosures. Unlike photographing large mammals or birds, snake photography demands both technical skills and an understanding of snake behavior.
Photographers must know how to photograph reptiles in a way that brings out the intricate textures, fascinating eye patterns, and smooth slithering movement of these often-misunderstood creatures. Its purpose is to show the beauty and mystery of snakes, not only to capture something like a snapshot.
For beginners, understanding the wildlife snake photography tips shared by professionals is vital. Key tips include respecting the snake's space, using the right gear, and taking proper safety precautions.
Essential Gear for Snake Photography
Camera and Lenses for Wildlife Photography
Mirrorless vs DSLR for nature photography
Both mirrorless and DSLR cameras are used in snake photography. For the best camera for wildlife photography beginners, mirrorless cameras like the Canon EOS R50 or Sony α6400 are ideal due to their lighter build and real-time electronic viewfinders.
Full-frame sensor advantage for low-light jungle conditions
Full-frame sensors work much better in dark conditions- ideal in lush jungles or in early mornings. Dynamic range is exquisitely handled by such cameras as Nikon Z6 II or Canon EOS R8 that allow you to see details in the scales of a snake and its surroundings.
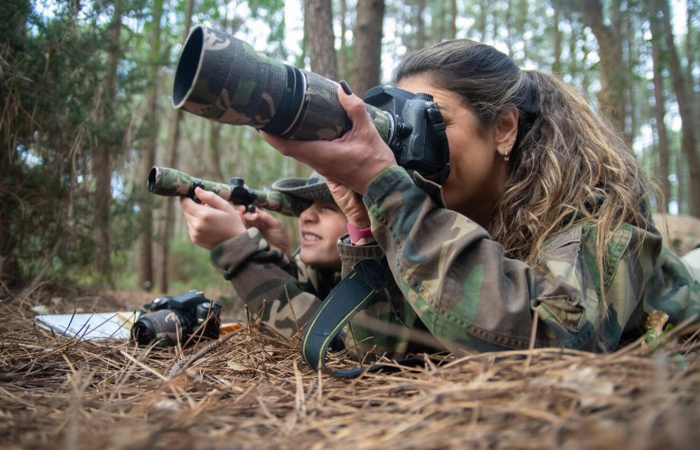
Highlight zoom lenses (100-400mm) for a safe distance
You can use long zoom lenses (100-400mm) and still take detailed, up-close photos without ever being close to these dangerous animals. These become very convenient when you want to shoot in the venomous or shy species without disturbing them.
Macro and Telephoto Lens Options
Close-up details of scales, eyes, and patterns
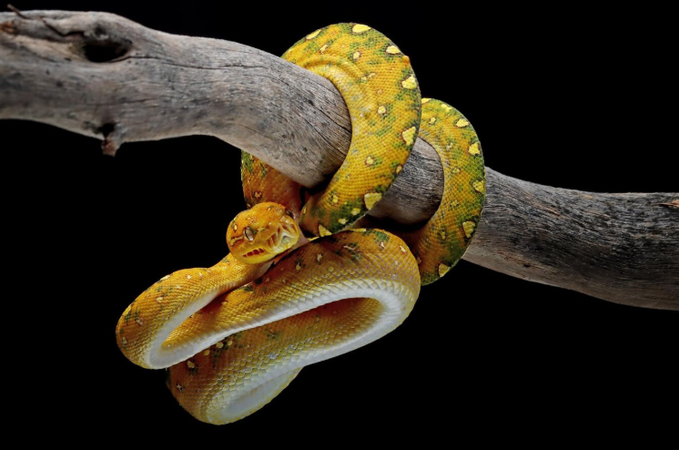
A macro lens for snake photography is crucial for highlighting intricate scales and mesmerizing eyes. It allows photographers to capture textures and fine details that would otherwise go unnoticed.
Macro shots vs action shots
Telephoto lenses are suited more to action shots, such as a snake coiling or flicking its tongue, but macro lenses (such as 90mm or 105mm) are more suited to close-up, more detailed shots.
Use of 90mm-105mm macro lenses
Macro lenses in the 90-105mm range strike the perfect balance between working distance and detail. They let you stay at a safe distance while still capturing tight frames.
Safety Accessories and Essentials
Tripods, bean bags, gloves, snake hook
A steady tripod or bean bag stabilizes your shot. Tools like snake hooks and gloves are essential, especially during controlled shoots where minimal handling may occasionally be necessary.
Importance of shooting from a distance
Never take a shot at the expense of safety. Longer lens, combined with zooming, means that you can take a closer shot without being exposed to any harm.
First aid, boots, and protective clothing
Wear thick boots and long trousers in the wild. Take a first aid kit all the time, especially in case of very venomous species.
Best Camera Settings for Snake Photography
Shutter Speed and Aperture
Short-term shutter speed (not less than 1/500s) is optimal to capture what is moving, including moving snakes. An aperture of f/4 to f/8 has an acceptable combination of background blur with depth of field, causing the subject to stand out.
ISO and Light Management
To have an ISO of 400-1600, depending on your lighting needs. Modern camera sensors handle high ISO with minimal noise. If you're editing wildlife photos in HitPaw FotorPea Photo Enhancer, you can fix noise without compromising image quality.
These are the best settings for wildlife photography to keep your snake photos sharp, vibrant, and dramatic.
Composition and Framing Techniques

Rule of Thirds and Eye Focus
Focus on snake eyes for captivating portraits
The eyes are the soul of the photo, just as they are in a portrait of a human being. Lock on the eye of the snake by way of single-point autofocus.
Use negative space and leading lines
Negative space also introduces the formal breathing space, and natural features such as branches or paths on the ground may encourage the eye to make way to the snake.
Framing head, tongue flicks, and coiling body
Attempt to take a picture of the snake in action, either whenever it sticks out its tongue or whenever it curls its body. Such details give more dynamism to your photos.
Backgrounds and Colors
Use natural backdrops: foliage, bark, forest floor
Have the surroundings aid your composition. The natural background, such as fallen leaves or tree bark, makes the picture merge with the background entirely.
Avoid distractions and cluttered backgrounds
Cut or clear away branches or debris that can interfere with your object. Clear backdrops give more emphasis to the snake.
Embrace earthy tones and contrast
Snakes tend to hide in the environment. Being earthy colored in your composition can either work in your favor by sticking out like a sore thumb or camouflage even more so, again depending on your creative intent.
Capturing Behavior and Movement

Document tongue flicks, hunting posture, slithering
The behavior of snakes contributes to the story. Keep waiting for the snake to stretch, flick its tongue, or get into a hunting position.
Use continuous shooting mode
Burst mode will help you in getting the perfect action shot, which is very necessary when snakes are moving.
Anticipate movements and maintain patience
Tracking the behavior of snakes enables one to tell what they will do next. Wait, watch, and be still.
Shooting in the Wild vs Controlled Environment

Photographing Snakes in the Wild
Nature provides realistic scenery and unpredictable patterns. But with those also come a few drawbacks- challenging light, rugged terrain, and difficult access to rare species.
Studio or Controlled Snake Photography
In a controlled environment, you are the one who controls lighting, composition, and snake handling. It is perfect for close-ups and close-up photography. Then, make sure to treat the animals properly in captivity.
Common Mistakes in Snake Photography
Getting Too Close
Never compromise your safety. Use a telephoto or long macro lens to capture close-up shots without getting too close.
Missing the Focus on Eyes or Tongue
Eye focus of importance. Focus points should always be on the eyes or tongue in case you want your photo to make a difference.
Poor Lighting and Harsh Shadows
There should never be direct flash. Do not use artificial lights; use relatively natural light or diffuse lighting to remain natural. Tools like HitPaw FotorPea Photo Enhancer can later help balance shadows and highlights effectively.
Editing and Post-Processing for Snake Photography
Enhancing Texture and Color
Increase textures and scales to make a point of detail. Apply clarity and texture in your HitPaw FotorPea Photo Enhancer so as to bring out the special snakes.
Cropping and Composition Fixes
Use crop to reframe your subject in case you have to. Remember the rule of thirds even when editing.
Sharpening and Noise Reduction
Clean the snake eyes and whisk away the noise, particularly those you shot using high ISO. The help of AI tools could simplify this, and HitPaw FotorPea Photo Enhancer presets.
Real-World Case Study: Before and After Edits
Jungle Viper Close-Up
- Before: somewhat darker picture with dull colors.
- After: Enhanced textures, deeper greens in the background, sharpened scales using HitPaw FotorPea Photo Enhancer.
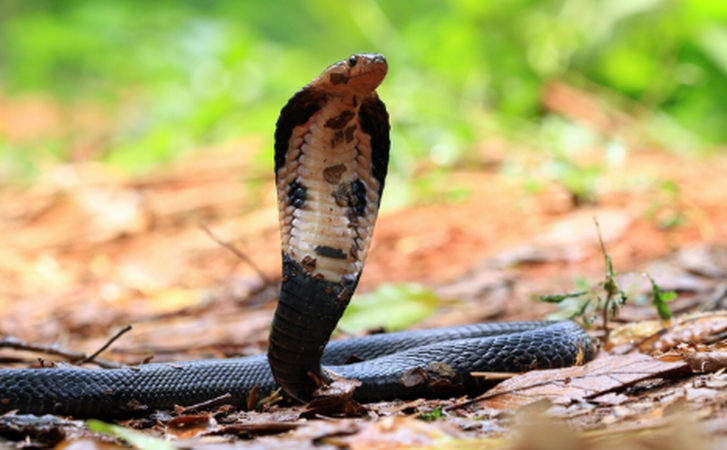
Cobra in Motion
- Before: blurred mid-body, underexposed.
- After: Adjusted shadows, midtone balance fixed, motion retained with clarity using HitPaw's AI-powered clarity enhancer.
Final Thoughts
Mastering snake photography is not just about the gear; it's about observation, patience, and post-production excellence. Whether you're learning how to photograph reptiles or refining your shots through editing wildlife photos inHitPaw FotorPea Photo Enhancer, every step matters.
Let tools like HitPaw FotorPea Photo Enhancer elevate your images, sharpening textures, improving colors, and breathing life into every snake photo you capture. Lock hearts into nature, treat wild animals with dignity, and leave the rest to the camera.
FAQs
Q1. Is it safe to photograph snakes in the wild?
A1. Yes, but as long as you use safety measures, keep your distance, and do not irritate the animal.
Q2. What's the best lens for snake close-ups?
A2. A macro lens for snake photography (90mm-105mm) is ideal for detailed close-ups.
Q3. How do I photograph venomous snakes safely?
A3. Keep a long telephoto lens, keep a distance, and do not make sudden movements.
Q4. Can I use my phone for snake photography?
A4. While it is possible for captive snakes, phones lack the depth and reach of dedicated cameras for wild snake photography.
Q5. How do I find snakes to photograph?
A5. Browse through the local habitats, employ a wildlife guide, and also photograph during early mornings as the snakes are more visible then.


 HitPaw Univd (Video Converter)
 HitPaw VoicePea
  HitPaw VikPea (Video Enhancer)


Share this article:
Select the product rating:
Daniel Walker
Editor-in-Chief
This post was written by Editor Daniel Walker whose passion lies in bridging the gap between cutting-edge technology and everyday creativity. The content he created inspires the audience to embrace digital tools confidently.
View all ArticlesLeave a Comment
Create your review for HitPaw articles