


[100% Working] How to Remove Background in Indesign in 2 Ways
Have you ever tried to remove background from the image directly in InDesign? Eliminating the image background to make it look relevant and attractive is familiar. What matters most while opting for the tool to eliminate the image is whether the tool maintains the original quality of the image or not.
If you want to opt for the InDesign remove background , you can dive into this post to learn how to remove background in InDesign.
Part 1. 2 Ways for How to Remove Background in Indesign
1. Remove Background Indesign Options 1: Clipping Paths
InDesign is a brilliant tool for eliminating the image background and making it transparent. You can watch out for the Clipping Paths tool of InDesign to remove background InDesign.
- 1.First, you'll need to start InDesign on your PC, and then you'll need to import the photo you'd like to eliminate the image background.
2.You'll need to choose the to establish the clipping path. Navigate to the Object menu and find the Clipping Path. Select the ''Options'' icon to begin the proceedings.

3.After visiting the dialog box, check the Preview and navigate to the Type menu. Next, select the ''Detect Edges''. If you find the areas inside the image's silhouette requiring clipping, you can proceed by checking the ''Include Inside Edges''.
You can customize the path's tightness by using the Tolerance. Setting the levels of your image's color contrast is possible courtesy of the Threshold.
4.That's all you've had to do to learn how to remove background from pictures in InDesign through Clipping Paths.
2. Indesign Remove Background Options 2: Pathfinder
If you want to enjoy more control while eliminating the image background, you can opt for the Pathfinder feature of InDesign.
Here's the step by step guide to learn how to remove background in InDesign.
- 1.Launch the InDesign and navigate to the File icon before tapping the Place button. This way, you'll be able to upload the image into the main interface of InDesign. You can access the tool by selecting the Pen Tool.
2.After starting in the image's upper left corner, you'll need to generate the anchor point in the photo's left hand corner. You must start the next anchor point while cutting out the subject. After selecting the subject, you'd like to create the anchor points on the upper right and bottom right sides. Next, you'll need to choose both paths around the subject. Navigate to the Subtract icon after clicking the ''Object and Path Finder.
3.Doing so will allow you to remove the image background and make it transparent. After eliminating the image background, you can resize the photo by pressing the Shift+ Ctrl command.
Once you're done editing the image parameters, you can download the photo to the desired location.
Part 2. The Best Alternative to Remove Image Background is HitPaw Photo Object Remover
Opting for the InDesign remove background is appropriate, but this process isn't beginner friendly. It implies that the newcomers won't enjoy using InDesign and would love to look for its alternative. You don't need to go anywhere to find an alternative to InDesign, as HitPaw Photo Object Remover exists.
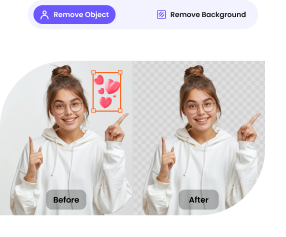
It makes removing the background from the images look simple, courtesy of the AI power technology it uses. Apart from eliminating the image background, HitPaw Photo Object Remover also enables you to apply gigantic and eye-catching colors to the images. Moreover, HitPaw Photo Object Remover also allows you to remove unwanted objects from the images, making them look watchable and stunning.
Features- It empowers you to eliminate the image background through AI recognition techniques.
- You can replace the image background with eye catching and mesmerizing colors.
- It helps you to eliminate unwanted objects from the photos automatically.
- HitPaw Photo Object Remover detects unwanted objects automatically before dismantling them.
- It comes up with a simple user interface.
- The image quality won't get compromised while eliminating the background and unwanted objects.
- It helps remove unwanted objects, including shadows, clutter, persons, and more.


Here's the step by step guide to learn how to remove the image background through HitPaw Photo Object Remover.
Step 1:March into the official HitPaw Photo Object Remover webpage in the first place, and then you'll need to get the software installed. Next, you must start the program and click the Remove Background button.
Step 2:Now, you'll need to upload the photo to the timeline of the HitPaw Photo Object Remover, and upon importing it, the tool eliminates the image background automatically. Watch out for the difference between the original and edited images on the screen below.
Step 3:You can now tap the Keep button to select the area of the original image you want to keep.
Step 4:If you don't want to keep the particular area of the image, you can click on the Erase button.
Step 5:If you want to make the background of your photo look elegant and attractive, you can select the wonderful background colors after hitting the Colors tab. HitPaw Photo Object Remover blesses you with multiple colors to select from.
Step 6:Before downloading the image result, you'll need to hit the Preview button to assess the outcome of your editing. Once you're satisfied with the results, you can hit the Export icon to download the photo.
Final Thoughts
Learning how to remove white background in InDesign has become manageable courtesy of this brilliant guide. We have listed the two brilliant methods, including the Path Finder and Clipping Paths, to remove background in InDesign.
Since InDesign offers a hectic user interface and new users might find it hard to rip apart the image background, you can look at the HitPaw Photo Object Remover. It automatically detects the image background before ripping it apart without tinkering with the resolution of the images.
 HitPaw VikPea (Video Enhancer)
 HitPaw Video Object Remover

![[Updated!] 2 Ways to Fix How to Remove Unwanted Objects in Excel](https://images.hitpaw.com/topics/covers/how-to-remove-unwanted-objects-in-excel-cover.jpg?w=299&h=450)

Share this article:
Select the product rating:
Daniel Walker
Editor-in-Chief
This post was written by Editor Daniel Walker whose passion lies in bridging the gap between cutting-edge technology and everyday creativity. The content he created inspires audience to embrace digital tools confidently.
View all ArticlesLeave a Comment
Create your review for HitPaw articles