Mastering Furniture Photography By Following Top Tips & Techniques
In e-commerce, product visualization is very important, as most buyers rely on visual appearance when making a purchase. The same goes for the furniture industry, where stunning, high-quality images do more than showcase the product. They build brand recognition, spark interest, and guide potential buyers toward a confident decision.
However, today’s buyers demand more than pictures and expect interactive visuals that feel close to reality. In this scenario, professional furniture photography meets these demands and boosts credibility and sales. Thus, if you want to know more about interior piece photography, this guide will explore how to capture and upscale images that leave a lasting impression.
Part 1. Essential Tips to Capture Captivating Furniture Photos
Before we get to know about reliable software for furniture product photography, it is essential to know the important techniques one should follow while taking homeware photos:
1. Best Angles for Furniture Shots: You can capture the front view, which shows the full design and symmetry of the piece and gives customers a clear look at its shape. Side and 45-degree angles allow you to add depth, while close-ups highlight the finer details like texture and material quality.
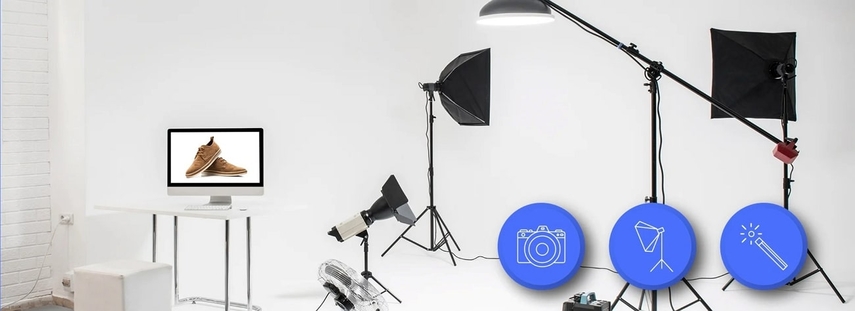
2. Lighting for Different Materials: Soft, diffused light is ideal for wooden furniture which can bring out the grain, while directional light works best for metals to showcase shine and reflection. However, glass homeware requires even lighting to avoid reflection, and using fabric with gentle, soft light is best to emphasize the texture.
3. Styling for Lifestyle Photoshoots: During furniture lifestyle photography, you can display decorative elements to show how the home decor item fits into a living space. Staging them in well-designed rooms creates a realistic setting that lets customers imagine it in their own homes.
4. Natural vs. Artificial Lighting: By providing natural light, you can give a warm, true-to-life appearance which is perfect for showing off colors and textures. Artificial lighting offers greater control and consistency, especially in indoor or low-light conditions, but must be balanced to prevent harsh shadows.
5. Reducing Glare and Reflections: To lower reflection on shiny surfaces, you can adjust their angle and use a polarizing filter on your camera. Shooting in diffused light or at different times of the day can also help reduce unwanted glare and showcase the furniture without distractions.
Part 2. Top Editing Software for Enhancing Furniture Photography
If you are looking for the best platform that allows you to do DIY furniture photography, you’ll find several options. To help you choose the best one, here are the top 5 software where you can edit professional home decor pictures:
1. HitPaw FotorPea
Starting with the best and most reliable tool, HitPaw FotorPea, with which you can easily upgrade your furniture photoshoot with its intuitive interface. When considering enhancing home decor pictures, this platform allows you to make basic adjustments such as the contrast and lighting of the picture. Moreover, with the help of AI tools such as Retouch, you can remove unwanted objects from your pictures.
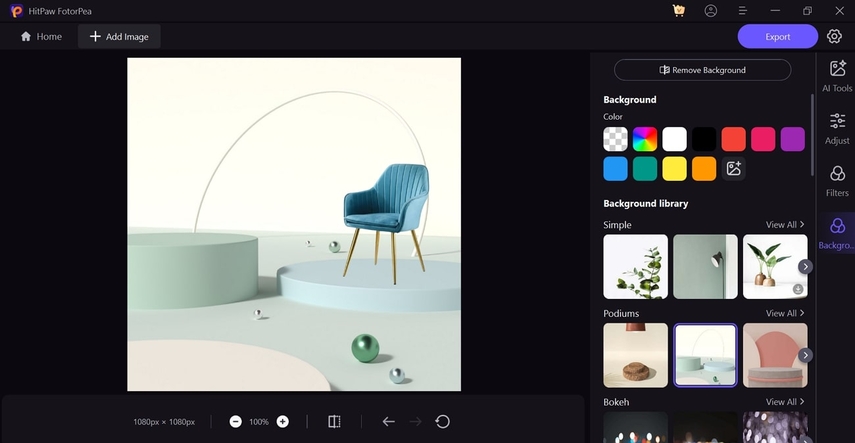
This software provides you with unlimited filters that can give your furniture, especially wooden ones vintage vibe. Users can preview the results before finalizing the home interior pictures in case they need more editing. It comes with batch features that allow you to edit multiple pictures at once which saves you time and effort.
Key Features
1. Low-Light Model: In case you have no lightning setup, and your product picture is in low light, you can use this model to adjust the picture's lighting.
2. Aspect Ratio: If you want to post on different social media platforms such as Instagram, Facebook, and Twitter. You can change the size of the picture using the aspect ratio and change it according to your preferred platform.
3. Background: With this feature, you can remove the background from your furniture’s picture. If you don't have a professional studio, choose the pre-made studio backgrounds from the given options.
2. Fotor
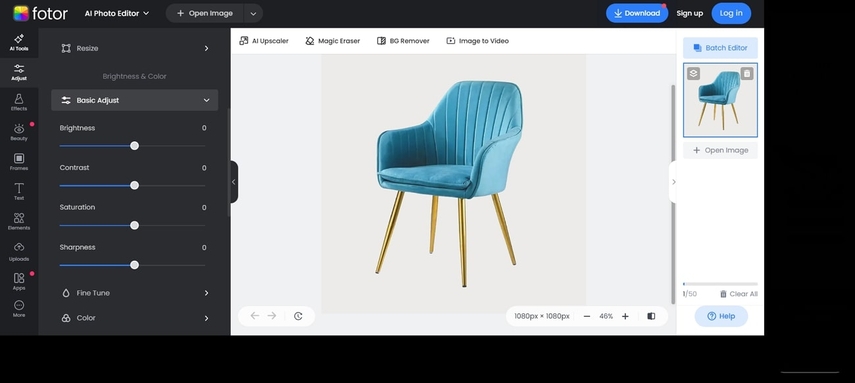
If you’ve items in different colors, instead of taking pictures separately, Fotor provides a color tool to change the temperature and tint of your furniture photography. You can also edit your furniture pictures by doing basic adjustments such as brightness, contrast, highlight, saturation, and sharpness Users can resize the picture of the item after editing to crop it according to the desired platform.
Key Features
1. Add different filters, such as classic, Retro, and vintage, to give a unique vibe to your pictures.
2. It provides a wide range of different borders to make the pictures visually appalling for the buyers.
3. Users can add text of different colors, fonts, and sizes from the text section to give a description of their home decor item.
3. Photoroom
For entrepreneurs who don't have a whole furniture photography setup, this platform allows you to add to remove the background of the pictures. It lets you to add different types of backgrounds, from basic bold colors to AI-generated studio backgrounds. Moreover, to save you time and effort, it provides you with a batch feature that can add multiple pictures at once.
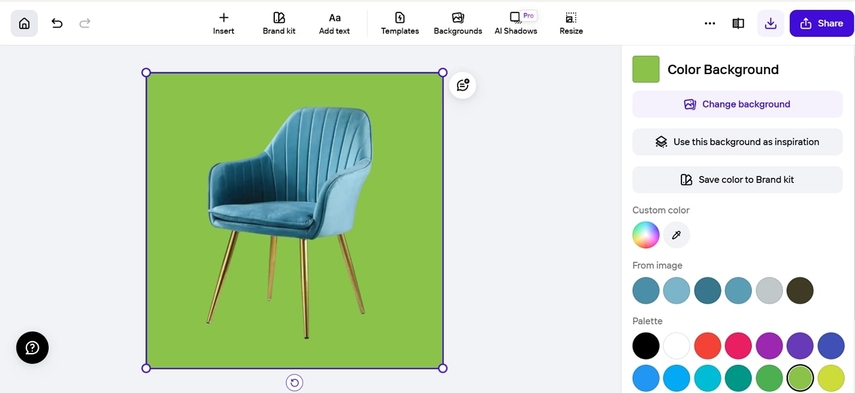
Key Features
1. Users can resize the pictures according to the social media platforms like Instagram, Facebook, or YouTube.
2. The software comes with a comparing tool that lets you see the before and after of the edited pictures.
3. From the Text feature, add descriptions of your product with different colors, fonts, and styles to attract shoppers.
4. Adobe Photoshop
Another best editing tool for enhancing furniture photography is Adobe Photoshop, which allows you to adjust your pictures using contrast brightness and sharpness. You can round the corner of the pictures and position the item from left to right according to the preferred place. Furthermore, from various color options, it lets you add different background colors that best suit your brand's style.
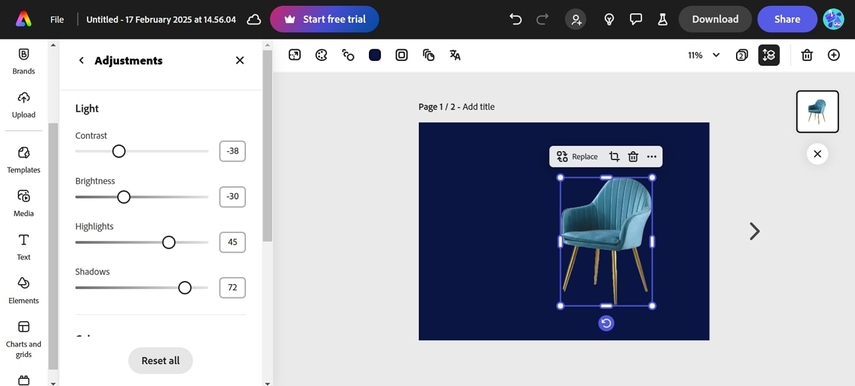
Key Features
1. From the element section, you can add different objects like table lamps to give a vibe, just like home.
2. Users can add different effects to enhance furniture photos and create a polished and professional look.
3. It changes the size of the picture to fit on the social media platform where you want to post.
5. Light X
With the background and foreground adjustment system, you can change the contrast, lightning, and highlight of both object and background separately. This platform allows you to remove the background of your furniture if you don't have a professional studio. Using refined cutouts, users can use the brush to remove the background from furniture product photography manually and achieve a clean look.
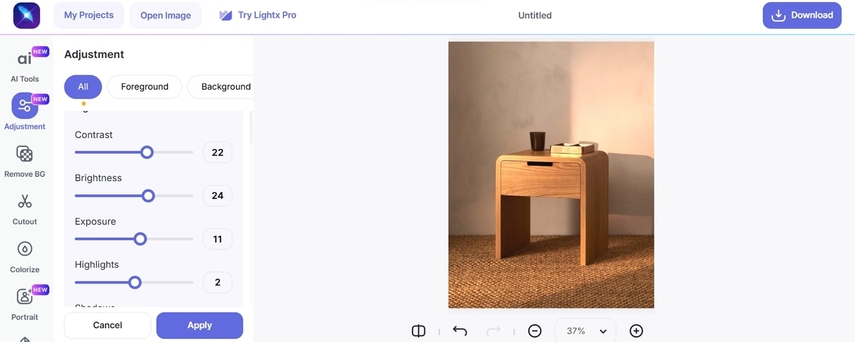
Key Features
1. If you accidentally remove the item while removing the background, use an eraser to recover it.
2. With the colorized model, adjust the lighting of the picture by highlighting the specific area with the brush.
3. The blur tool sharpens the image and removes the unwanted blurriness from your furniture picture.
Part 3. How to Elevate Furniture Photography with HitPaw FotorPea
After learning about the above software, you might be wondering how to use enhance picture with best solution. Here are step-by-step instructions to help you learn how to take professional furniture photos at home using HitPaw FotorPea:
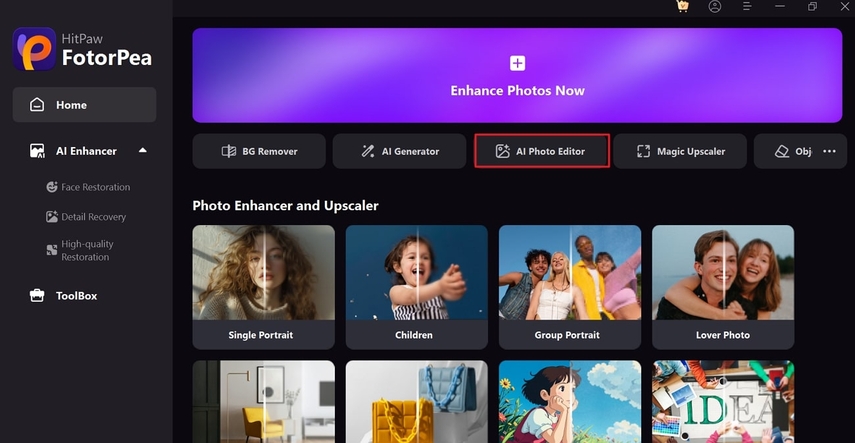
Step 1. Download the Tool and Choose AI Photo Editor
Install the tool, open it on your device, and from the main interface, choose the “AI Photo Editor” tool to start the editing process.
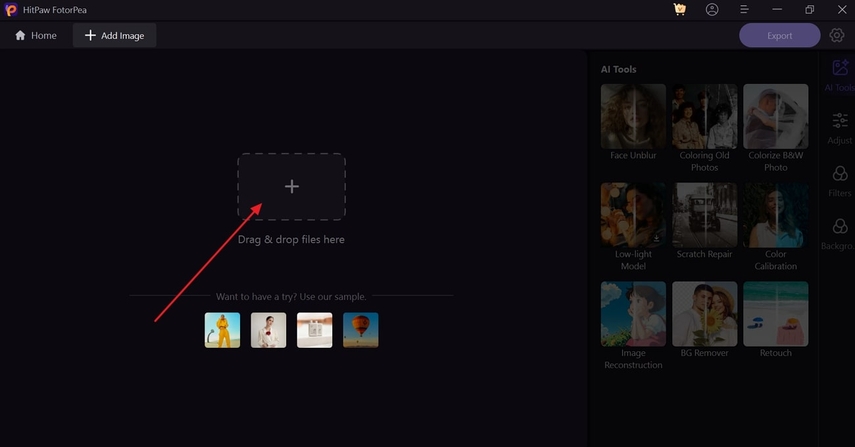
Step 2. Import Your Target Furniture Picture
Now, click the “+” or “Drag and drop files here” button to insert the pictures from your device.
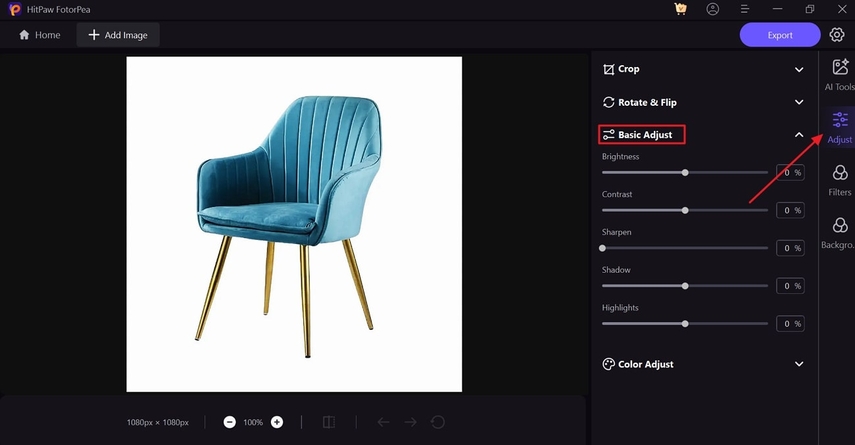
Step 3. Execute the Basic Adjustments
Press the “Adjust” tool, and from the “Basic Adjustment” section, change the brightness contrast and others with the help of the toolbar.
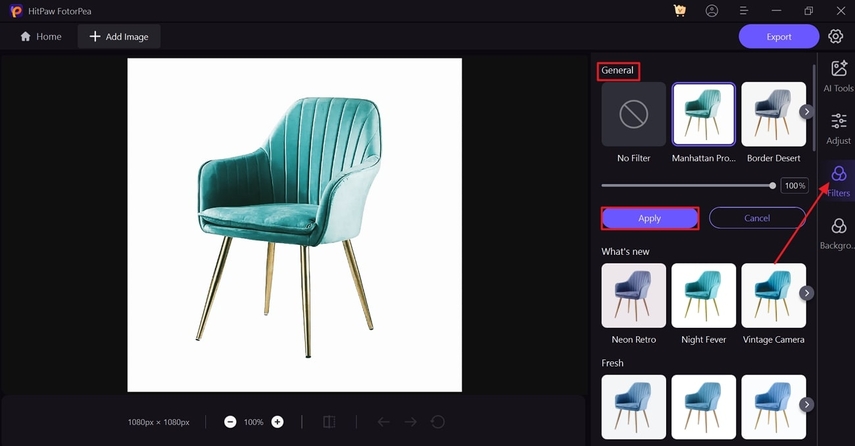
Step 4. Select the Suitable Filter for Furniture Photos
Afterward, select the “Filter” tool, and from the “General” section, select the suitable filter for your furniture pictures by hitting the “Apply” button.
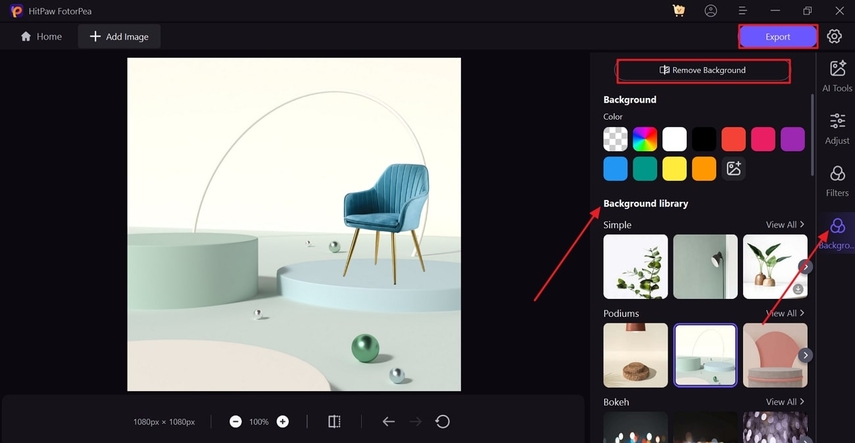
Step 5. Remove the Background and Download the Picture
From the same screen, choose the “Background” tool and click the “Remove Background.” When the background is extracted, add the suitable one from the “Background Library,” and once done, pick the “Export” button to download your furniture picture.
Conclusion
Mastering furniture product photography is essential for creating compelling visuals that attract customers. From choosing the right angles to selecting the best tool to edit its pictures, everything plays a crucial role. This is why this guide has provided the top 5 best tools to enhance pictures. Among all, HitPaw FotorPea stands out the most as it offers various filter options and even lets you add a studio background to your pictures.


 HitPaw Edimakor
 HitPaw VikPea (Video Enhancer)
 HitPaw Univd (Video Converter)


Share this article:
Select the product rating:
Daniel Walker
Editor-in-Chief
This post was written by Editor Daniel Walker whose passion lies in bridging the gap between cutting-edge technology and everyday creativity. The content he created inspires the audience to embrace digital tools confidently.
View all ArticlesLeave a Comment
Create your review for HitPaw articles