Best Tips & Tricks for Cloudy Day Photography in Various Scenes
Cloudy days are usually avoided since they seem to be dull, but they are actually ideal for most types of photographs. Nevertheless, it is hard to shoot on cloudy days since the light can seem flat and low contrast. This article will provide all the necessary camera settings, tips, and ways to enhance your cloudy day photos. With these tips, you can master cloudy photography and expand your creativity to produce striking images in any weather.
Part 1. Why Photographers Value Cloudy Photoshoot
Photographers often cherish the cloudy days as they provide a unique lighting environment that sunny conditions cannot replicate. Learn more about why photography in cloudy weather is better in the following:
1. Soft Diffused Light: Your pictures get that natural soft box effect with no harsh shadows and lighting, giving a unique look.

2. Enhanced Texture & Detail: With cloudy weather, the textures and intricate details of your overcast photos pop out more.
3. Rich & Balanced Colors: Cloudy weather reduces the glare and saturated extremes on your models and makes their colors appear more true-to-life.
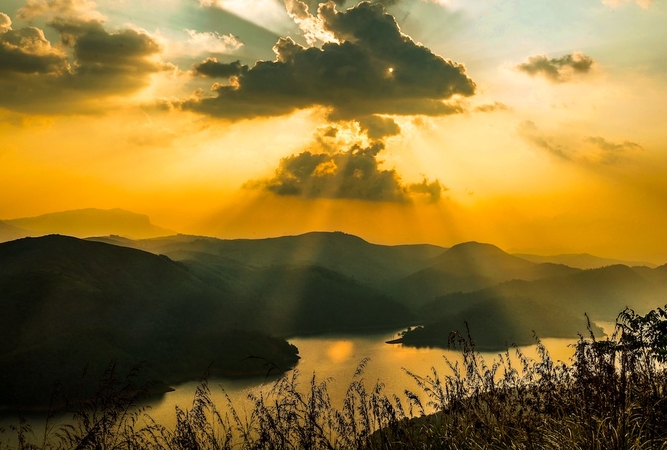
4. Moody Pictures: If you want to add depth and emotions to your picture, photographers prioritize cloudy weather for a serene effect.
5. Consistent Lighting: Unlike the harsh glare of sunny days, overcast conditions provide stable light for great photography sessions.
Part 2. Ideal Camera Settings for Cloudy Day Photography
When the opportunity for overcast day photography arises, you need to be prepared for it, meaning adjusting the right camera settings, given as follows:
1. Camera Settings for Cloudy Day Photography in Auto Mode
On Auto Mode, the camera will automatically adjust to cloudy weather, with an increased exposure of +0.3 to +0.1 and white balance to ‘cloudy.’ Also, the scene modes and image stabilization are turned on to capture soft and natural photos.

2. Manual Cloudy Day Photography Settings
Users can manually adjust the cloudy day photography settings, like setting the shutter speed to 1/500 sec to 1/250/sec. Moreover, set the aperture to f/2.8 or f/4, ISO to 400 to 800, and the lens to 18-24mm.
3. Best Camera Settings for Overcast Day Photography
The ISO setting for cloudy days should be from 400 to 800 and a large aperture of f/2.8 to f/5.6 to soften the background. For creative results, use 1/125s or 1/10s to 2s shutter speeds with single-point AF to get sharp portraits.
4. Mobile Photography Settings for Cloudy Day Photos
Your smartphone's camera settings for overcast day should have a manual temperature set around 5500 K-6500 K for natural colors. Also, turn the HDR mode on, use a lower ISO (50 to 200), and avoid using flash to capture dramatic pictures.
Part 3. 7 Tips for Capturing Stunning Cloudy Day Photos
To get the perfect cloudy pictures, professional and amateur photographers can follow these tips and tricks:
Tip 1. Creative Composition Techniques
Shoot during "blue hour" for cool, dramatic tones. Frame subjects against cloudy skies for minimalist backdrops. Capture reflections in puddles or lakes to double the visual impact.

Tip 2. Take Advantage of the Soft, Diffused Lighting
With a perfect natural soft box, capture beautiful and even lighting portraits, macro photography, and detailed shots. Unlike sunny days, cloudy weather reveals subtle textures and provides illumination for various product photography.
Tip 3. Enhance Mood with Filters
Attach a polarizing filter to reduce glare and boost cloud contrast. For long exposures, use an ND filter (e.g., ND64) to achieve silky sky effects. Experiment with graduated ND filters to balance bright skies and dark landscapes.

Tip 4. Capture the Mood with Overcast Skies
Cloudy weather is perfect for taking moody and atmospheric shots with the dramatic cloud formation and the diffused sky. Also, a black-and-white conversion works well with such weather as it emphasizes textures and contrast of fog and a misty feel.
Tip 5. Use a Tripod to Avoid Camera Shake
A tripod is a lifesaver when you want to capture steady and long-exposure images on a cloudy day. You can shoot at lower ISOs while still maintaining sharpness in a landscape or architectural photoshoot.
Tip 6. Enhance Post-Processing to Add Contrast
Photography in cloudy weather benefits users with the post-processing to add contrast to their pictures. Try gently increasing the contrast, but don’t overdo it, and adjust the tone curve to bring back some depth to the shadows and highlights.
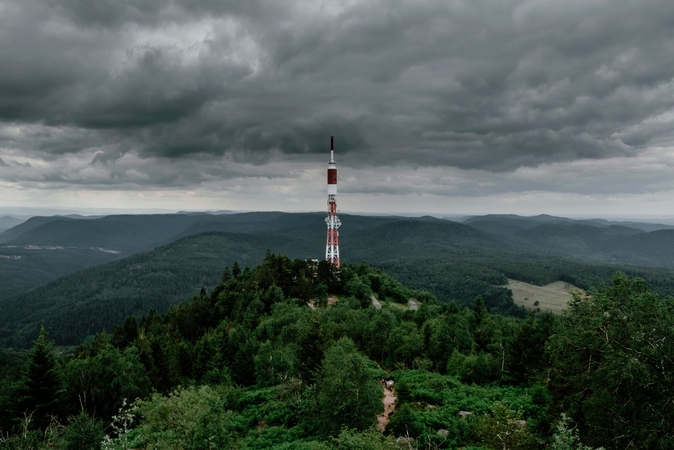
Tip 7. Experiment with Reflections on Wet Surfaces
On rainy, overcast days, you can get fantastic opportunities to capture reflection photography. The best time is after the rainfall when you try shooting from low angles to maximize the reflection effect of puddles, buildings, trees, and more.
Part 4. Enhance Cloudy Day Pics with HitPaw FotorPea
Say you manage to capture some overcast photos, but due to thick clouds, the pictures' colors appear dull and muted. Moreover, the shadows might look minimal and pale compared to sunny day pictures. Despite the various advantages of cloudy day photography, the low light levels can sometimes lead to motion blur and low-quality images. Therefore, try using HitPaw FotorPea, an AI enhancer that can turn any image into professional quality.
Key Features
1. The Denoise model can help reduces image noise from low-light cloudy images and improve their visuals.
2. You can upscale overcast and dull cloudy images up to 8K with the Upscale Model.
3. This tool can enhance the blur or out-of-focus cloudy picture’s quality without losing any of the intricate details.
4. With its Colorize Model, restore the cloud day image’s color and details by emphasizing on the contrast and luminance.
5. Users can easily improve cloud pictures in batches with this AI enhancer software.
How to Enhance Cloudy Day Pictures with FotorPea
Let's dive into the following comprehensive steps and understand how HitPaw FotorPea improves cloudy images:
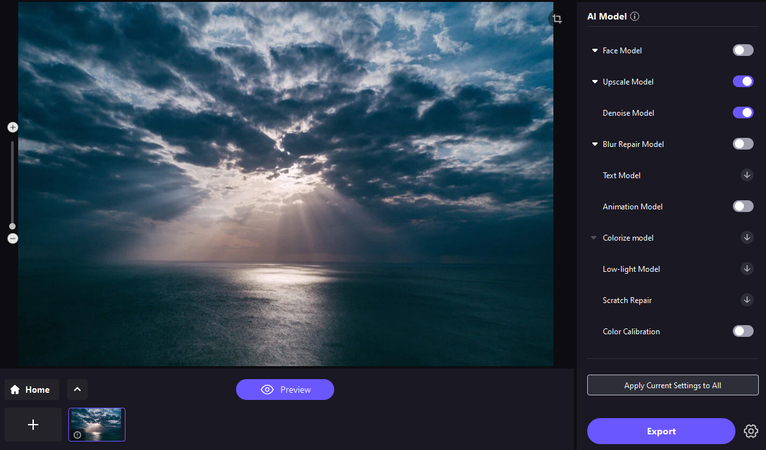
Step 1. Access AI Enhancer Tool in FotorPeaOpen the main interface of the software, click the “Enhance Photos Now” button, and import the cloudy picture.

Step 2. Choose AI Models and Start the Enhancement Process
After that, toggle the “Upscale Model” and “Denoise Model” from the left “AI Model” panel. When the desired settings are selected, hit the “Preview” button to start the process.
Step 3. Preview and Export Picture
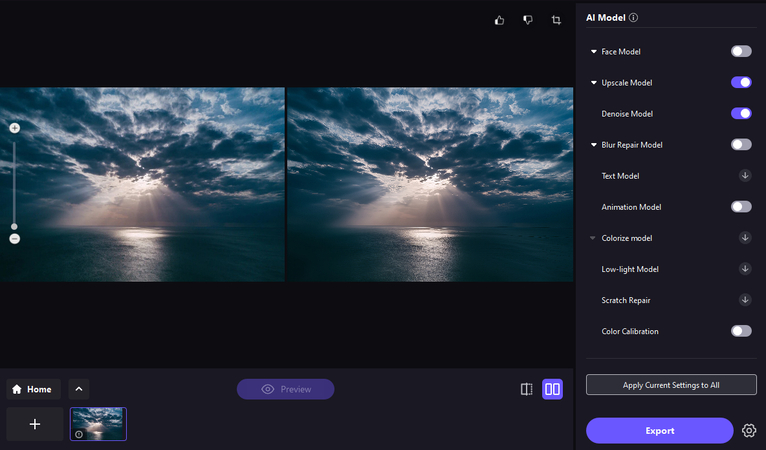
Once the process is over, review the side-by-side comparison and press the “Export” button.
Part 5. FAQs on Cloudy Day Photography
Q1. What are the best ISO settings for cloudy day photography?
A1. The best ISO setting for cloudy days is between 100 and 400 as it maintains clean images, but you can push it to 800-1600 on smartphones. Moreover, if you're using a tripod, try the 100-200 ISO to get that perfect still pictures.
Q2. How do I avoid noise in cloudy day photoshoots?
A2. You can shoot photos in RAW, in the lowest ISO setting (100-400), and camera mounted to a tripod to get the best noise-free shots. Enable the in-camera noise reduction for JPEG and use enhancer tools to clean up later.
Q3. What is the best camera setting for overcast day photography?
A3.
For an overcast photoshoot, use these settings:
1. ISO: 100-400 for balanced images
2. Aperture: f/2.8–f/5.6 for portraits; f/8–f/11 for landscapes
3. Shutter Speed: Adjust according to light and motion
4. Exposure: +0.3 to +1.0 EV to prevent underexposed images
Q4. How can I enhance my cloudy photos with editing tools?
A4. You can use the most efficient and advanced AI image enhancer tool, HitPaw FotorPea, for various enhancement features, like denoiser and more upscale models. Furthermore, users can change the aspect ratio from 1X to 8X and apply different modes from high-quality to high-fidelity.
Q5. What’s the ideal aperture for cloudy day photography to avoid overexposure?
A5. When taking photos on a cloudy day, your typical aperture settings should be wider, like f/2.8-5.6. to let in more light. Users can use an ND filter if they want to shoot a long exposure in bright overcast.
Conclusion
Lastly, cloudy weather is perfect for shooting dramatic and atmospheric photos, and that is why photographers recommend it. To achieve the same mood, this article provides you with the best camera settings and guidelines on lovely cloudy day photography. In case your pictures come out blurry and low-quality, you can use HitPaw FotorPea to enhance them with AI technology.


 HitPaw Edimakor
 HitPaw VikPea (Video Enhancer)
 HitPaw Univd (Video Converter)



Share this article:
Select the product rating:
Daniel Walker
Editor-in-Chief
This post was written by Editor Daniel Walker whose passion lies in bridging the gap between cutting-edge technology and everyday creativity. The content he created inspires the audience to embrace digital tools confidently.
View all ArticlesLeave a Comment
Create your review for HitPaw articles