How to Combine Videos on Mac: A Simple Step-by-Step Guide
Merging videos is one of the most basic and widely used video-editing skills. Whether you're creating a family montage video or stitching together clips for content creation, you need video merging skills. And it's quite easy to merge videos, too. For Mac users, the options are endless. However, they all vary in terms of quality of output, ease of use, performance, and many other factors. So, you must find the right tool for combining videos on a Mac. We've created this guide to help everyone from casual users to enthusiasts merge videos on Mac effortlessly and produce outstanding-quality projects.
Part 1: The Best Way to Merge Videos on Mac
HitPaw Univd for Mac is one of the few video editing tools that does not automatically transcode imported videos during merging. This makes the merging process radically faster, allowing Mac users to merge several videos, including feature-length movies, in a matter of minutes. HitPaw Univd is built for speed. On Mac, it delivers the highest performance.

HitPaw Univd - All-in-one Video Solutions for Win & Mac
Secure Verified. 254,145 people have downloaded it.
- Deep Customization: You can trim, split, cut, rearrange, and do more with videos before merging them.
- Broad Format Support: With over 1000 formats supported, Univd can merge videos in any format.
- Lossless Merging: Univd merges videos without losing their original video quality.
- Quality Standardization: Combining videos with different quality? Built-in AI upscaling turns bad video into 4K.
- 120X Faster: Univd uses hardware acceleration to merge videos faster than any other tool.
- Easy to Use: Unlike dedicated video editors, Univd is remarkably easy to use, even for beginners.
Secure Verified. 254,145 people have downloaded it.
How to Merge Videos on Mac with HitPaw Univd
- Step 1: Access Merge Tool
- Step 2: Prepare Videos for Combining
- Step 3: Choose Output Format for Video
- Step 4: Combine Videos on MacBook
- Step 5: Access Merged Video
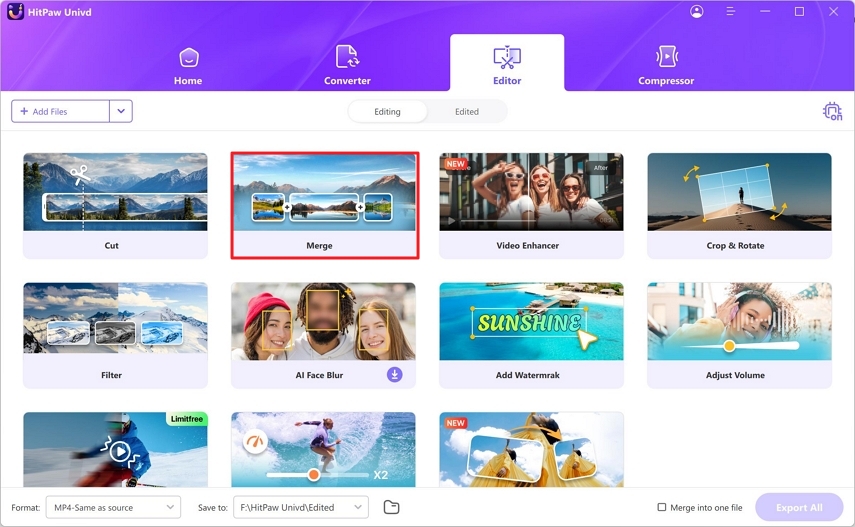
Install and launch HitPaw Univd for Mac on your desktop >> Go to 'Editor' >> Choose 'Merge' feature.
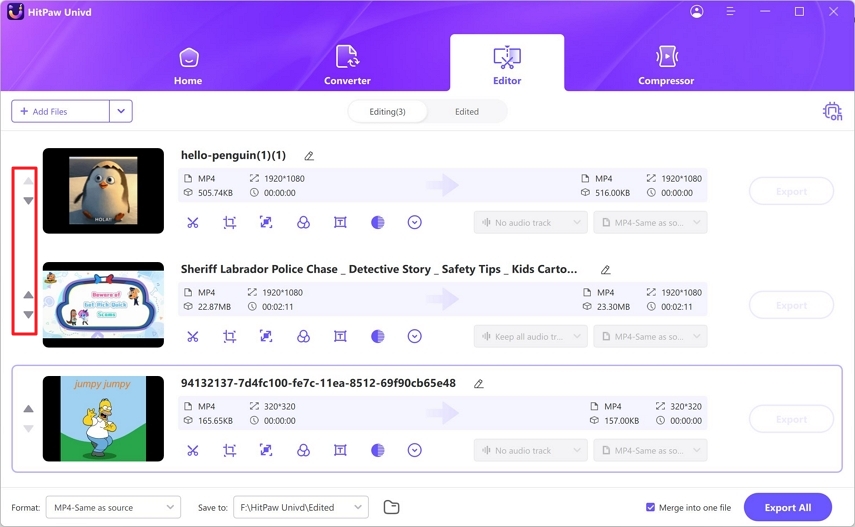
Drag and drop the videos into the tool or use the 'Add Files' button >> Use the 'Triangle' buttons on the left to rearrange the videos in the sequence of their merging.
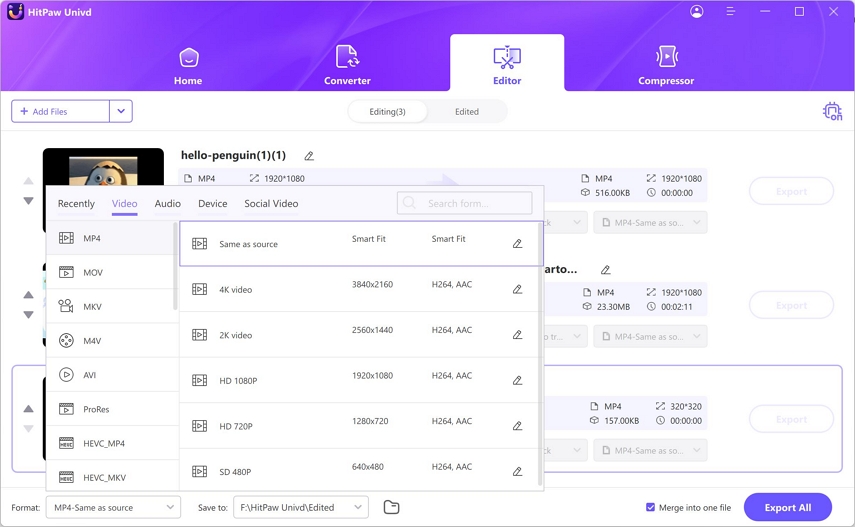
Click on the 'Format' menu at the bottom left corner >> Go to the 'Video' tab in the popup window >> Choose a video format for the merged video.
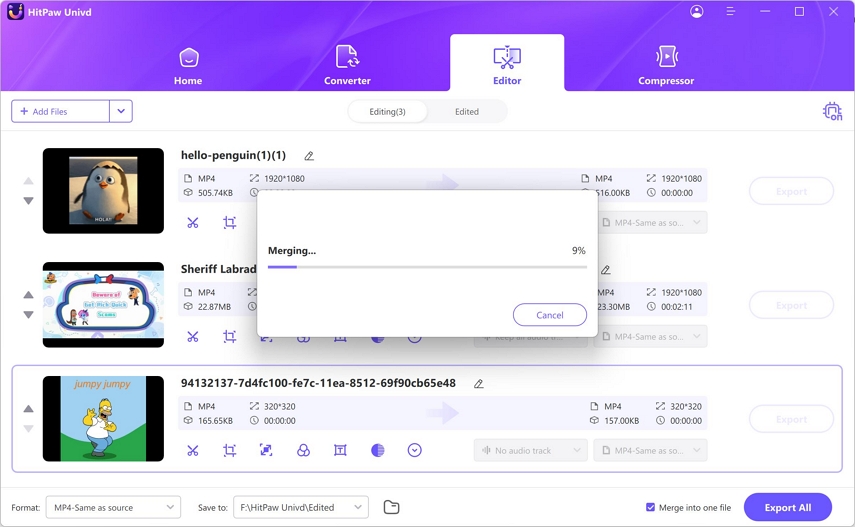
Click on 'Merge into one file' >> Hit 'Export all.'
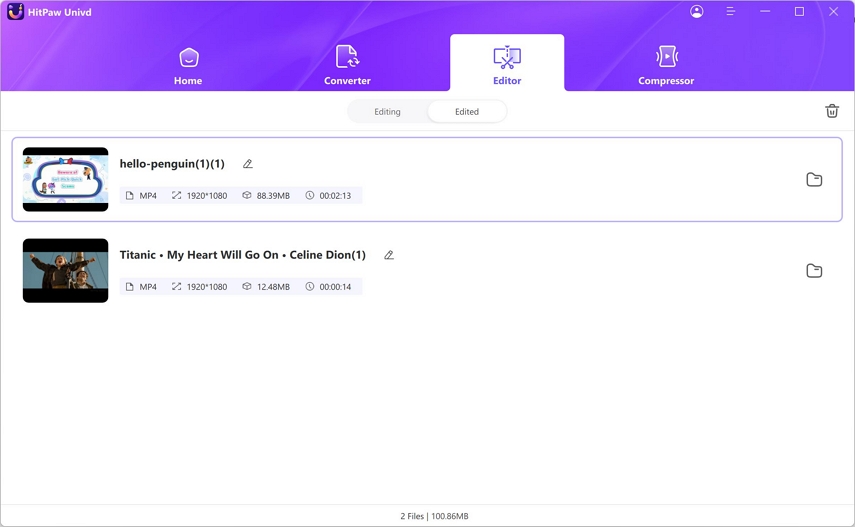
After the completion of merging, head over to the 'Edited' tab to access merged videos.
Pros
- Enhance low-quality videos
- Merge thousands of clips into a single video
- Industry-leading output quality at 8K
- Beginner-friendly user interface
- Available for Mac and Windows
Cons
- Premium tool
Part 2: How to Merge Video on Mac with iMovie
iMovie is probably the first tool to pop up in the minds of Mac users for working with videos. It's an excellent tool with all the basic features that users need. iMovie can perform video merging but not in the traditional sense that other video editing tools do, so you'll have to work around its limitations. Nevertheless, iMovie's strengths continue to be that it's intuitive, user-friendly, and optimized for Mac devices. So, follow our detailed tutorial and you should be just fine.
Guide on iMovie Combine Clips on Mac
- Step 1: Start New Project
- Step 2: Import Videos for Merging
- Step 3: Sequence the Clips in iMovie
- Step 4: Combine Clips on Mac via iMovie
Launch iMovie >> Click 'File' in the toolbar >> Choose 'New Project'.
Click 'File' >> Hover over the 'Import' button to reveal import options >> Click 'Movie' to select and add videos to the tool.
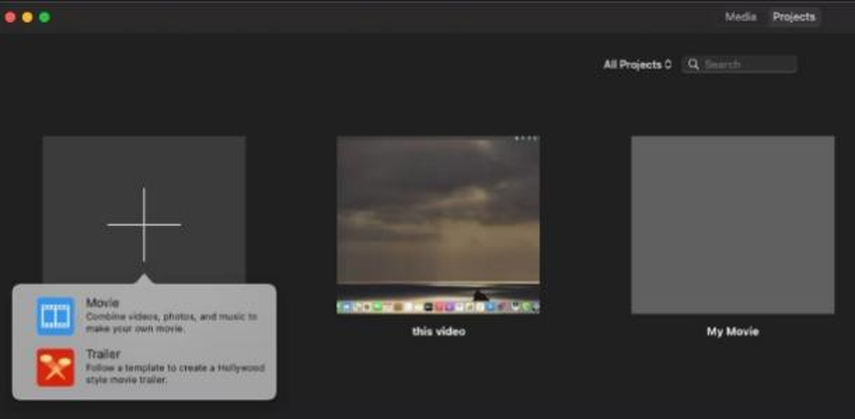
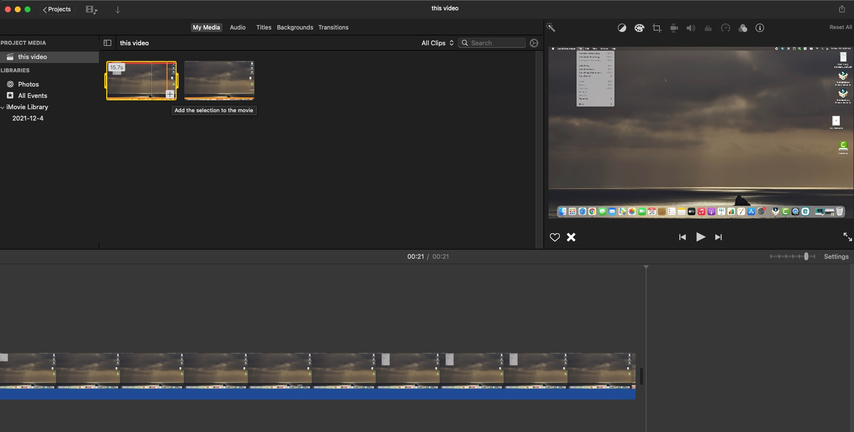
Drag the imported videos to the timeline >> Arrange them in the order of their appearance in the merged video >> Use Preview to see the outcome before merging.
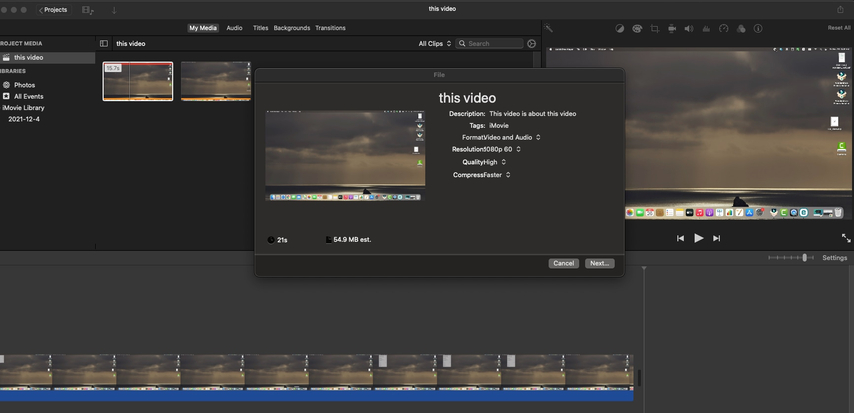
Go to 'File' >> Navigate to 'Share' >> Choose 'File' to save the merged video onto your desktop.
Pros
- Free and preinstalled on all Macs
- User-friendly and intuitive
- Basic editing tools
Cons
- Lacks advanced features
- Mac-only
Part 3: How to Merge Video with QuickTime Player on Mac
It's surprising that Apple has two different tools capable of merging videos on Mac. QuickTime Player, which is an excellent tool for playing audio and video on Mac, doubles up as a video editing tool for basic editing purposes. Video merging is one of the features in its toolkit. It can also trim, splice, cut, rearrange, and other basic editing functions. However, it's far from a full-fledged video editor, but that's not a problem for merging videos, at which it excels. QuickTime Player is even capable of converting videos to other formats after merging the videos, which is a huge plus.
Guide to Merge Videos with QuickTime Player on Mac
- Step 1: Open Video File in QuickTime
- Step 2: Add Videos and Organize Them
- Step 3: Merge Videos in QuickTime
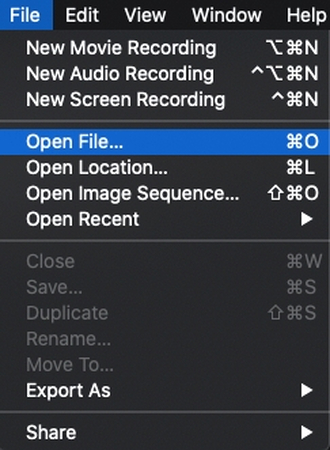
Launch QuickTime Player >> Click on 'File' in the toolbar at the top >> Choose 'Open File' >> Select and start playing it in QuickTime Player.
Drag other videos you'd like to merge with the first video directly onto the timeline in the QuickTime Player's playback screen >> Rearrange all videos in the sequence you would like them in the merged video.

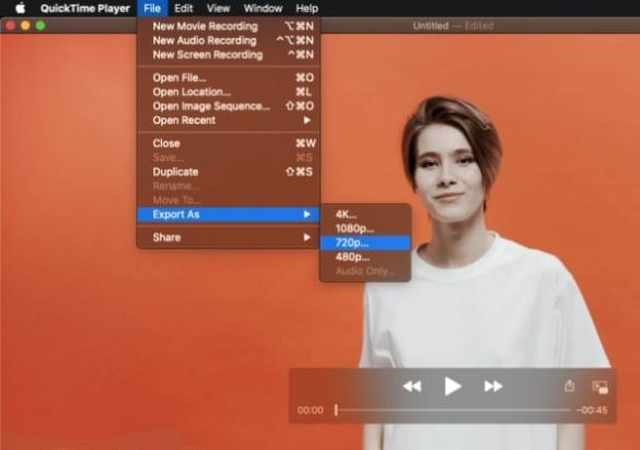
Go to 'File' >> Hover over 'Export As' >> Choose the appropriate resolution as per your needs >> Enter output video name >> Click 'Save.'
Pros
- Free and preloaded
- Easy to use
- Fast and intuitive
- Beginner-friendly
Cons
- Lacks advanced editing features
- Supports limited video formats
FAQs on Combining Videos on Mac
Q1. Can I combine videos with different formats (MP4, MOV, etc.)?
A1. It's an intermediate-level feature that isn't available in most basic video editing tools. HitPaw Univd is one of the few tools with support for multi-format video merging. Univd also allows users to export the merged video to another format entirely or keep it in the format of one of the original videos used in the merge.
Q2. How do I merge videos without re-encoding or losing quality on Mac?
A2. Most professional video editors transcode videos the moment you import them, which affects their quality and size. So, you need a video editing tool that does not automatically transcode videos during import. HitPaw Univd is one of the best such tools. It edits and merges videos in their original format without transcoding, ensuring 100% quality retention.
Q3. How do I combine two videos into one on a Mac?
A3.
You can apply the 3 methods we mentioned above. For combine two videos into one on a Mac using HitPaw Univd, you only need 3 steps:
Q4. How do I merge videos in VLC for Mac?
A4.
To merge videos in VLC on a Mac, the process isn't super straightforward since VLC is more of a media player than a video editor-but there is a way to do it if the videos are of the same format and codec. Here's how you can do it:
Conclusion
Putting videos together on a Mac is easy once you know how. You can take short clips and turn them into one full video to share with family, friends, or even online audiences. It doesn't matter if you're new to editing or have done it before; the easy methods we've discussed will have you creating your first video mergers in a matter of seconds. For best results, choose HitPaw Univd. It's fast, powerful, and offers advanced video editing tools with built-in AI. Check it out today.


 HitPaw VoicePea
  HitPaw VikPea (Video Enhancer)
 HitPaw FotorPea


Share this article:
Select the product rating:
Daniel Walker
Editor-in-Chief
This post was written by Editor Daniel Walker whose passion lies in bridging the gap between cutting-edge technology and everyday creativity. The content he created inspires the audience to embrace digital tools confidently.
View all ArticlesLeave a Comment
Create your review for HitPaw articles