How to Fix Blurry Instagram Video and Upload High Quality Videos
High-quality video increases engagement, yet many creators are puzzled when crisp footage turns soft or pixelated after posting. From capture and editing mistakes to platform compression choices, small errors can have big visual consequences. This guide explains the common causes of Instagram video blurry and offers practical, step-by-step fixes, covering capture and export settings as well as upload techniques to help you improve Instagram video quality and keep your posts looking crisp and professional.
Part 1. Why Does Instagram Ruin Video Quality?
Seeing your carefully edited clip turn fuzzy after posting is frustrating. Instagram applies automated compression, re-encoding, and format checks that can degrade detail, color, and sharpness. Knowing the main causes helps you avoid common mistakes and gives you a clear path to fix Instagram video quality before you hit publish.
- Automatic compression to save bandwidth and speed up loading.
- Unsupported or nonoptimal codecs that trigger re-encoding.
- Excessive file size or very high bitrates leading to aggressive downscaling.
- Wrong resolution or aspect ratio causing Instagram to crop and re-encode.
- Uploading over a poor mobile network that triggers lower-quality transfer.
- Repeated in-app editing or filters that force Instagram to reprocess your video.
- Low source quality or heavy prior compression from downloads or exports.
- Unsupported frame rates or audio settings that cause transcoding artifacts.
Part 2. What Is the Best Settings For High Instagram Video Quality?
Preparing your video with Instagram-friendly settings before uploading is the single best way to preserve detail and color. Exporting with the recommended format, resolution, frame rate, and bitrate reduces the chance Instagram will re-encode aggressively and helps you upload high quality videos on Instagram consistently.
- Format: MP4 (H.264 codec + AAC audio)
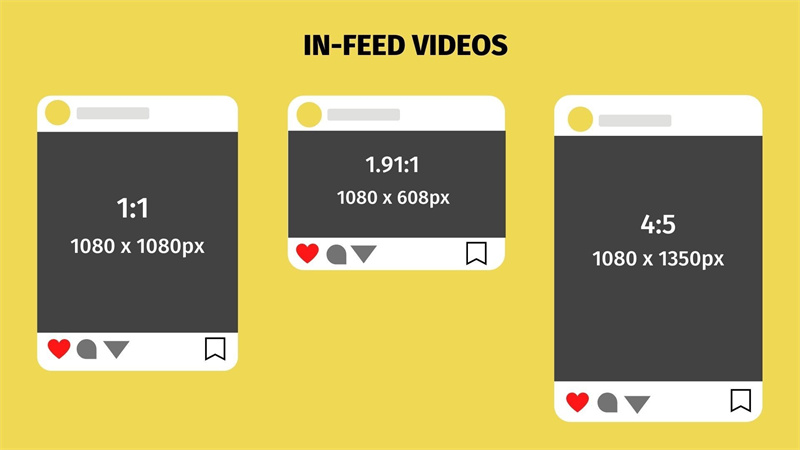
- Resolution: 1080 x 1350 (portrait) for feed, 1080 x 1920 for Stories/Reels
- Frame rate: 30 fps
- Bitrate: 3,500 - 5,000 kbps for Reels/Stories or slightly higher for longer Instagram Video content (up to 60 minutes for some accounts).
- Instagram Video Length: 3 seconds - 60 mins.
- Aspect Ratios: 1:1 (square), 4:5 (portrait), or 16:9 (landscape) for Feeds; 9:16 (vertical full screen) for Reels/Stories
Part 3. How to Enhance Your Video For Best Quality Before Uploading to Instagram?
Prepping footage with an AI enhancer can dramatically reduce the chance your uploads look soft or noisy. Tools like HitPaw VikPea use machine learning to upscale, denoise, and repair compression damage so you can upload high quality videos on Instagram with confidence. Preparing files in advance is one of the most reliable ways to fix Instagram video quality and avoid Instagram videos blurry after uploading.
- AI video upscaler that enlarges footage while preserving natural details.
- Advanced denoising removes compression artifacts to restore clean, smooth video.
- Sharpening module enhances edges and textures without introducing halo artifacts.
- Color correction and balance for vivid, accurate tones across all clips.
- Batch processing and GPU acceleration for fast upscale of multiple videos.
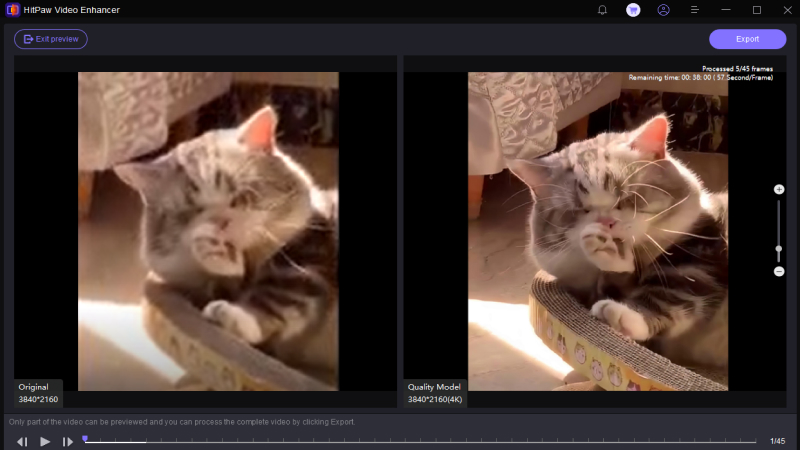
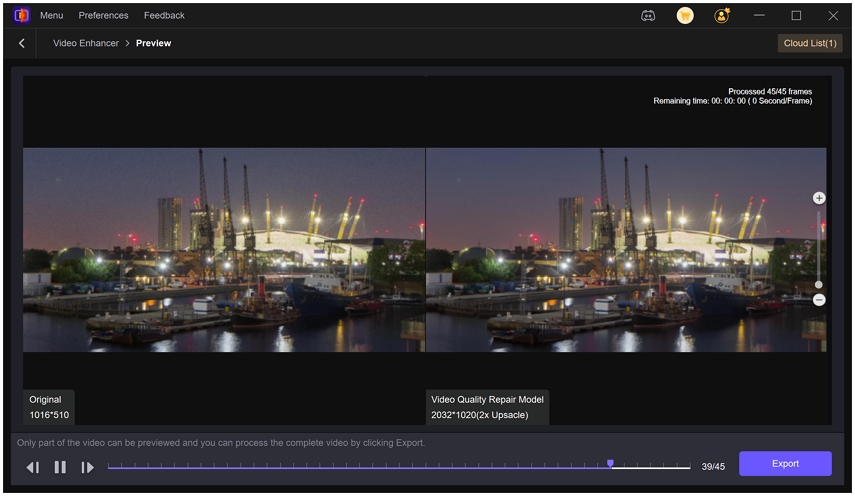
- Preview with side by side comparison to verify improvements before exporting.
- Multiple AI models tailored for portraits, general scenes, and repair tasks.
- Export up to 4K or 8K resolution to future-proof your content for other platforms.
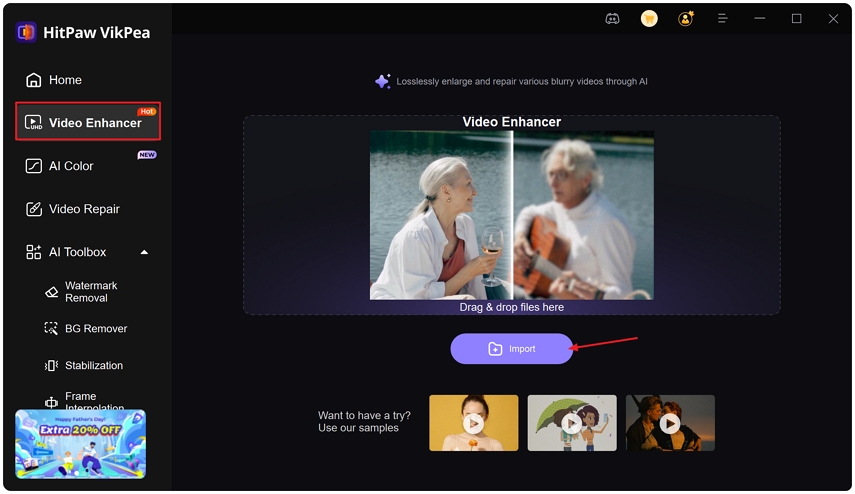
Step 1.Download and launch HitPaw VikPea on your computer. Import your video by clicking Choose file or drag and drop the file into the program.

Step 2.Pick an AI model that fits your footage. Options include General Model, Sharpen Model, Portrait Model, Video Quality Repair Model and more.

Step 3.In Export Settings select your target resolution; VikPea supports upscaling to 4K or 8K. Preview the result with a side by side comparison, then click Export to save the enhanced file to your computer.

Tip: For blurry downloaded Instagram videos, you can also use VikPea to denoise, sharpen, and remove compression artifacts before sharing or reuploading.
Part 4. How to Upload High Quality Videos to Instagram?
Even with perfect source files, upload methods matter. Instagram can still compress or lower quality if your settings or connection cause a poor transfer. Follow these steps to minimize Instagram re-encoding and learn how to fix blurry videos on Instagram caused by upload issues.
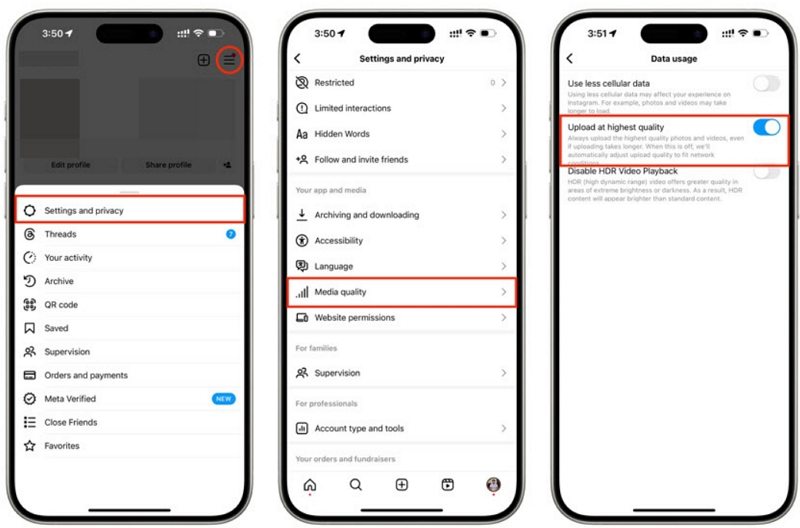
1. Enable "High Quality Uploads" in Instagram Settings
Turning on Instagram's highest upload option forces the app to attempt less aggressive compression when network conditions allow. This setting is essential for anyone who wants to upload high quality videos on Instagram regularly, especially creators who depend on detail and color accuracy.
- Open Instagram and go to your profile.
- Tap the menu icon, then Settings.
- Navigate to Data usage and media quality.
- Turn on Upload at highest quality or Upload high quality videos, depending on the account UI.
- Confirm while on Wi-Fi to preserve mobile data and ensure the best transfer.
2. Upload Over a Stable Wi-Fi Connection
Uploading over a fast, stable Wi-Fi connection greatly reduces the chance Instagram will downscale your video. Mobile networks often throttle or fallback to lower-quality transfer, which can lead to Instagram videos blurry after uploading even when your source file is perfect.
- Always prefer a reliable Wi-Fi network for large uploads.
- If Wi-Fi is unavailable, ensure a strong 5G connection and avoid network congestion.
- Upload during off-peak hours if your home network is shared or slow.
3. Avoid Over-Editing Inside the Instagram App
Instagram editing tools are convenient but can trigger additional re-encoding that degrades sharpness and alters color. To improve Instagram video quality, complete creative edits in an external editor and upload the final exported file, keeping in-app edits minimal.
- Finish color grading, stabilization, and titles in a dedicated video editor.
- Use Instagram tools only for minor additions like stickers or captions if needed.
- Export using the best settings listed earlier to reduce re-encoding impact.
4. Avoid File Compression During Transfer
Transferring videos between devices using apps that compress files will degrade quality before you even upload. To prevent loss, use direct transfer methods that preserve the original file bit rate and resolution so you do not need to figure out how to fix Instagram video quality later.
- Use AirDrop, USB transfer, or cloud storage with original file preservation.
- Avoid messaging apps or social platforms that automatically shrink videos.
- Check the transferred file on the destination device to confirm resolution and bitrate intact.
FAQs about Improving Instagram Videos Quality
Instagram often downscales high resolutions like 4K to 1080p or lower for stories, causing apparent blur; export at recommended settings before uploading.
Most reels are effectively limited to 1080p; Instagram may accept higher uploads but will commonly compress to 1080p for delivery.
The practical highest quality commonly delivered is 1080p with 3,500 to 5,000 kbps; long videos may vary by account and device.
Yes, Instagram applies platform limits and compression. Upload settings, network conditions, and in-app edits influence final quality.
Conclusion
Improving Instagram video quality is a combination of good export settings, careful pre-upload preparation, and smart upload habits. Start by exporting MP4 H.264 files at recommended resolutions and bitrates, use AI enhancers like HitPaw VikPea to restore and upscale when needed, enable high quality uploads in Instagram, and upload over stable Wi-Fi to avoid Instagram videos blurry after uploading. Follow these steps to consistently improve Instagram video quality and keep your content looking sharp and professional.
Leave a Comment
Create your review for HitPaw articles


