How to Denoise Video in After Effects in 2026
Noise and grain can easily ruin an otherwise perfect shot. Whether caused by low light conditions, high ISO settings, or camera sensor limitations, these unwanted visual specks reduce your footage’s clarity and professional look. For video editors working in Adobe After Effects, there are built-in tools and powerful plugins to reduce or remove noise. In this guide, we’ll walk through how to denoise video in After Effects, the best plugins for the job, and an easier AI-powered alternative for faster, high-quality results.
Part 1. How to Remove Noise or Grain from Videos in After Effects
After Effects is a professional video editing software developed by Adobe, it is widely used by video editors, animators, and motion graphic artists to create and edit visual effects, animations, and compositing for film, television, and digital media.
One of the features of After Effects is the ability to remove unwanted noise from the footage, a process known as "de-noising."
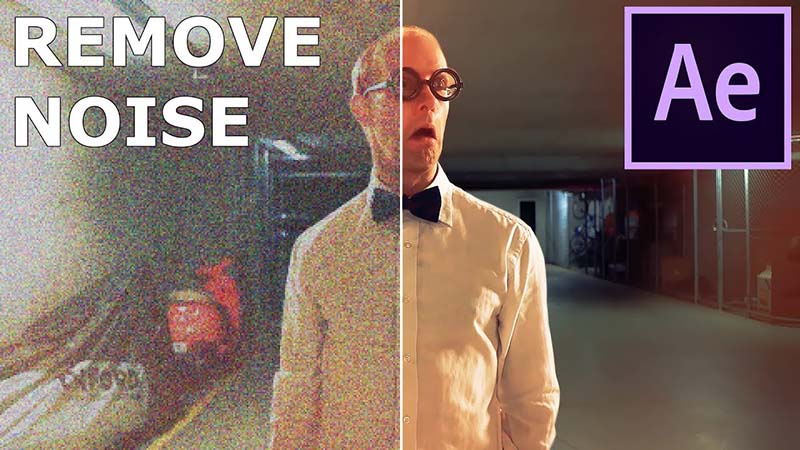
Here Are the Steps Remove Noise in After Effects:
Tips: If you need to denoise video effortlessly and get a high-quality outcome, just take use of AI video denoiser for free try!
-
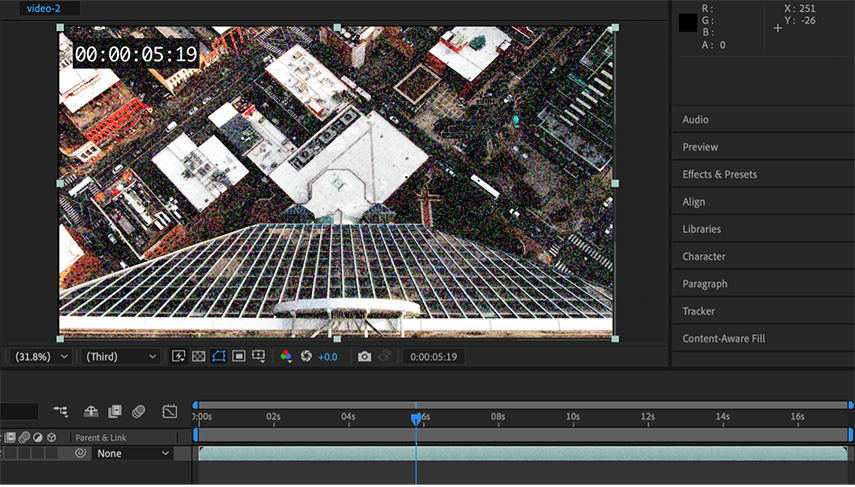
Step 1. Begin by opening your After Effects project and selecting the specific clip on the timeline that you want to remove noise from.

-
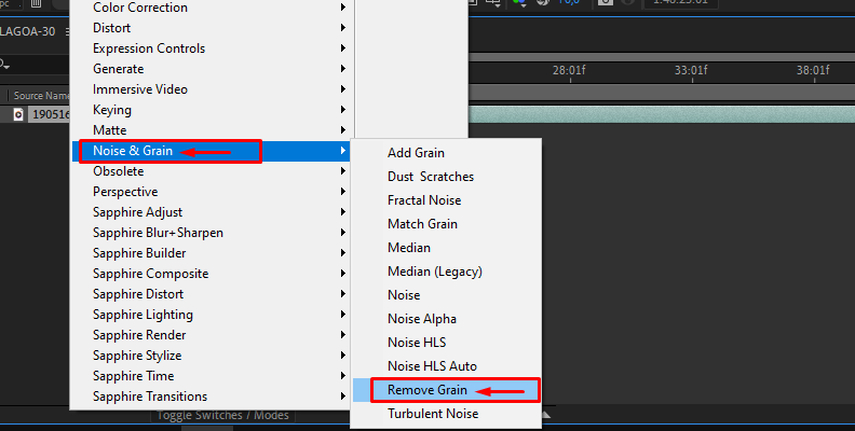
Step 2. Navigate to the "Effect" menu, then select "Noise and Grain" and apply the "Remove Grain" effect.

-
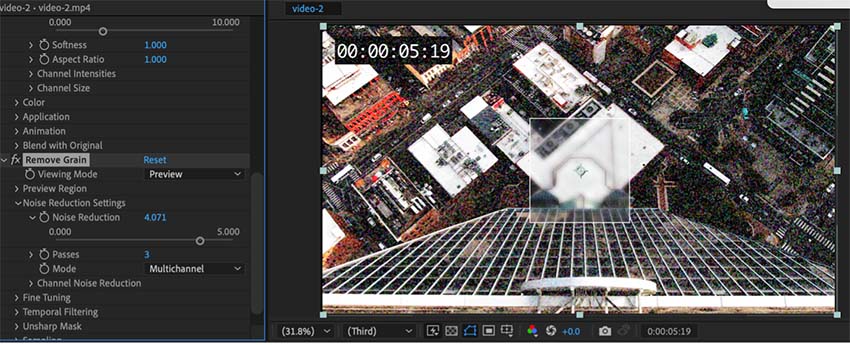
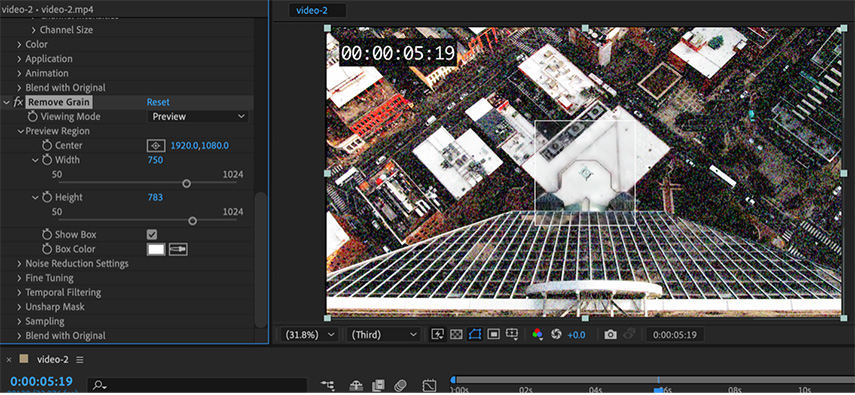
Step 3. Before making adjustments to the noise reduction settings, it is important to set your preview region size. This will allow you to preview the final image with the effect applied and ensure that the effect is only applied to the intended area of the image.

-
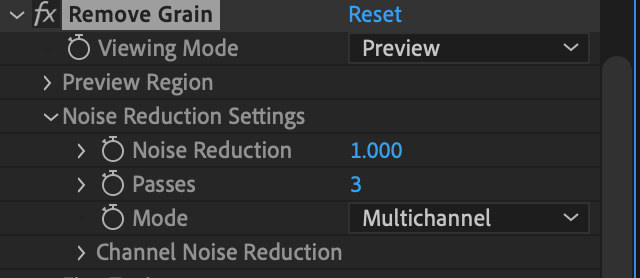
Step 4. Adjust the noise reduction settings until you have a good balance of noise reduction and image clarity.

-
Step 5. Keep an eye on the visual preview box, and use it to check different areas of the image as you make changes. Remember to move the preview box to different parts of the image to check the effect in different areas.
Part 2. Noise Reduction Plug-ins to Use With After Effects
While After Effects’ built-in tools can handle basic noise reduction, third-party plugins can deliver more advanced control and superior results. Here are two top options for After Effects users.
1. Plug-in That Ships with After Effect
The Remove Grain plug-in that ships with After Effects is a valuable tool for removing noise and grain from the footage. It is the denoiser plugin After Effects free download.
The ability to work per channel and fine-tune the settings provides a high level of control over the final result. The Match Grain and Add Grain settings are similar to Remove Grain, making it easy to match the grain of different shots.
One of the biggest advantages of this plug-in is its per-channel degraining option, which allows for a more targeted and precise noise reduction. The robustness of the plug-ins also makes it a reliable option for dealing with noisy footage.
Pros
- Per channel degraining option
- Robust and reliable
- Match Grain and Add Grain settings are similar to Remove Grain
- A fine level of control
Cons
- Processor-intensive
- Small preview window
2. Denoise video After Effects using ABSoft Neat Video
ABSoft Neat Video Pro is a video filter designed to reduce visible noise and grain in digital video footage. It supports a wide range of host applications, including After Effects denoiser, Adobe Premiere Pro, Apple Final Cut Pro, Sony Vegas Pro, and Pinnacle Studio.
One of the key features of Neat Video Pro is its ability to work in 8-bit, 16-bit, and 32-bit float color space in After Effects, which enables fast and efficient noise reduction. The tool is also able to handle very fine grain really well without blurring the detail, and it's an impressive tool.

Pros
- Reduces visible noise and grain in digital video footage
- Compatible with a wide range of host applications, including Adobe After Effects, Adobe Premiere Pro, Apple Final Cut Pro, Sony Vegas Pro, and Pinnacle Studio
- Able to work in 8-bit, 16-bit, and 32-bit float color space in After Effects
Cons
- Few options in the Effect Controls panel in After Effects
- Users may need to click the Options link to access the full interface
Part 3. Best Video Denoiser Alternative to After Effects for Crystal-Clear Video
HitPaw VikPea positions itself as a fast, user-friendly alternative to After Effects when your main goal is noise reduction and clarity enhancement. Built around AI-driven models, VikPea lets creators remove grain, reduce compression artifacts, and sharpen footage without wrestling with complex compositing timelines. Whether you work on smartphone clips, vlogs, or compressed downloads, HitPaw VikPea streamlines the denoise workflow so you get crystal-clear results quickly while preserving natural detail and color.
- AI-powered denoise removes grain while preserving fine detail and natural textures.
- One-click auto denoise for fast results without complex settings or technical knowledge.
- Adjustable denoise strength slider gives precise control over noise removal intensity.
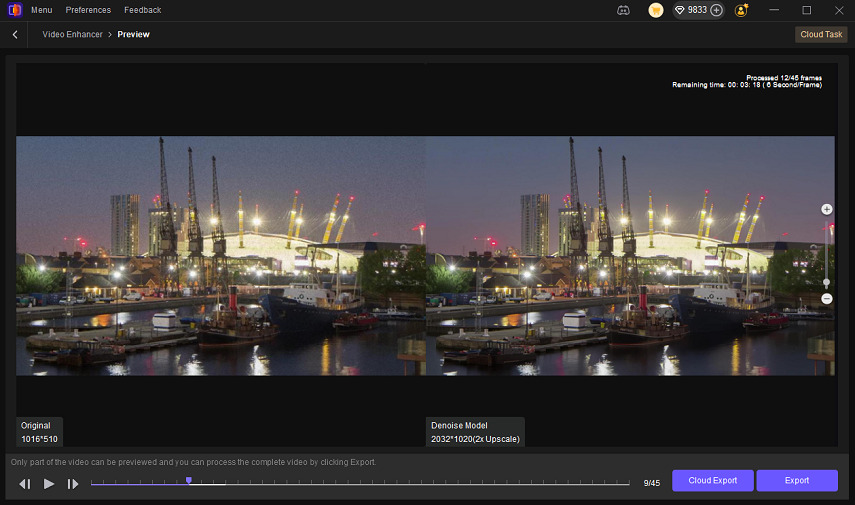
- Preview comparison mode shows side-by-side before and after to verify improvements.
- Batch processing exports multiple denoised videos simultaneously to save time.
- Supports wide range of input formats and maintains original resolution and frame rate.
- Sharpen and decompression modules enhance clarity and recover compressed footage details.
How to Denoise Video with HitPaw VikPea
-
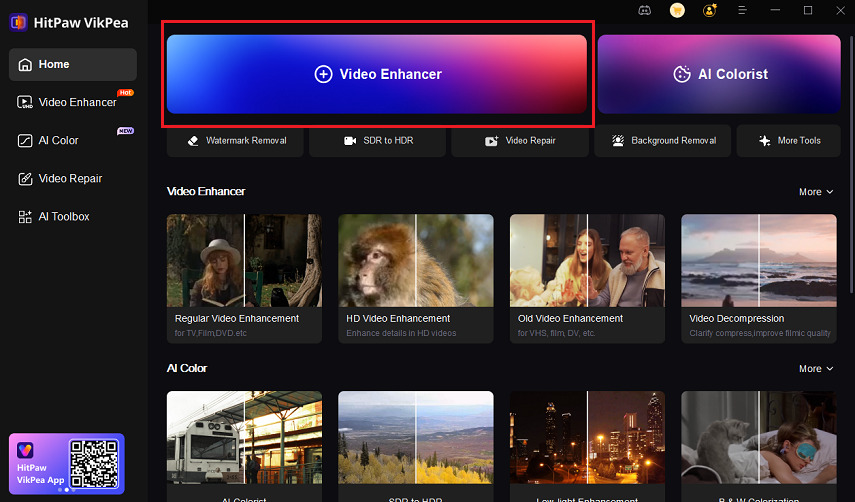
Step 1. Download and launch HitPaw VikPea on your computer. From the main interface choose Video Enhancer and import your clip, or drag the video into the Video Enhancer workspace from the Home tab.

-
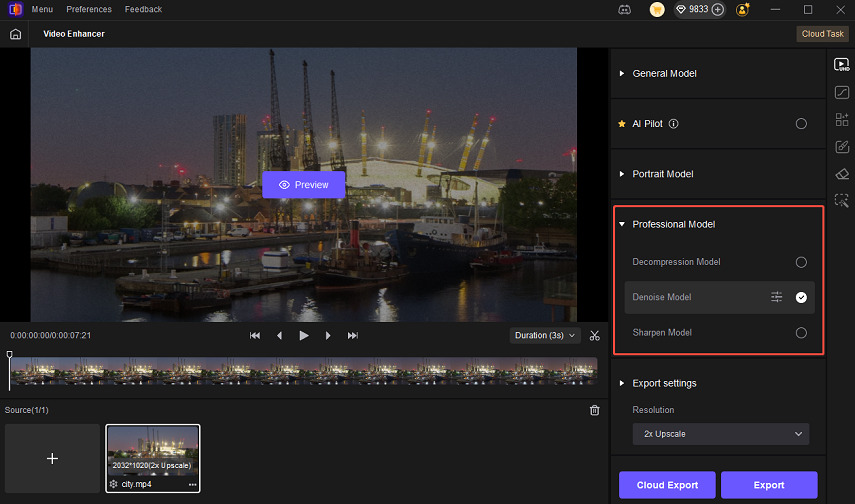
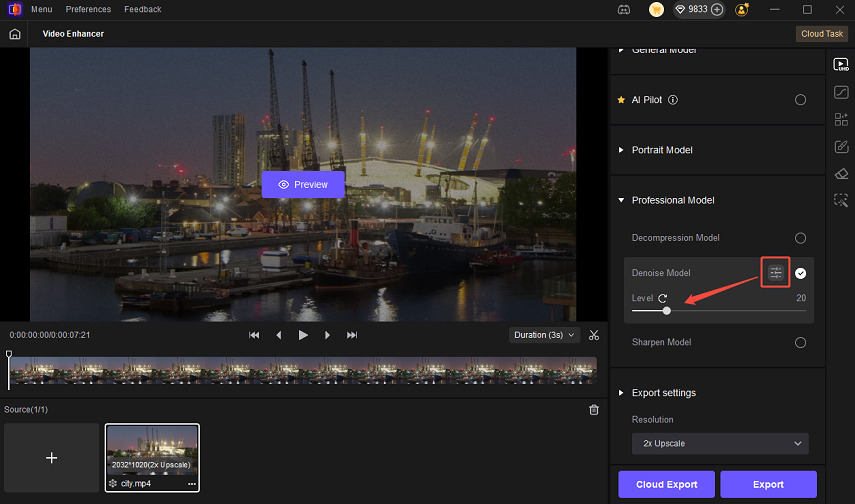
Step 2. After your video appears in the workspace, open the module list and select the Professional Model. You will see tools such as Denoise, Sharpen, and Decompression available for advanced enhancement.

-
Step 3. Select the Denoise Model to enable noise reduction. For instant results choose One-Click Auto Processing so the software analyzes and applies an optimal denoise effect. For manual control select Custom Processing and move the denoise strength slider to increase or decrease the amount of noise removal.

-
Step 4. Use the Preview function to compare the original and denoised footage side-by-side. When you are satisfied with the result, click Export or Cloud Export to save the cleaned, crystal-clear video to your device.

Learn More about HitPaw VikPea
Part 4. FAQs of Denoising After Effects
Q1. Can You DeNoise Audio in After Effects?
A1. Yes, it is possible to de-noise audio in After Effects. Audio noise reduction After Effects has built-in audio effects that can be used to reduce noise and improve the overall quality of audio recordings. The "Adaptive Noise Reduction" effect can be used to reduce background noise in audio recordings. This effect uses an algorithm to analyze the audio and remove unwanted noise while preserving the original audio.
Q2. Why Is My Footage So Grainy?
A2.
There are several reasons why footage may appear grainy:
Conclusion
Denoising video in After Effects is possible with both built-in tools and professional-grade plugins. The Remove Grain effect works for simple fixes, while Neat Video provides superior control and quality. However, if you’re looking for a faster, AI-powered solution without the After Effects complexity, HitPaw VikPea offers excellent noise removal and quality enhancement in just a few clicks. Whether you’re a professional editor or a casual creator, choosing the right tool will help you produce clean, high-quality videos every time.



 HitPaw Edimakor
 HitPaw Watermark Remover
  HitPaw VikPea (Video Enhancer)


Share this article:
Select the product rating:
Daniel Walker
Editor-in-Chief
This post was written by Editor Daniel Walker whose passion lies in bridging the gap between cutting-edge technology and everyday creativity. The content he created inspires audience to embrace digital tools confidently.
View all ArticlesLeave a Comment
Create your review for HitPaw articles