How to Remove Mosaic or Censored Parts from a Video/Picture
Trying to get rid of the annoying mosaic from a funny video clip or a hilarious meme? Is it possible to uncensor an image or a video? Mosaic effects are commonly used in videos and pictures to obscure sensitive or private information. While the primary purpose of mosaicking is to protect privacy, there are instances where removing mosaic might be necessary. This could be for professional reasons, such as restoring original footage for editing purposes or enhancing image quality for forensic analysis.
However, when it comes to removing mosaics from videos or pictures, it's crucial to handle the process ethically and legally, respecting both privacy and intellectual property rights. Whether you're looking to unpixelate the image or reduce a mosaic blur effect, there are effective techniques and tools available to help you achieve the best results. This article will walk you through the step-by-step process of removing mosaics, offering insights into the most reliable tools and methods for clearing up your visuals while staying within ethical boundaries.
Part 1. AI Mosaic Removal to Remove Mosaic Watermark From a Video/Picture
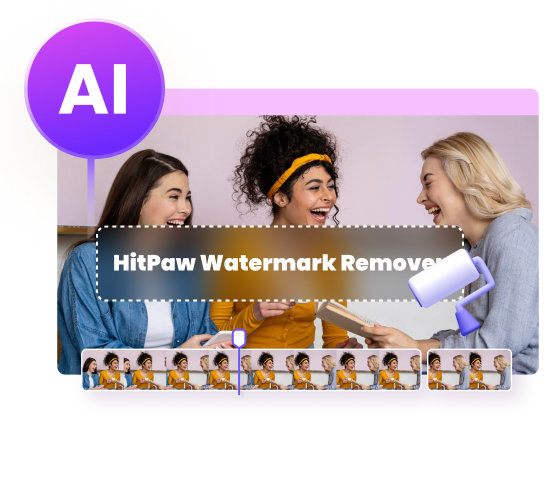
How to remove mosaic blur from video easily and quickly? Advances in artificial intelligence have led to the development of tools that can effectively de-mosaic images and videos. HitPaw Watermark Remover is a great AI tool for beginners and experts alike to remove mosaic blur from videos and pictures automatically without any professional techs! Not only can you remove mosaics, but you can also eliminate watermarks, text, dates, censored sections, and any unwanted objects from photos and videos. Whether you need to unpixelate part of an image or clear specific areas, there are powerful tools available to help you restore clarity and maintain a clean, professional look.

More Features of HitPaw Watermark Remover:
- AI to accurately remove censor, mosaic while preserving the surrounding details
- Provide real-time processing to preview the mosaic removed results instantly
- Customize the level of censorship removal according to your preferences
- Utilizing GPU acceleration can significantly speed up reducing mosaic
- User-friendly interface to apply mosaic removal without a steep learning curve
Achieve clear, high-quality mosaic removal with HitPaw Watermark Remover. No hassle, just results. Try it now!
How to remove mosaic from video/image via HitPaw Watermark Remover
Follow the below steps to demosaic video to use this mosaic remover. It uses machine learning algorithms to predict and reconstruct the obscured content.
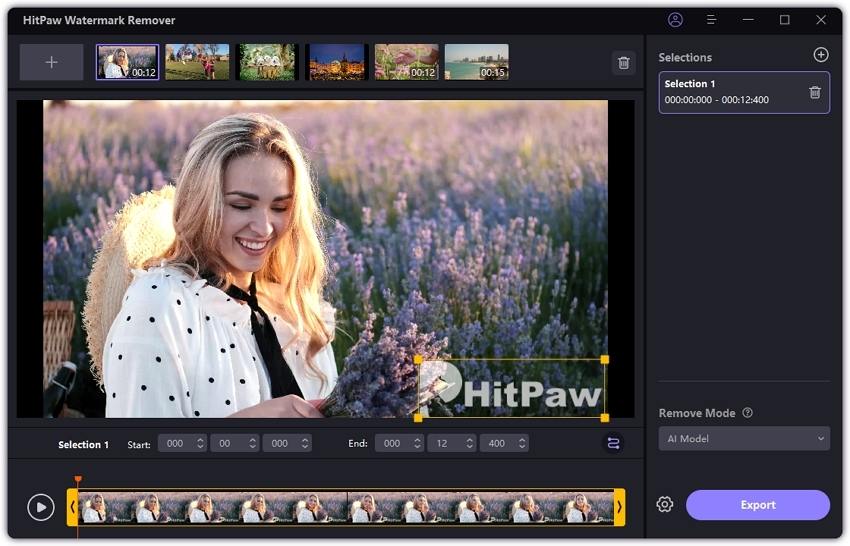
Step 1.Download, install, and launch HitPaw Watermark Remover on your computer. Import the video or image to remove mosaic. This software also supports batch watermarking if you have multiple images or videos.

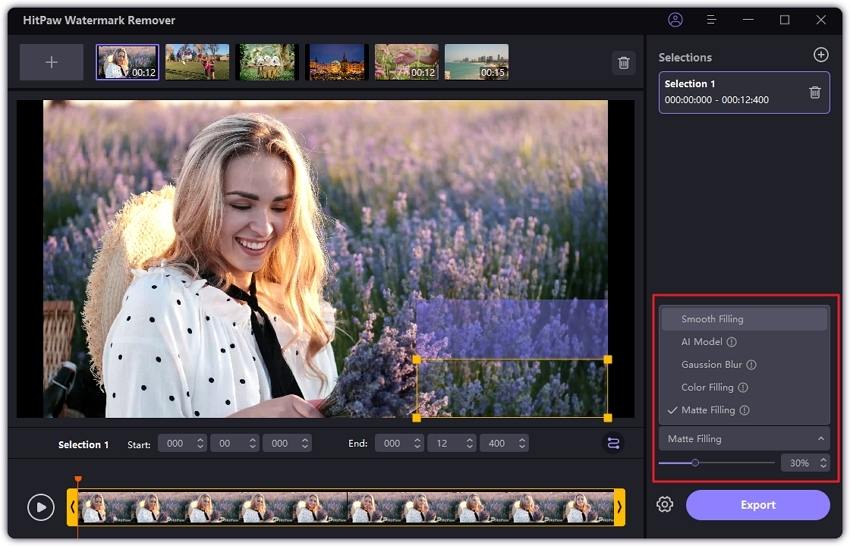
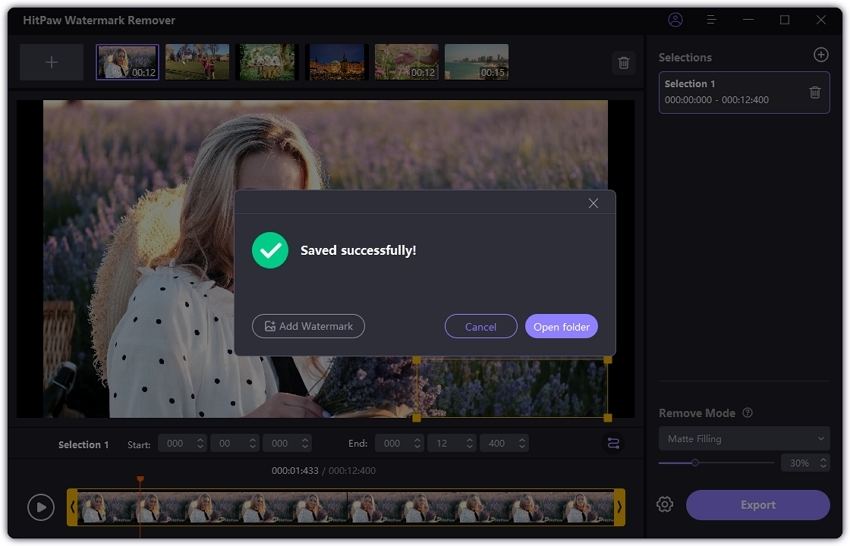
Step 2. For video mosaic removal, you just need to adjust the selection box to select the mosaic you want to remove and select AI model to remove mosaic automatically or can select any other remove mode as per your needs. You can also adjust the length of the progress bar at the bottom of the video to control how much of the mosaic is removed.

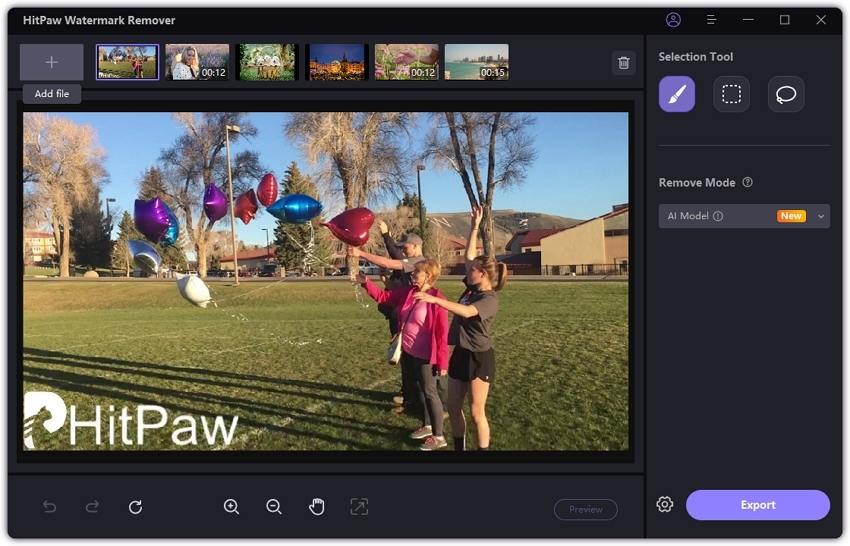
Step 3. For image mosaic removal, in addition to selecting Remove Mode, you can also select the appropriate Selection Tool to accurately capture the watermark or mosaic in the image.

Step 4. Tap the Preview icon to check the removing effect. Lastly, click the Export option to remove watermark and save it.

There you go, the watermark or mosaic removed within a blink. Beginner can use it without any efforts, while experts can use it to save time and remove mosaic from video and picture quickly.
Say goodbye to mosaic blocks with a single click. Download HitPaw Watermark Remover for the easiest solution.
Part 2. How to Remove Mosaic from Picture with Adobe Photoshop
There is countless reducing mosaic software for image or video mosaic editing, but speaking of the professional mosaic removers, Adobe Photoshop must pop up in your mind. However, usually you need to be trained for using it to remove photo mosaic blur if you are not a professional video editor or a designer.
1.Download and install Adobe Photoshop, open it and import or drag your picture to it.
2.Select your mosaic area with tools on the left pane.
3.Hit on Filter on the main menu on top and choose Noise >> Despeckle, and repeat it about 3-10 times (adjust according to different situations)

4.Filter >> Noise >> Reduce Noise, adjust the parameters and preview the blur section. Reference settings:

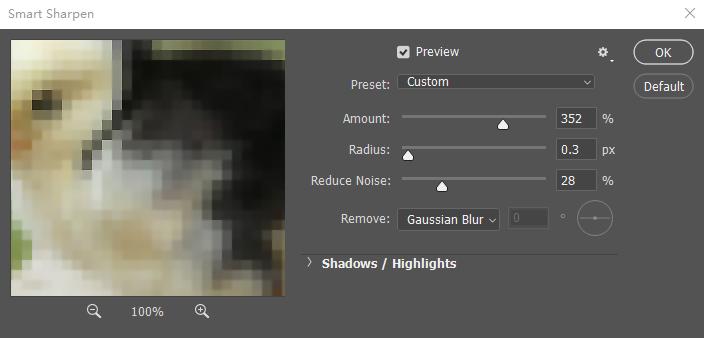
5.Filter >> Sharpen >>Smart Sharpen, increase Amount, decrease Radius.
-

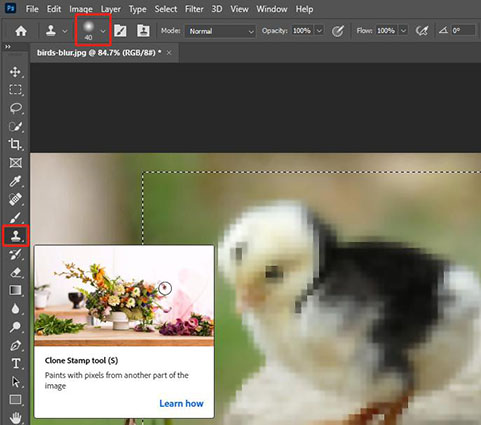
6 Hit on Clone Stamp Tool on the left tool pane, adjust the hardness and size of the pen. Press Alt and pick up the color on the picture, and then loose Alt to click on the mosaic blur area to remove censored parts from photo with Photoshop.
-

7Click File >> Save or Save to. Choose your desired format and destination.
Here is how to remove mosaic censorship from photos with Photoshop. Though Adobe is so powerful that it can almost satisfy all your needs for editing videos or images, it requires related professional skills. If you haven't used Adobe before, you will probably get confused by the complicated interface.
Pros
- Most widely used with most tutorials and plug-ins
- Free operating interface with many shortcut keys
- Able to recognize multiple video or picture formats
Cons
- Not user-friendly: Requires professional skills
- Need a lot of patience for operating and adjusting
Remove mosaic easily—no complex steps like in Photoshop! Download HitPaw Watermark Remover for quick, effortless results.
Part 3. How to Remove Mosaic from Video with Adobe Premiere Pro?
Adobe Premiere Pro does not have a built-in feature specifically designed for removing mosaic or censoring from videos. However, you can use certain tools to manually remove video mosaic blur.
1.Download and install Adobe Premiere Pro, open it and create a new project.
2.Drag or import your video to the timeline.
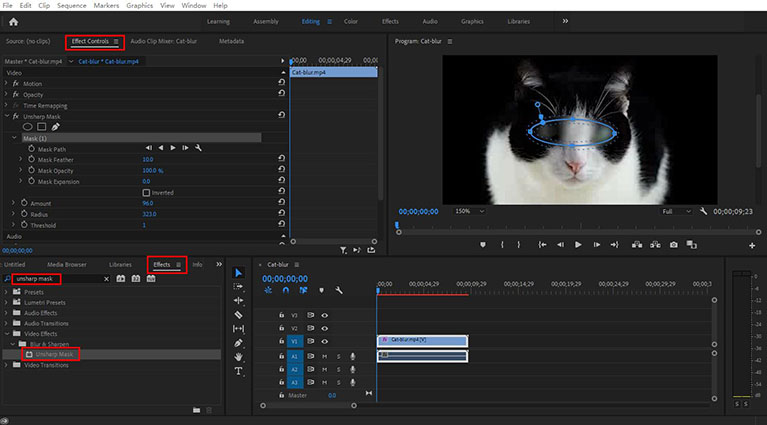
3.Click on the effect on the left bottom tab menu, and search “unsharp mask”, drag and apply the effect on your timeline.
4.Hit on Effect Control on the left top tab, and adjust the parameters to fit your video until you are satisfied.

5.Press Ctrl+M to export your video in your desired format.
Here we are, your video has become clearer than before. This video mosaic app can only be applied for videos that are not deeply pixelized with mosaic.
Pros
- Provide you with professional-grade video editing tools
- Seamless integration with other Adobe Creative Cloud applications
- Supports a wide range of video formats, making it versatile for working with various types of footage.
Cons
- Manually mosaic removal may require patience and precision
- There is still a learning curve for mastering the more advanced features, especially for beginners.
- Adobe Premiere Pro can be expensive for some users compared to one-time purchase alternatives.
Why struggle with Premiere Pro? HitPaw Watermark Remover simplifies mosaic removal in just a few clicks. Download now for a smoother experience!
Part 5. What is Mosaic? Things You Didn't Know about Mosaic
Mosaic, is originally an art of decoration for floors and walls, made of small regular or irregular pieces of colored stone, glass, or ceramic. The mosaic we are talking about today, also called pixelization or mosaic processing, is an image or a video blurred by displaying part or all of it at a markedly lower resolution.

Mosaic is a common sight in our daily lives, and it's easy to see why—it serves crucial purposes in protecting privacy and ensuring security. By blurring specific parts of an image or video, mosaics help safeguard sensitive information such as personal details (name, address, etc.) and even faces. Mosaics are also widely used in censorship, particularly in TV shows and on social media, to prevent the spread of inappropriate or harmful content. For example, you wouldn’t want to accidentally see a graphic scene while enjoying dinner, right? While mosaics play an important role in protecting privacy and maintaining content integrity, there are legitimate cases where mosaic removal is necessary—such as for professional image editing, legal investigations, or other authorized purposes. However, it’s important to always ensure that mosaic removal is done within legal boundaries and with proper consent, as unauthorized removal can violate privacy rights and intellectual property laws.
For fast, high-quality mosaic removal without the learning curve of Photoshop or Premiere Pro, try HitPaw Watermark Remover!
Part 4. Frequently Asked Questions about Mosaic Remover
Q1. Can you remove mosaic from picture?
A1. Yes, there are many mosaic remover programs like HitPaw Watermark remover let you remove the mosaic effect from photos.
Q2. What is the best software to remove mosaic in video?
A2. There are many best tools that you can use to remove mosaic blur from a video, such as Adobe Premiere Pro CC, Sony Vegas, HitPaw Watermark remover and Apple Final Cut Pro.
Q3. Is it illegal to remove mosaic?
A3. The legality of removing a mosaic or censoring from an image or video depends on several factors, including the context, the nature of the content, and the laws of the jurisdiction in which you are located. You should always respect privacy and legal considerations when editing or sharing images.
The Bottom Line
This article shows you several available ways to remove unwanted mosaics from videos or pictures. As a professional video editor or a designer, you'll probably choose the traditional and comprehensive tools like Adobe Premiere Pro and Adobe Photoshop to remove watermark or mosaic. However, if you're a newbie to Adobe, HitPaw Watermark Remover allows you to remove a certain kind of mosaic or watermark in simple clicks.




 HitPaw Edimakor
 HitPaw Univd (Video Converter)
  HitPaw VikPea (Video Enhancer)


Share this article:
Select the product rating:
Daniel Walker
Editor-in-Chief
My passion lies in bridging the gap between cutting-edge technology and everyday creativity. With years of hands-on experience, I create content that not only informs but inspires our audience to embrace digital tools confidently.
View all ArticlesLeave a Comment
Create your review for HitPaw articles