Complete Guide to DJI Mavic Pro Gimbal Replacement
The critical element of the DJI Mavic Pro is its gimbal, which helps to stabilize the camera for smooth video and photos. However, a crash or hard landing can easily damage the gimbal since it is very delicate. Although replacing a broken Mavic Pro gimbal is an advanced repair, it can be done at home with proper tools and patience.
This guide will take you through every step of replacing the gimbal on your Mavic Pro and repairing it, from identifying problems in your gimbal and ordering parts to completely disassembling your drone, replacing the gimbal, and finally recalibrating it.
Part 1. Introduction to DJI Mavic Gimbal Repair
The gimbal for Mavic Pro is one of the most important components of the DJI Mavic Pro and other DJI drones. It is the motorized 3-axis stabilizer that the camera is mounted to, allowing it to smoothly adjust the camera's orientation during flight. The gimbal compensates for vibrations, tilts, and movement of the drone, stabilizing the footage and enabling the Mavic Pro to capture smooth, professional-quality video and photos even while in motion.
Without a properly functioning gimbal, the footage will look shaky and unstable. The gimbal's motors can wear out over time or become damaged in a crash, requiring repair or replacement. While gimbal repair is an advanced process, it can be performed at home with the right tools patience, and by following this guide. Replacing the gimbal will restore your Mavic Pro's stabilization and video capabilities to like-new condition.
Part 2. Why is DJI Mavic Gimbal Not Working?
There are a few common issues that can cause the gimbal on your DJI Mavic Pro to stop working properly:
- Physical damage from crashes or hard landings - The delicate parts of the gimbal are exposed and can easily be knocked out of calibration or alignment in an accident. Collisions can damage the motors, axes, or cables as well.
- Worn out motors - The constant movement and vibration in flight causes wear and tear on the motors over hundreds of hours of use. Motors may stop being able to stabilize footage properly.
- Electrical issues - Faulty wiring connections, short circuits, or electrical damage can cause gimbal stabilization failure.
- Firmware glitches -Bugs in the firmware can sometimes cause gimbal problems, though these are often fixable with calibration.
When the gimbal is not functioning, the footage will be shaky, uneven, and unusable. Stabilization is extremely important for aerial photography, so it is critical to repair or replace a malfunctioning DJI Mavic gimbal to restore proper camera control and video quality.
Part 3. DJI Mavic Pro Gimbal Replacement: Steps to Repair DJI Mavic Pro Gimbal
With care and attention to detail, these steps will help you successfully replace your faulty Mavic Pro gimbal for smooth footage once again:
-
Step 1: Remove Battery and Upper Shell
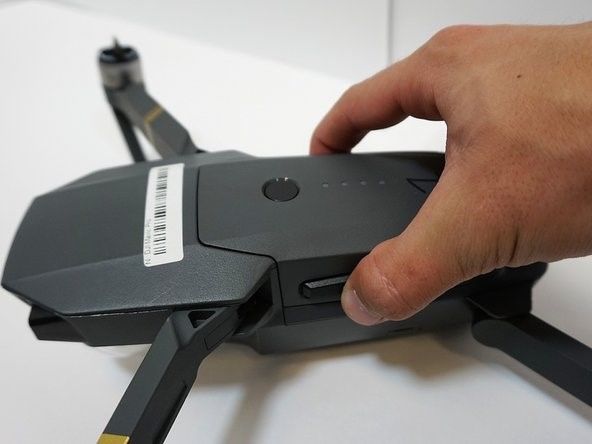
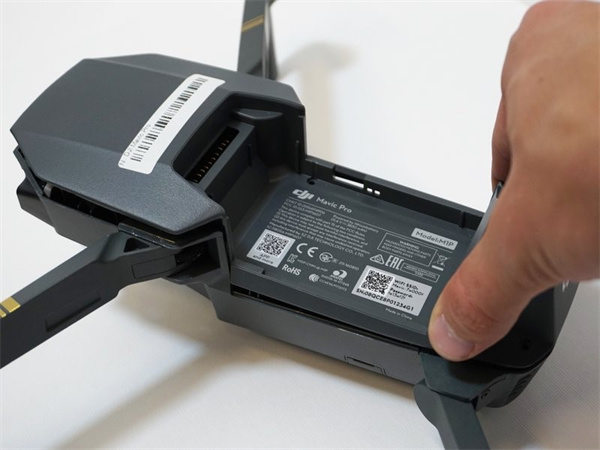
To start the gimbal replacement process, you will need to remove the battery from the drone. Grab both sides of the battery and press the small releasing buttons on the sides to detach it. Set the battery aside carefully.

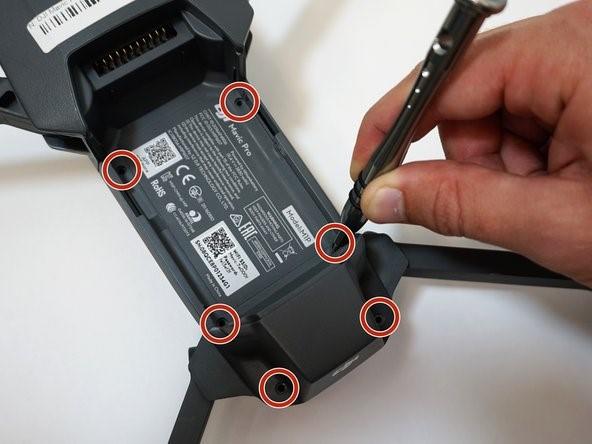
Next, use a Phillips screwdriver to remove the six shell screws holding the upper shell in place, turning each screw counterclockwise to loosen it. Removing the upper shell will allow you access to the interior components.

-
Step 2: Access the Gimbal
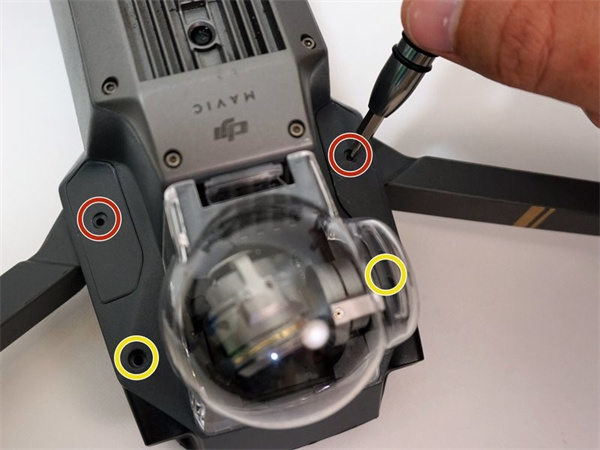
With the battery removed, flip the drone over so the gimbal is facing upwards. You will see two small screws near the gimbal case. Use the screwdriver to remove these screws.

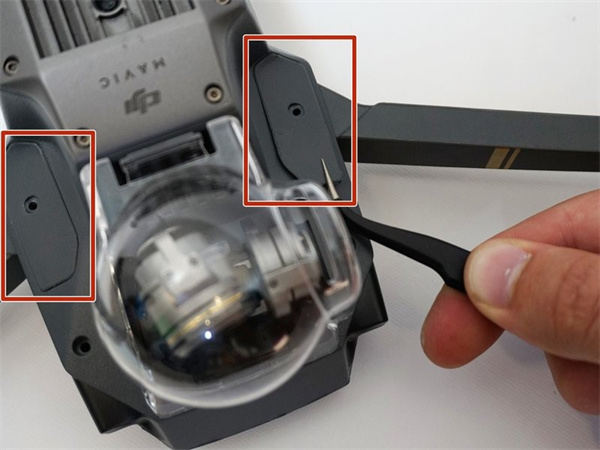
There are also two tiny plastic panel pieces near the gimbal case that you can pry off carefully using tweezers. Removing these panels will reveal another six screws beneath them, which also need to be removed with the screwdriver.

-
Step 3: Detach Cables and Controller
After removing the screws, flip the drone back over so the upper shell is facing up. Take the nylon spudger and gently pry the upper shell off, being careful not to damage the plastic tabs.

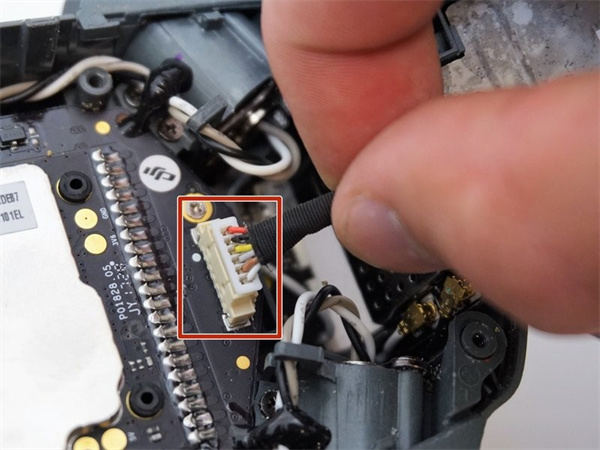
Once detached, look inside for a white connector at the rear and detach it by pulling up on the base. Next, use the screwdriver to detach the front microcontroller board by removing its screw and pulling it away. Also, use the spudger to disconnect the two ZIF cables underneath this controller.

-
Step 4: Remove Gimbal Cover
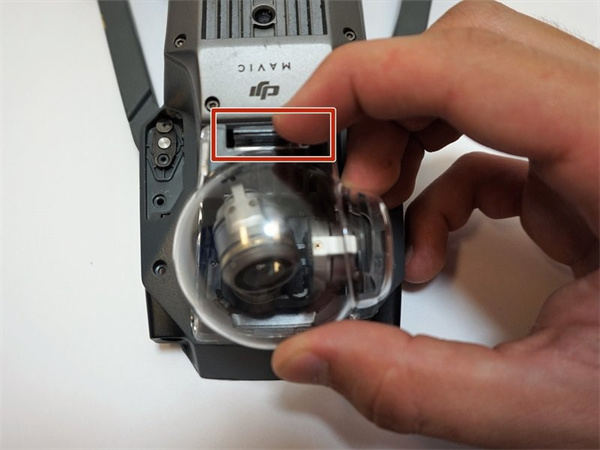
Flip the drone over again so the gimbal is facing upwards. Press the small latch near the gimbal and detach the gimbal cover.

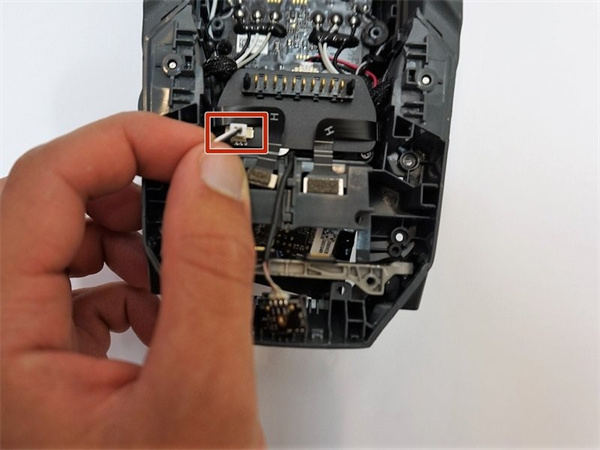
Flip the drone over once more and disconnect the two ZIF cables located behind the gimbal board covers using the spudger. There is also a power cable to detach from the left side of the gimbal board.

-
Step 5: Remove Gimbal
You're almost ready to remove the faulty gimbal. First, use the screwdriver to scrape away any adhesive covering the two gimbal screws.

Once exposed, remove these screws. Also, remove the two front screws carefully. With all screws detached, slowly lift the gimbal/camera assembly out of the drone body.
-
Step 6: Install New Gimbal
To install the replacement gimbal, follow these steps in reverse, taking care to align all screws and connections properly. Reattach all connectors and cables. Refer to your disassembly photos if needed.

-
Step 7: Recalibrate
With the new gimbal installed, power on the drone and run through the full calibration procedures outlined in the DJI manual. Follow the same steps for the DJI Mavic Pro camera replacement.
Part 4. Pro-tip: How To Enhance DJI Shot Videos
The DJI Mavic Pro captures stunning aerial footage, but aggressive flying or shooting in low light can sometimes result in shaky or grainy video. Luckily, there is an easy solution for repairing and enhancing your DJI drone recordings - HitPaw VikPea (formerly HitPaw Video Enhancer).
HitPaw VikPea is an AI-powered video editing tool that can significantly improve the quality of drone footage with just a few clicks.
FeaturesHere are some of the ways HitPaw VikPea can help enhance your DJI Mavic videos:
- Video Repair -HitPaw VikPea uses AI algorithms to fix corrupted, choppy, or glitchy footage and restore damaged videos to pristine quality. This can rescue an otherwise unusable clip.
- Stabilization - Shaky drone videos are smoothed out and stabilized for perfectly steady aerial shots.
- Upscaling -Increase video resolution up to 8K for stunning detail and clarity. AI upscaling sharpens and enhances without losing quality.
- Noise Reduction - Eliminate graininess and discoloration to make dark or low-light videos clearer.
- Colorization - Breathe new life into black & white or faded old footage by adding vivid, realistic color.
-
1.Download and install HitPaw VikPea on your computer.
-
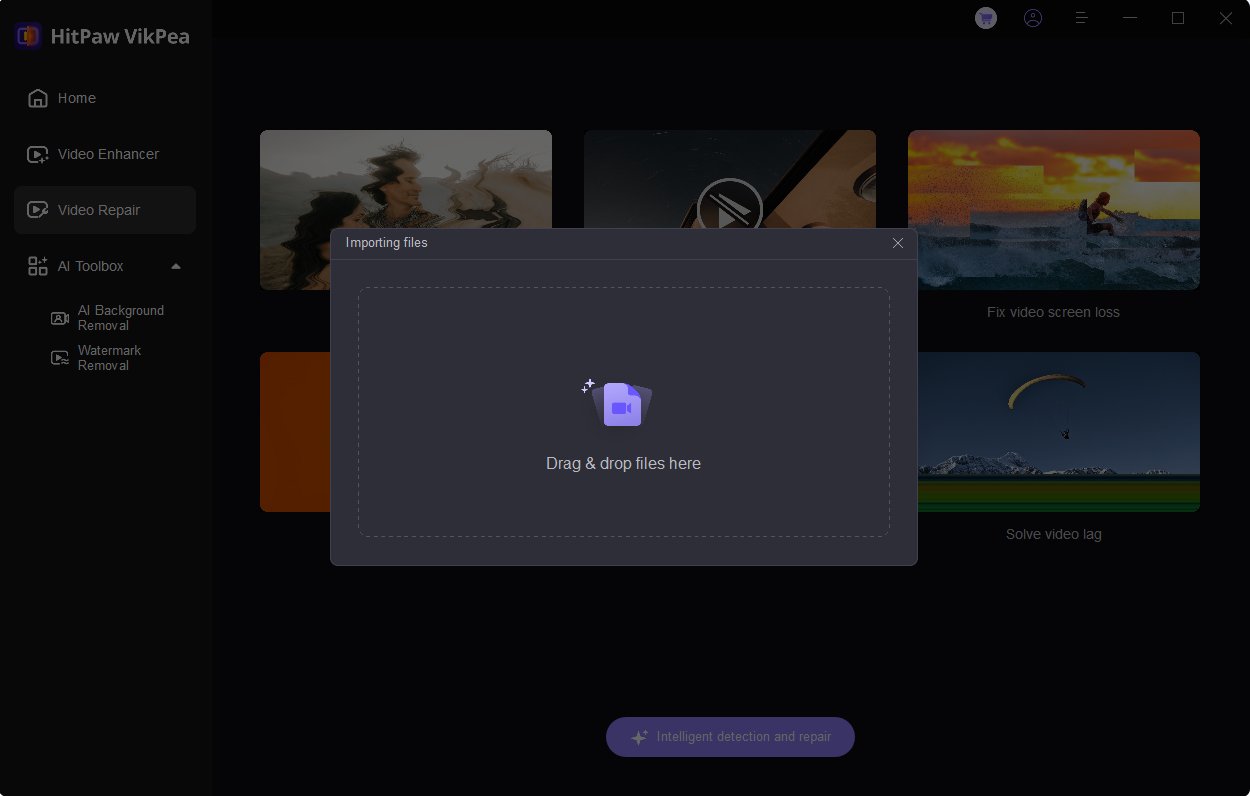
2.Open the program and go to the "Video Repair" module. Select the repair type that matches your footage issues.

-
3.Import your damaged DJI Mavic drone videos into HitPaw VikPea. You can drag and drop files or use the import button.

-
4.With your videos loaded in, click the "Start Repair" button to begin the enhancement process.

-
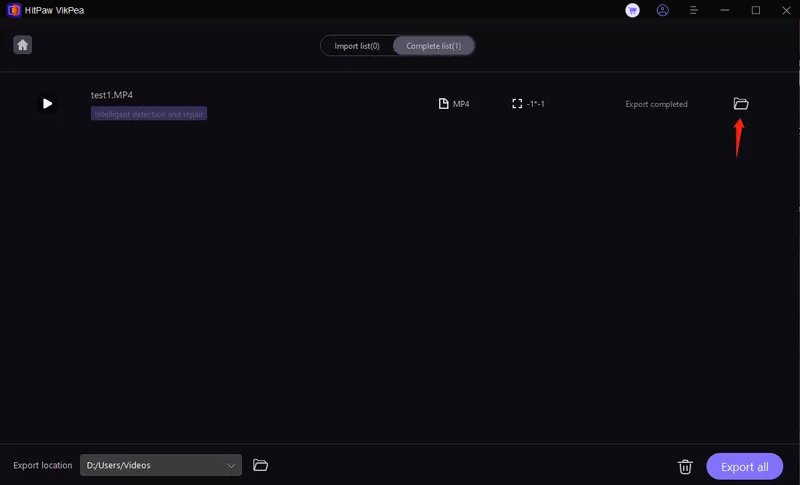
5.HitPaw VikPea will repair the drone footage using AI. Repaired videos will appear in the "Complete" section.

-
6.Finally, export the repaired drone videos by hitting the download or export buttons. Then, view your enhanced, stabilized footage!

Part 5. FAQs of DJI Mavic Pro Gimbal Replacement
Q1. Does DJI gimbal have warranty?
A1. The Osmo Shield service plan is provided by DJI that guarantees gimbal defects or damages not caused by the user for up to one year after purchase. In case it needs repairing or replacement.
Q2. How much does it cost to fix a gimbal on DJI drone?
A2. The cost of replacing a DJI Mavic gimbal typically ranges from $150 to $300, depending on the model. Additionally, repair shops charge for labor, and gimbal parts need to be bought separately. On the other hand, doing it all by yourself saves you some money but requires technical skills.
Q3. Is the DJI Mavic Pro good for photography?
A3. Undoubtedly, the Mavic Pro is among the best drones for photography and videography. These features enable it to take stunning aerial photos and smooth video footage due to its compact size, long flight time, and stabilized 4K camera. Mavic models are preferred by any drone photographer.
Bottom Line
Even though your DJI Mavic Pro’s gimbal has been broken, nothing of this kind implies that you should dispose of your gadget in total despair. You can do a DIY gimbal replacement if you have these tools with appropriate patience and care as explained here. This will make your drone stable again during video recording.
Although advanced repair steps this guide gives step-by-step instructions for swapping out damaged gimbals on an aircraft like yours. Once you have repaired your Mavic Pro back in order, make use of HitPaw VikPea—with AI technology being embedded into it—to enhance aerial footage.







 HitPaw Univd (Video Converter)
  HitPaw Screen Recorder
 HitPaw VikPea (Video Enhancer)
Share this article:
Select the product rating:
Daniel Walker
Editor-in-Chief
This post was written by Editor Daniel Walker whose passion lies in bridging the gap between cutting-edge technology and everyday creativity. The content he created inspires audience to embrace digital tools confidently.
View all ArticlesLeave a Comment
Create your review for HitPaw articles