[2024] Quick Guide: How to Screenshot Video on iPhone
Several reasons demand you to screenshot a video, including the need to save your favorite scene of your favorite movie or a random video. Though it is a little difficult to keep the video as a still picture on an iPhone, various third-party apps come into play to finish this task.
However, it's straightforward if you want to use the iPhone feature to take a snapshot. You need to reach the point from where the screenshot is required and then capture using the buttons, which are different for various models.
The snapshot will automatically go to the screenshots folder, but there are various issues like the black screen and the output size & quality. Let's resolve the issues by learning to take a video screenshot on iPhone!
Part 1: Why We Screenshot Video on iPhone
Though every person has a reason to learn how to screenshot a video on iPhone, some are usual. For example, you need to capture a video screenshot of a documentary on an iPhone to attach it to your research paper. Also, you may want to save your favorite movie dialogue to share with your friends. Not only this, but it might be the requirement to save a TV show scene to create a review post. Sometimes, people have to screenshot some still pictures of a video to create a tutorial.
Whatever the reason, you need to follow some steps and the correct settings to get the desired result because the iPhone screenshot video capture is a bit challenging than Android. However, the below content will undoubtedly prove valuable in this regard!
Part 2: How to Screenshot Video on iPhone
No doubt, it's essential to follow a tutorial when the purpose is to screenshot a video on iPhone. Here is the detailed guide to let you finish this task!
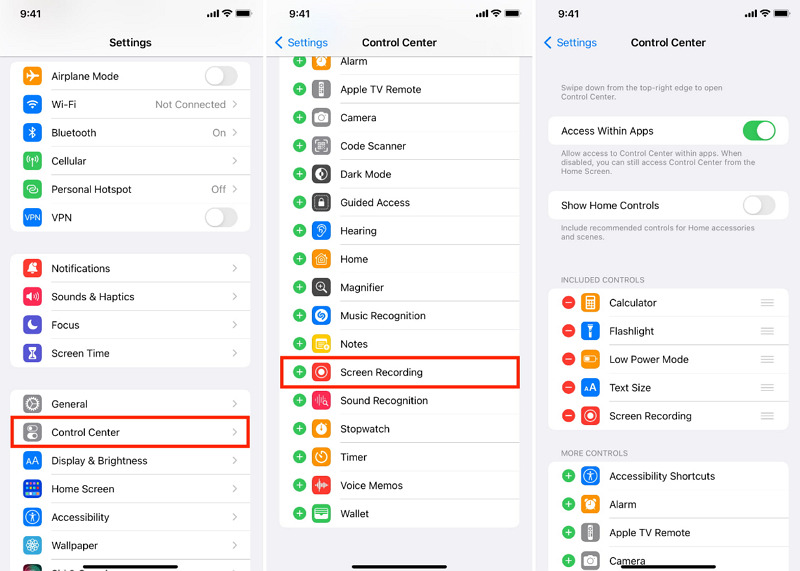
Step 01 (iOS 11 or later) First of all, you have to add the Screen Recording shortcut on the Control Center. Open the “Settings” and then the Control Center > Customize Controls. From here, click the “+” sign that is present infront of the Screen Recording. Now, you can open the Control Center anytime and start/stop recording by hitting the Screen Recording button.
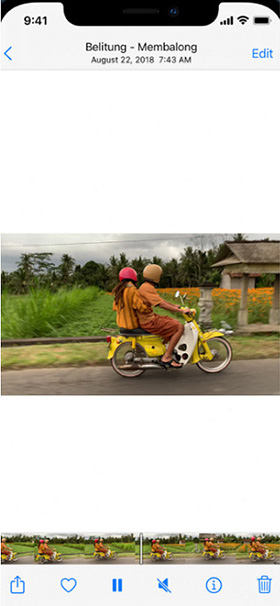
Step 02 Now, open the iPhone screen using either the Home/Lock button or the password/face lock. Now, go to your gallery and play the video you need to capture. You have to reach the exact point of taking a video screenshot.
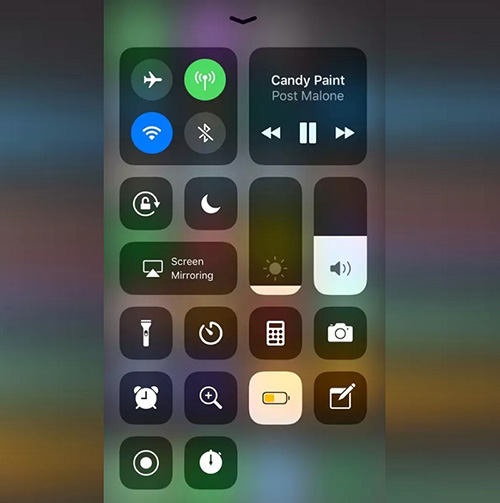
Step 03 Step 2 will be little different based on your iPhone system. Before iOS 11, there is a requirement to open Control Center by swipping up from the bottom side and for iOS and updated version, you need to swipe down from the top corner.
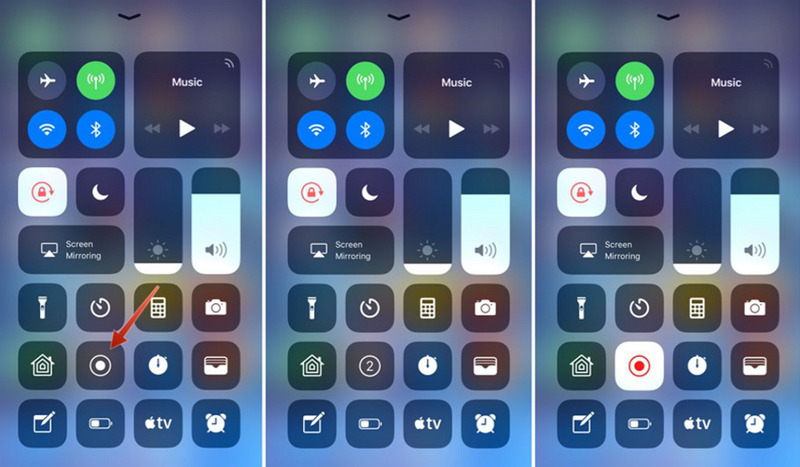
Step 04 From the Control Center, click “Screen Recording” tab and the bar will turn red while recording. However, it will take two seconds to start recording. Now where you want to stop recording, again press the same button from control center. This will save your video screenshot on iPhone.
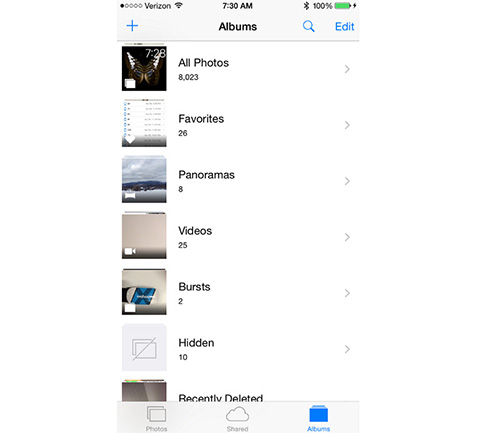
Step 05 After capturing the video screen, a notification appears temporarily on the left-hand screen corner. Either you can dismiss it or be open to editing further. However, you have to open the iPhone Photos app and the Albums. Check the “Videos” folder and if you have the connected iCloud, the video screenshots can be seen in the "All Photos" album. That's all!
Note:
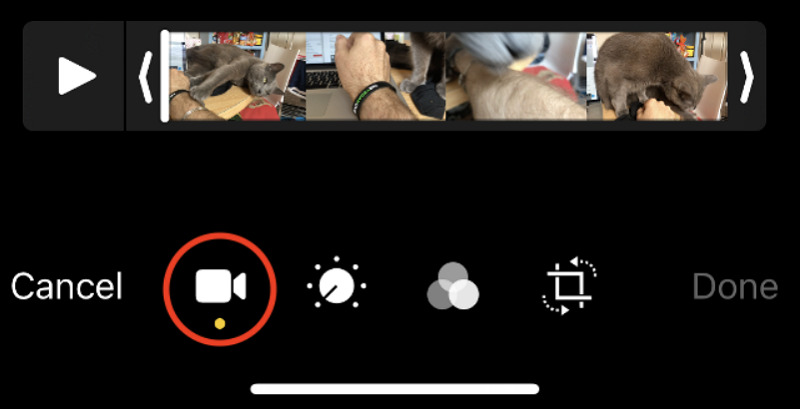
You can open the video from Photos app and edit the video such as cutting, trimming, cropping, adding effects, etc.
Part 3: How to Screenshot Video on iPhone with/without External Audio
In various scenarios, people need to screenshot or screen record video on iPhone. You might want to share it with family/friends, save it to watch later, add it to the presentation, or record it as proof. Whatever the case, it's a requirement to choose if you want to add the internal audio or not. Below are the settings to perform in both scenarios.
Screenshot Video on iPhone without External Audio
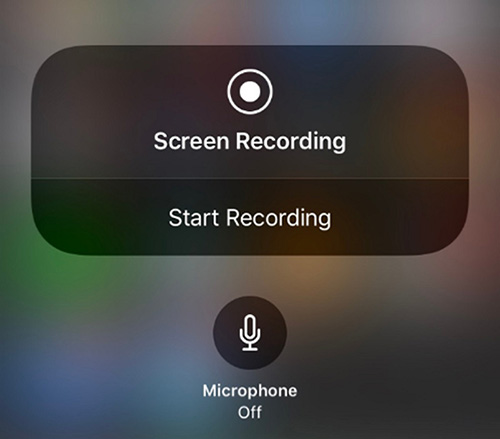
Open the iPhone Control Center and long-press the "Screen Recording" tab. It will display a pop-up menu. If you want the video with internal audio, make sure that the microphone is turned off by pressing the red microphone button. It will already display the "Microphone Off" message if it's not. Now, click "Start Recording," and you are done!
Screenshot Video on iPhone with External Audio
What to do if you want to make a tutorial where you need to screenshot or record video on your iPhone along with your sound (external audio). In this situation, follow the steps below for the required output.
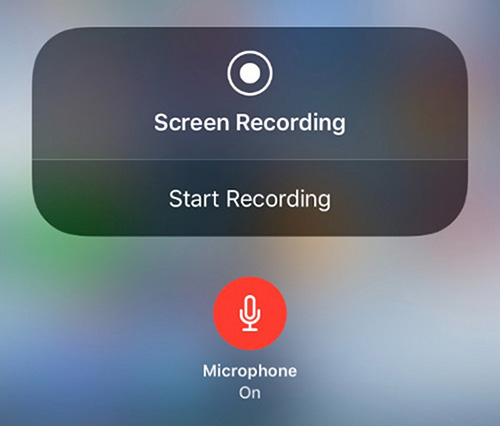
After opening the iPhone "Control Center" and the "Screen Recording" menu, click the "Microphone" to turn it on. It will turn red to notify that it's ON. Now hit the "Start Recording" button and "Stop Recording" once finished.
Plus, you can long press the screen recording to add your voice if you want to record your own video or tutorial. That's all. This video screenshot on iPhone will include both the internal and external audio. Check the video in the Photos app, where you can also perform editing.
Tips:
Once you start the screen recording function on your iPhone, everything, including the notifications, will be recorded. In case you don't want to, turn off the notifications before proceeding.
Extra Tips: More Than Screenshoting on iPhone
HitPaw Screen Recorder is a stable, secure, superb software that assists you in recording the screen and whatever is being played on the screen. It can be a video, a game, a lecture, or the devices like iPhone, iPad, and Webcam. Also, the recorder lets you do live to stream with its virtual camera. You can select this camera on any streaming platform if required. Besides these, it is possible to add text, stickers, and unique effects easily and quickly. However, what makes it more impressive is its schedule and segment recording feature. Even you can even capture keystrokes and screenshots as per your choices.
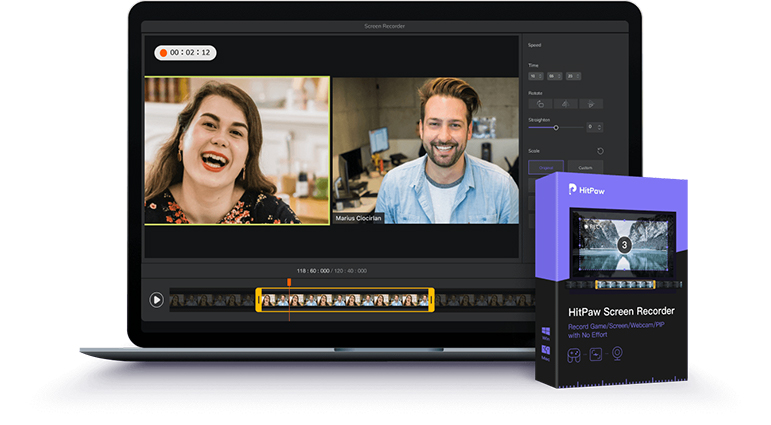
Let's look at some more notable features of this screen recorder:
- Offer multiple gaming and educational templates
- Add as many sources to stream as you want
- Record either combined audio or separate speaker & microphone
- Alter the frame rate, resolution, and output format
- Support automatic stop and adjust hotkeys function
- Let you switch the Graphics card in case of a black screen
Here is the detailed procedure for how to screenshot video on iPhone using HitPaw Screen Recorder. One thing to keep in mind that always make sure that your iPhone and desktop must be connected to the same network!
Step 01 You need to download and launch this software from its official website. Now, click Live > Livestreaming to jump to the new window. And you will be able to add sources. Click on the small plus "+" sign to add a source to proceed further. Under the "General" section, click the "iOS device."
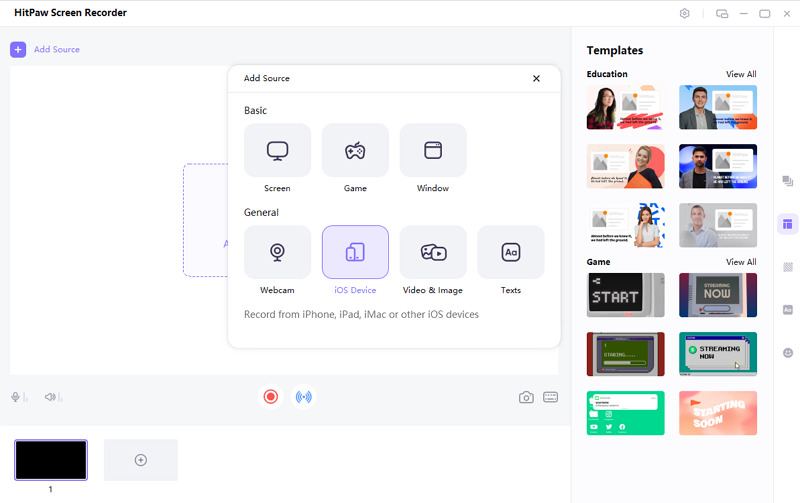
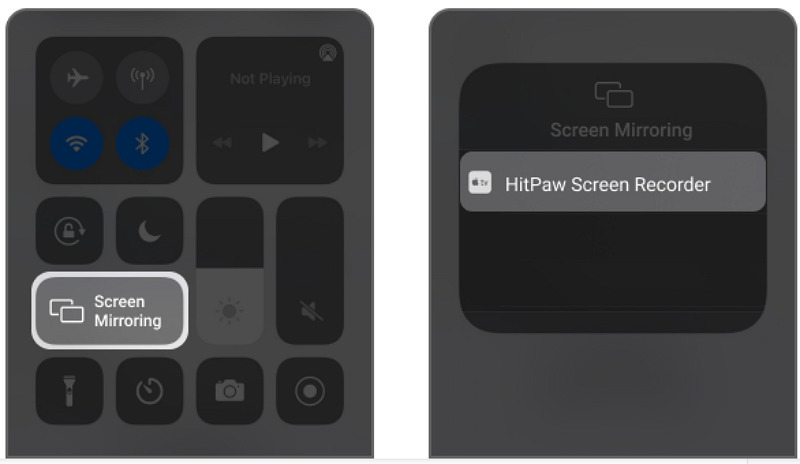
Step 02 Secondly, open your iPhone's "Control Center" and expand the "Screen Mirroring" button. From here, you will be able to select the "HitPaw Screen Recorder" in the Airplay destinations. iPhone screen will be displayed on your HitPaw streaming screen now.
Step 03 Finally, you can play the video which you want to capture video screenshot. Click the small “Red” recording button from where you want to start. You will see the recordings in progress and where it needs to end, hit this tab again. The recording will be present under the “History” tab of main interface where you can easily do the editing. You are all done!

Conclusion
Irrespective of the purpose, the above write-up is helpful in any situation, such as how to screenshot video on iPhone with/without external audio. It makes the process easier for you to capture a snapshot on your iPhone. However, if you want to take the screenshot in HD quality, third-party software like the HitPaw Screen Recorder is the best and the most efficient. Besides screenshots, you can use several other notable features like recording complete videos and live streaming. Let's try!


 HitPaw Univd (Video Converter)
  HitPaw Watermark Remover

Share this article:
Select the product rating:
Daniel Walker
Editor-in-Chief
This post was written by Editor Daniel Walker whose passion lies in bridging the gap between cutting-edge technology and everyday creativity. The content he created inspires audience to embrace digital tools confidently.
View all ArticlesLeave a Comment
Create your review for HitPaw articles