Step 01 The first step is to get the photo blur remover application onto your computer. The next step is to launch the program by clicking its icon on the desktop.


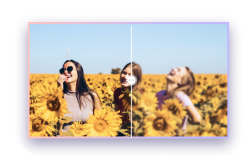
Think back to the time you went to see your favorite band and returned home to find that half of the images you shot were blurry. Perhaps the subject was in motion, the camera was shaky, or the lighting was poor.
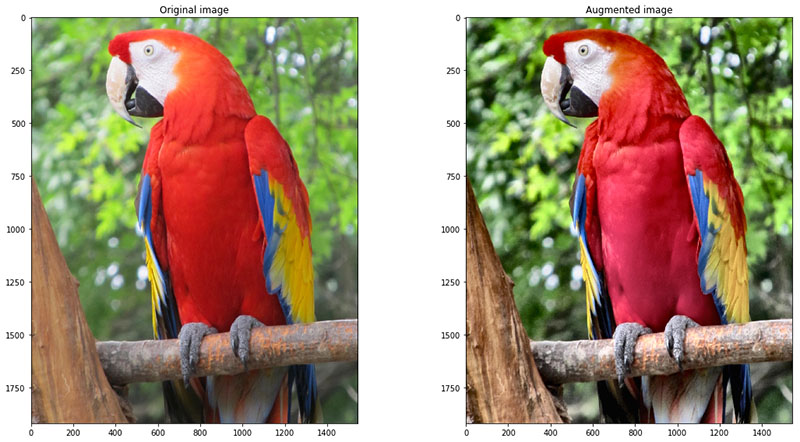
Regardless of the cause, the damage may appear permanent at first. Fortunately, blurry photos may be fixed. With the correct picture editing program, you can remove blur from photos.

HitPaw FotorPea (Originally named HitPaw Photo Enhancer and HitPaw Photo AI) is one of the best options out there for those looking for a solution to blurry photos. With the AI-powered function, it can help you achieve the desired effect intelligently. Because AI technology can identify color deviations, it can automatically adjust the most suitable pixels and colors for you. So you can easily remove blur from image with it since the AI have do the things you need to do. It is user-friendly and can help you with picture editing, video editing, and even image animation.
Step 01 The first step is to get the photo blur remover application onto your computer. The next step is to launch the program by clicking its icon on the desktop.
Step 02 The editing process begins when you launch the program and load the image for processing. You may choose the file you want to use by clicking on it or by dragging it into place.
Step 03 Select the preview button to see the final result before you process the photo. Turn on TTA mode to have the photo reprocessed if it doesn't turn out the way you wanted.
Step 04 Your photo can then be exported in one of three formats offered by the program. Image formats include WEBP, PNG, and JPG. Exit with your improved photo in the format of your choice.
Learn more about remove blur from image with HitPaw FotorPea with the following video:
It's not necessary to have a special app or even download any software to use the numerous useful blurred removers available on the web; all you need is access to the internet. Unblurring a picture is a fundamental capability, thus it's included in the vast majority of them. Here, we'll use Fotor as an example. In order to help you remove blur from images with this program, below is a little tutorial.
Visit Fotor's site online.
Choose Photos > Edit to begin editing your pictures with the photo blur remover. A new screen will appear. To access the dialog menu, click inside the central rectangle. Browse to the file you want to open, and then click Open.
It's time to remove blurriness from photos. Open the Basic drop-down menu on the left side of the screen. Adjust the preview's sharpness by dragging the slider to the right until you're satisfied.
To save your work, select the Save option. The output file can have a custom name, extension, and quality settings set by the user. Just click the download button. Please note that only logged-in users will have access to some features.
Pros
Cons
Snapseed is an excellent, no-cost photo editor. It offers a wide variety of options for improving image quality. Thus, if your shot is a bit blurry, you may utilize Snapseed's sharpening feature to make it more clear. Before continuing, download Snapseed from the App Store for free.
Here is how to remove blur from a photo using Snapseed:
Open the Snapseed application.
Now import your blurry photo by clicking "Plus +" or "OPEN."
Then, under the bottom bar, select "TOOLS."
Now go to the "Tools" menu and pick the "Details" option.
Select "Sharpening" by dragging your finger up, and "Structure" by dragging it down.
To fine-tune the effect of your choice of sharpening or structure, use the slider at the top of the screen.
Reach the desired level of clarity in your photo, and then choose the "Done" icon.
Finally, tap "EXPORT" to store your photo.
Pros
Cons
One of the most widely used photo editing apps is Adobe Lightroom, which is included in the Creative Cloud package and has an estimated 21 million users as of 2017. Because of this, blurring in digital photographs is simple to correct. Take a look at how to remove blur in photo:
Launch the Develop window and load the picture in.
Find the Sharpening slider in the Detail panel. Bringing more definition to your image requires you to shift it to the right.
You may customize the effect by using the Radius and Detail controls. Each image you sharpen will have its own optimal range of these, so tinkering about is the best way to get the results you want.
You can either export the picture or use Lightroom to share it on social media.
The brush tool also allows you to fine-tune the sharpness of a selected area inside a shot. Avoid over-sharpening the background or other parts of the photo by just brushing on sharpness only where you want it.
Pros
Cons
For consistently sharp photographs, follow these Dos and Don'ts.
Dos
Don’ts
You can unblur any kind of image, whether it was taken from a digital camera or a mobile phone app. I hope now you know how to remove blur from a picture.
We reviewed the 3 best ways to remove blur from photos easily. The best and recommended method is to use HitPaw FotorPea. It is user-friendly and suitable for beginners. Moreover, it provides you with all the necessary and advanced features. Just download and try it!


HitPaw Video Converter
Ultra-Fast to convert and download video.

HiPaw Video Enhancer
One-click enhance videos and increase resolution with poweful AI.


Join the discussion and share your voice here
Leave a Comment
Create your review for HitPaw articles